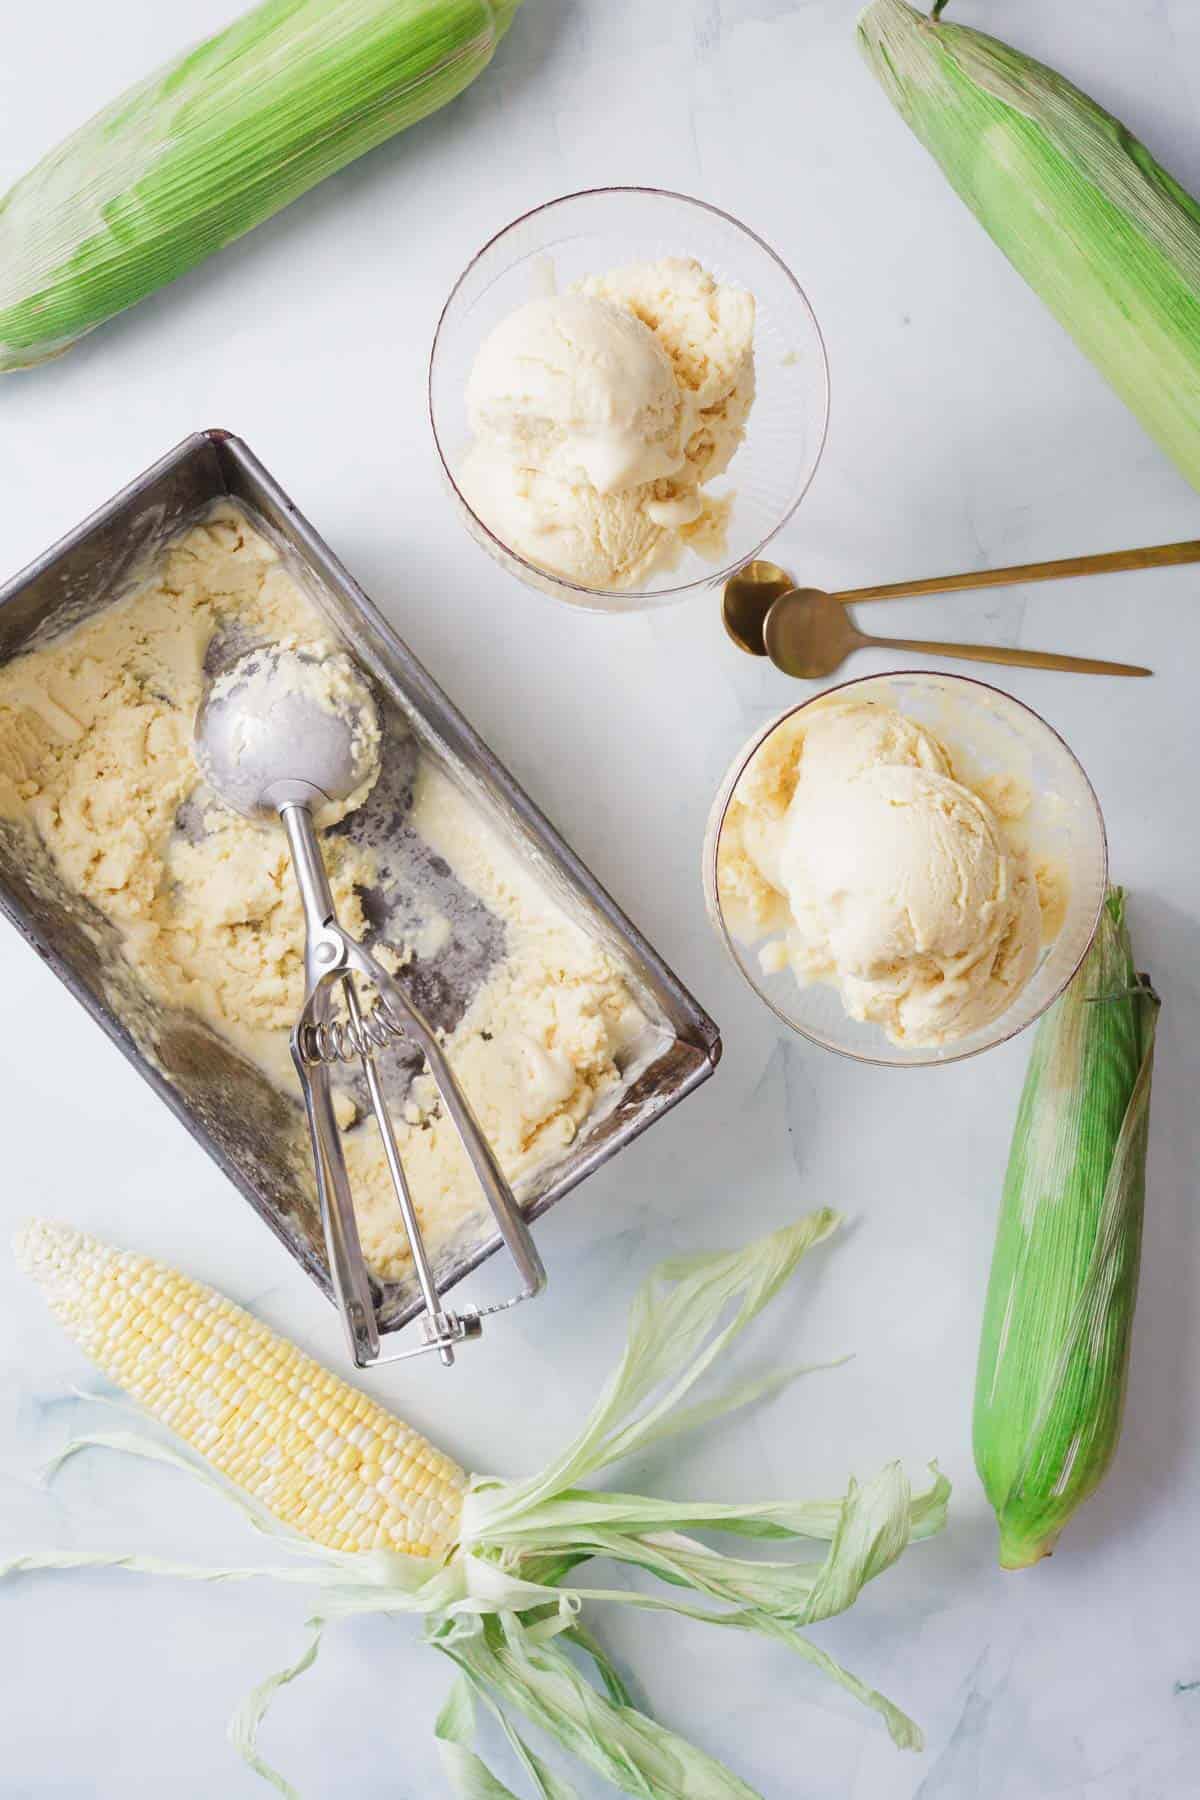
Homemade corn ice cream, filled with summer memories, creamy custard, and real corn flavor.

Jump to:
There’s always another ice cream. That’s what I told myself as I stood in line at Dalla Rose, the little creamery tucked behind the bookstore with the flickering neon sign. I’d just finished chasing Leo down the sidewalk and was too tired to argue when he pointed to a pale yellow pint. His request that week for “yellow” ice cream.
I took one bite and knew I was in trouble. Corn ice cream. Another favorite. One that would quietly wedge itself into our summer, our kitchen, and my thoughts until I learned how to make it myself.
It’s a bit of a process. You simmer the cobs, steep the kernels, whisk yolks low and slow, strain, chill, churn, freeze. But the reward? A scoop of late summer. Custardy, soft, not too sweet. That earthy sweetness corn hides inside its husk comes through like a memory more than a flavor.
And for me, that memory begins far from any creamery.
Every summer when I first moved to Manitoba, just outside the city, we’d pass a roadside corn stand — a sagging table shaded by tarp, stacked with golden ears. The woman behind it took coins and smiles and always tossed in an extra cob. My mom never drove past without stopping. Half the corn went straight into a pot, slathered with butter. The rest she saved.
“For something new,” she’d say, husks at her feet. Sometimes that meant spiced Mexican street corn. Then later, when I met the man who would become my husband, arepas de choclo—crispy-edged and topped with queso. They stuck. I still make them year-round, especially when I’ve frozen corn at its peak season to hold onto summer just a little longer.
So did this corn soup, my take on ajiaco. It leaned more curious than comforting, but we ate it anyway, laughing through the steam. I make it properly now, with chicken and guascas, when we need something warm and grounding.
Where Summer Settles Into Memory

That’s what I thought about when I tasted the corn ice cream at Dalla Rose. The old corn stand. The arepas. That soup. So I went home and started trying.
Simmering corn in cream. Whisking yolks. Straining, chilling, starting again. There were failed batches. Ones that froze too hard, or split. But when I finally nailed the texture — that soft, custardy scoop — and the taste that felt like a page out of my past, I knew it was ours.
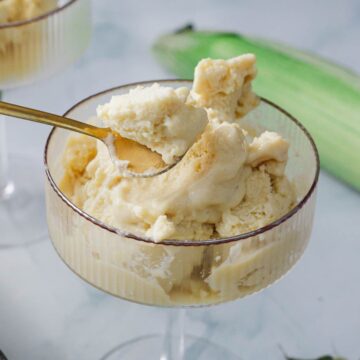
So on quiet summer evenings, after bedtime delays and backyard games, we sit on the porch with bowls of melting corn ice cream. Sometimes I make them into ice cream sandwiches, and sometimes I just sprinkle a few toasted kernels on top. But mostly, we just eat it as is. Simple. Golden. Familiar.
It’s become a little treat. Like freezing corn for winter arepas, pulling it out for a simmering pot of ajiaco, or making popsicles when the heat won’t let up. Each scoop carries a little sunlight, tucked into the rhythms of our family life.
Ingredients
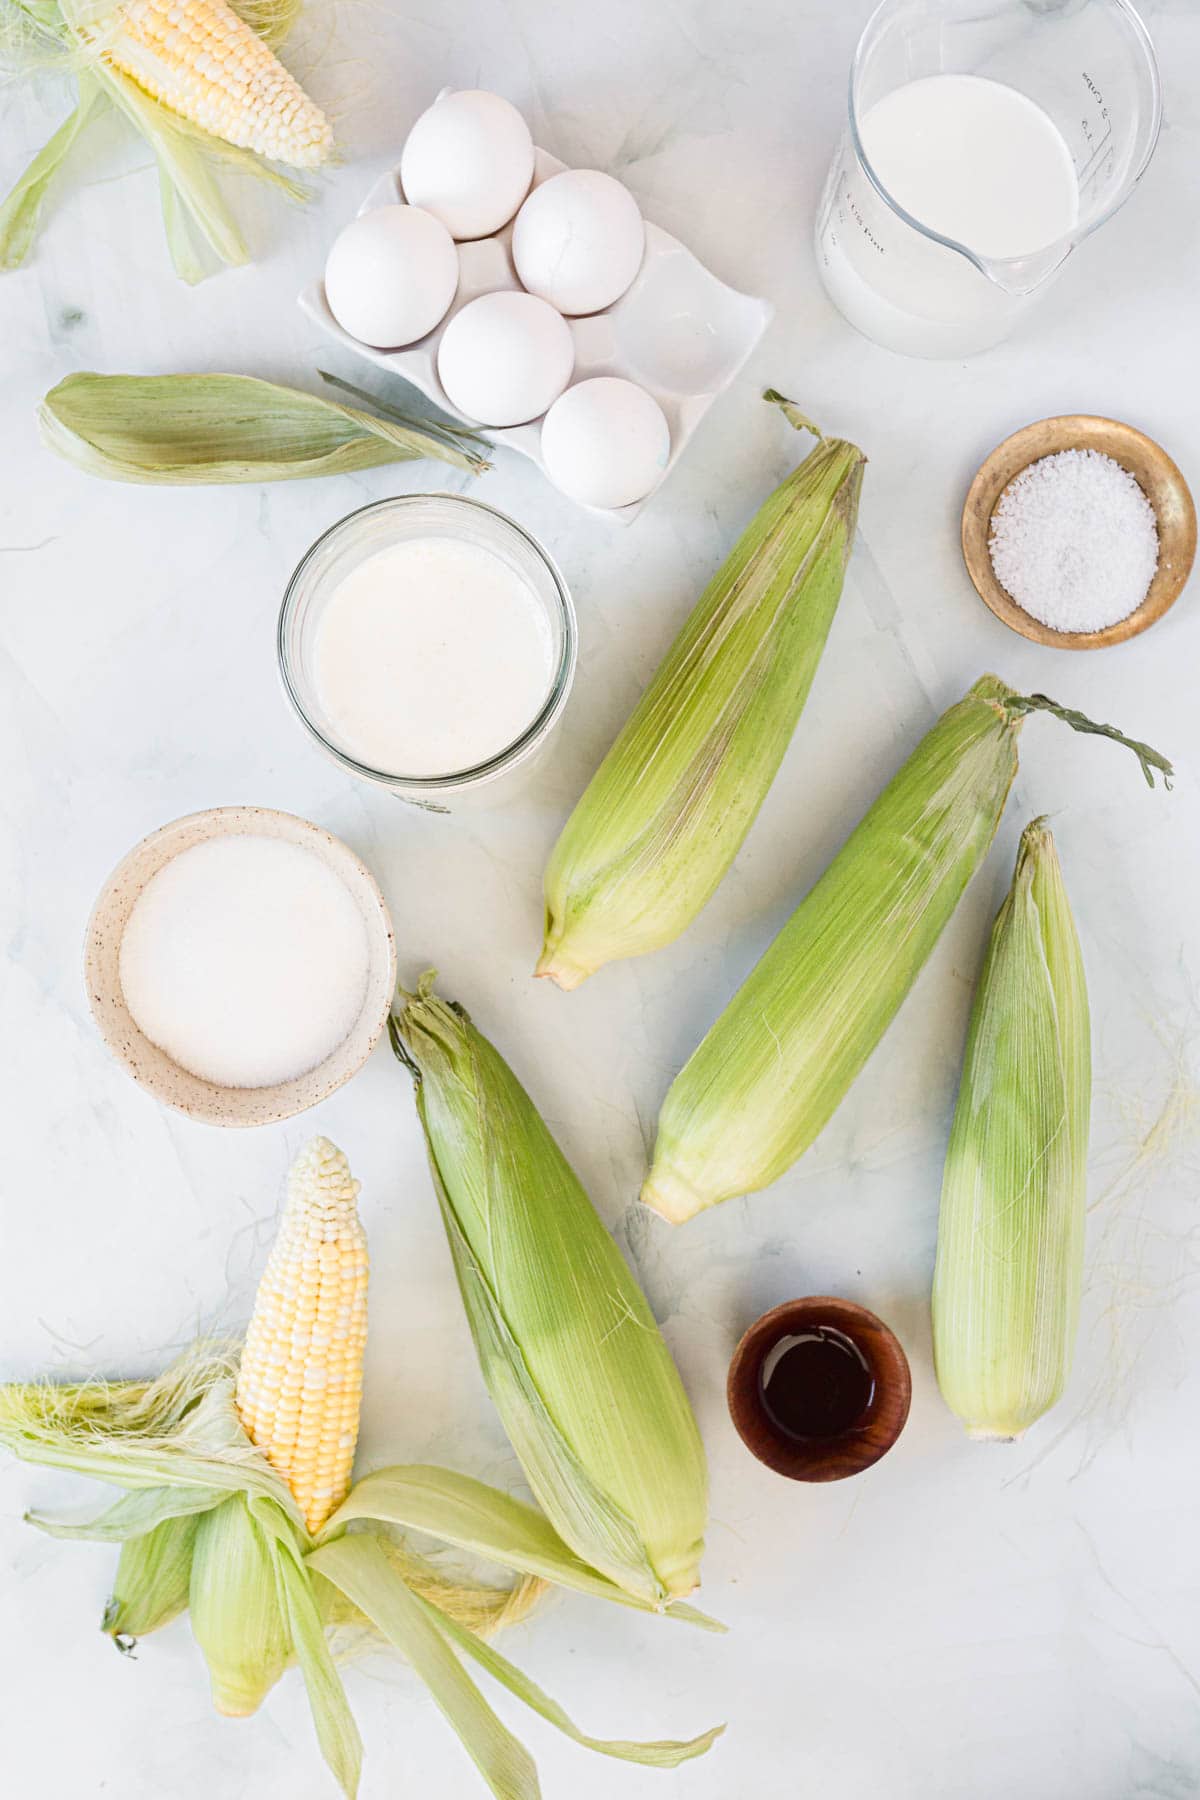
- Fresh Corn – This recipe begins and ends with corn. I use four ears of fresh, in-season corn because both the kernels and the cobs are essential. If fresh corn isn’t available, frozen kernels can work in a pinch — but skip the cobs and accept that the flavor won’t be quite as deep!
- Heavy Cream – For that scoopable, custard-like richness. The fat content in cream helps bind everything together and keeps the texture silky once frozen. You can make this recipe with coconut cream for a dairy-free version, but expect a slightly different (though still lovely) flavor.
- Whole Milk – Balances out the richness of the cream while still giving the base enough body. I wouldn’t recommend swapping this out for low-fat options, as the final ice cream may turn out icy rather than smooth.
- Egg Yolks – Five yolks give the ice cream its classic French-style custard base. They thicken the mixture and lend a pale golden color that pairs beautifully with the corn’s hue.
- Vanilla Extract – Just a teaspoon rounds out the flavor, making the corn taste fuller, almost toasted. I’ve made it with half a scraped vanilla bean before, and if you have one on hand, it’s a beautiful upgrade, but extract works perfectly well.
See the recipe card for full list and exact quantities.

The Ninja Creamii is heralded as the best healthy ice cream machine on the market!

Instead of a separate machine, I use the ice cream machine attachment for the Kitchenaid. It gets plenty of use here!
How to Make this Corn Ice Cream Recipe
If you’re craving a summer dessert that’s creamy, quietly sweet, and rich with the flavor of real corn, this homemade corn ice cream is worth every step. It’s a slow process, but a deeply satisfying one, especially when shared with curious little helpers and sticky spoons.
Prepare the Corn
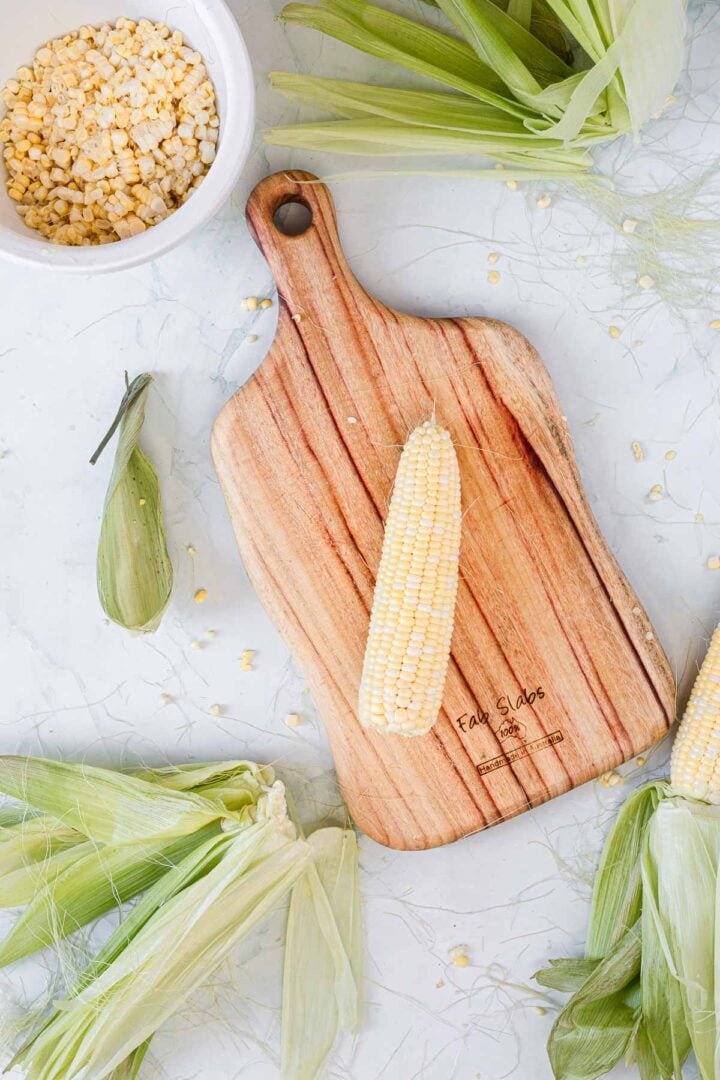
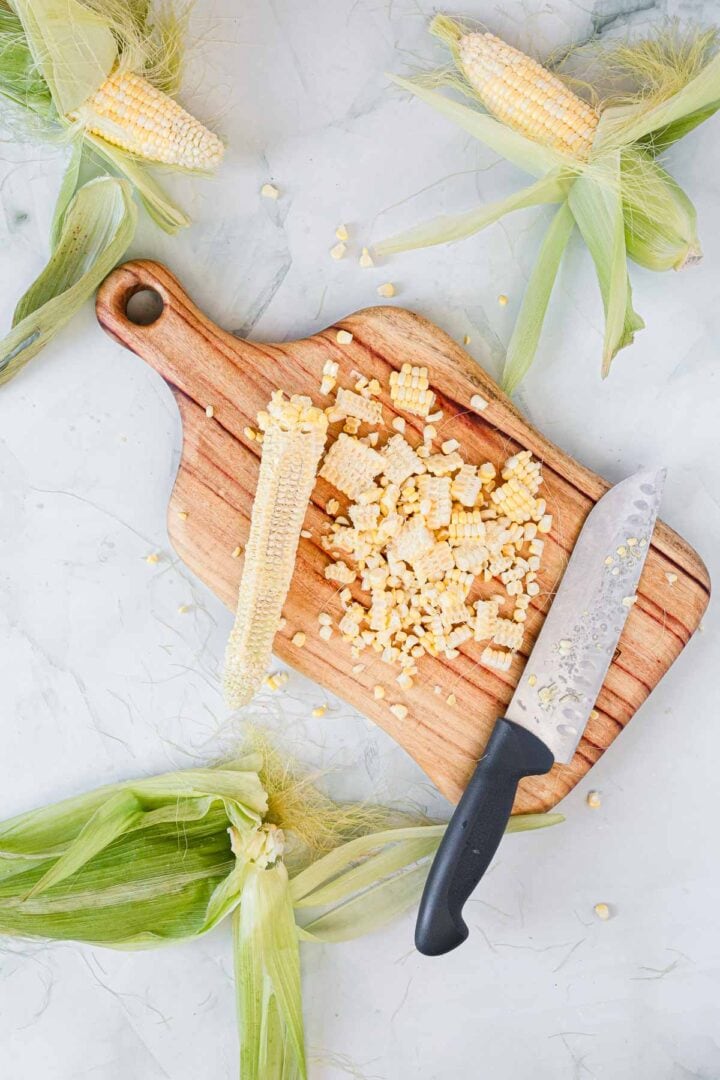
Shuck the corn and slice the kernels off the cobs. Set the kernels aside and reserve the cobs. You’ll use both to build flavor into the base.
Simmer the Corn Base
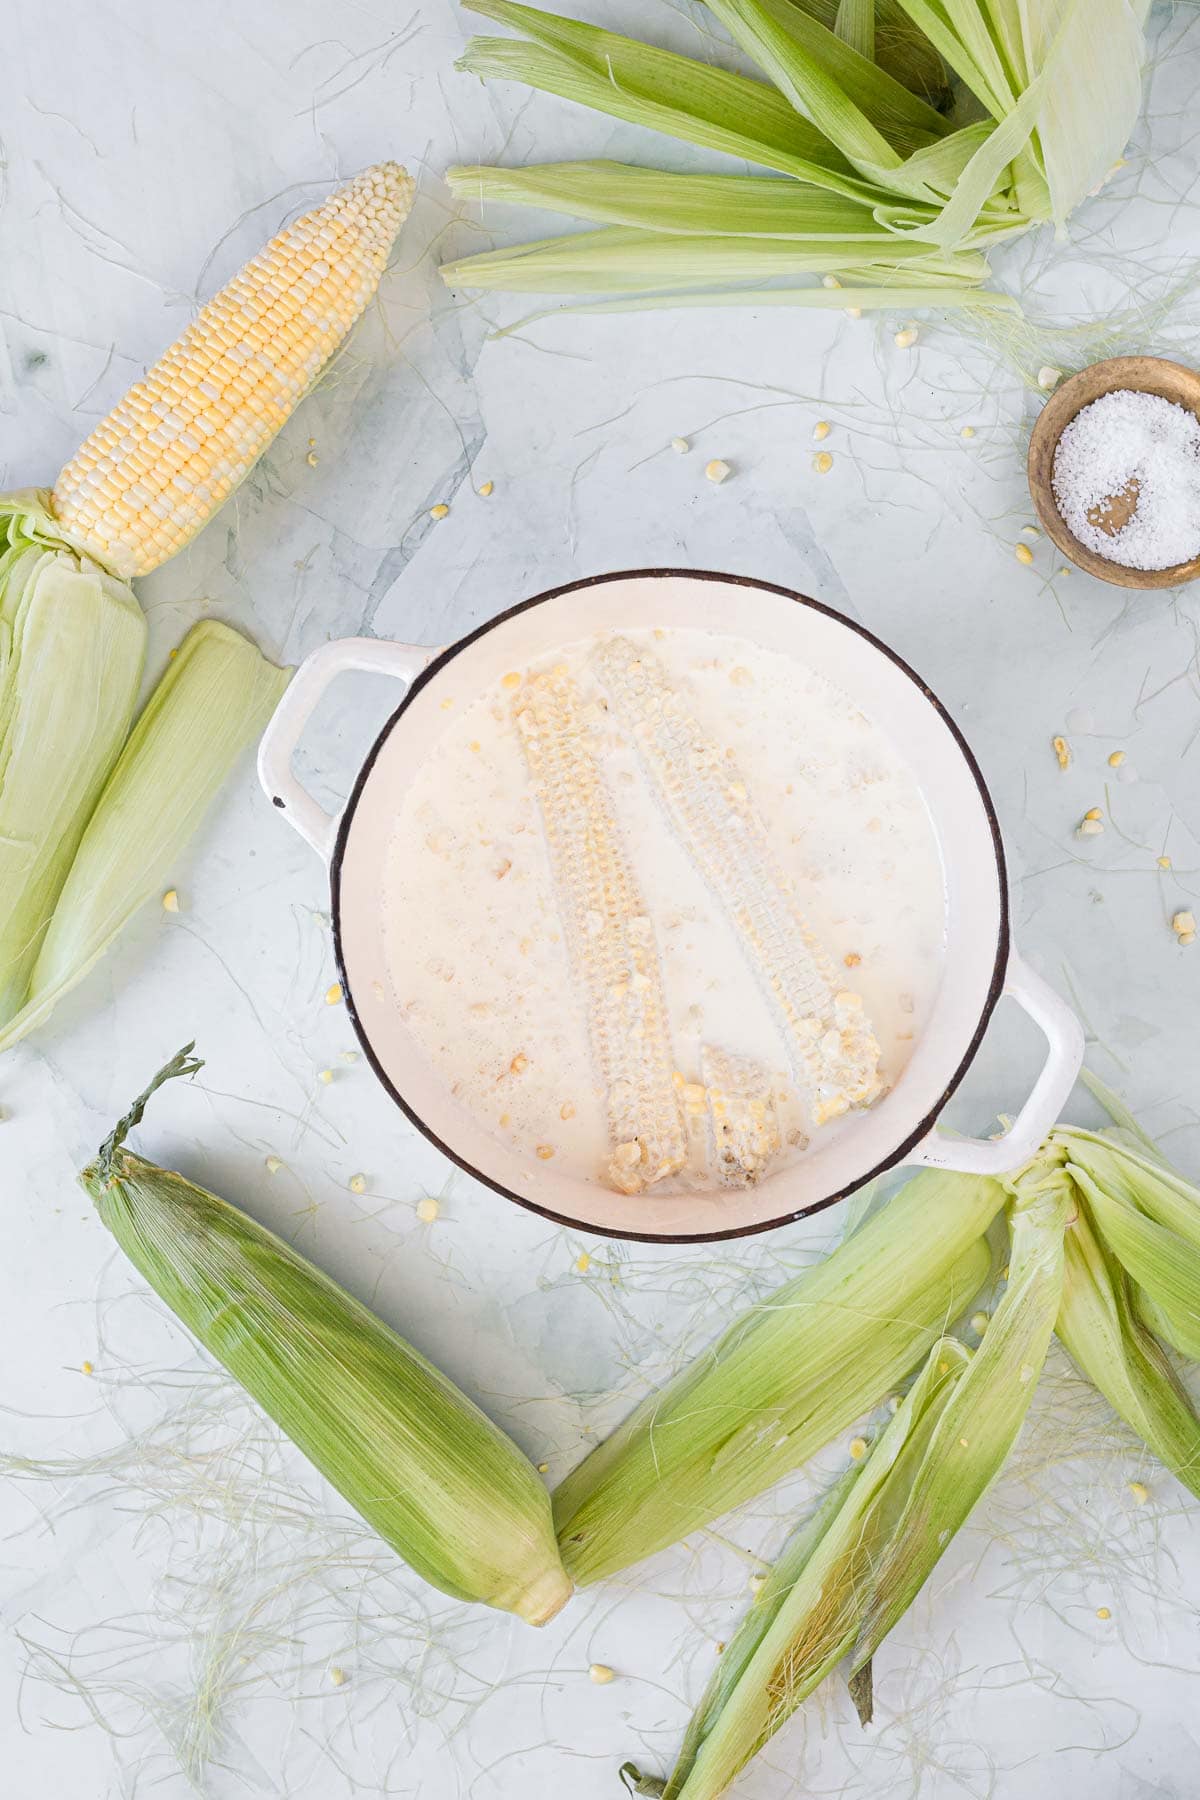
In a medium saucepan, combine the corn kernels, reserved cobs, heavy cream, whole milk, ½ cup of sugar, and a small pinch of salt. Bring to a gentle simmer over medium heat, stirring occasionally. Once it begins to bubble lightly, remove from heat, cover the pot, and let the mixture steep for 1 hour. This is where the corn flavor deepens and blooms.
Blend and Strain
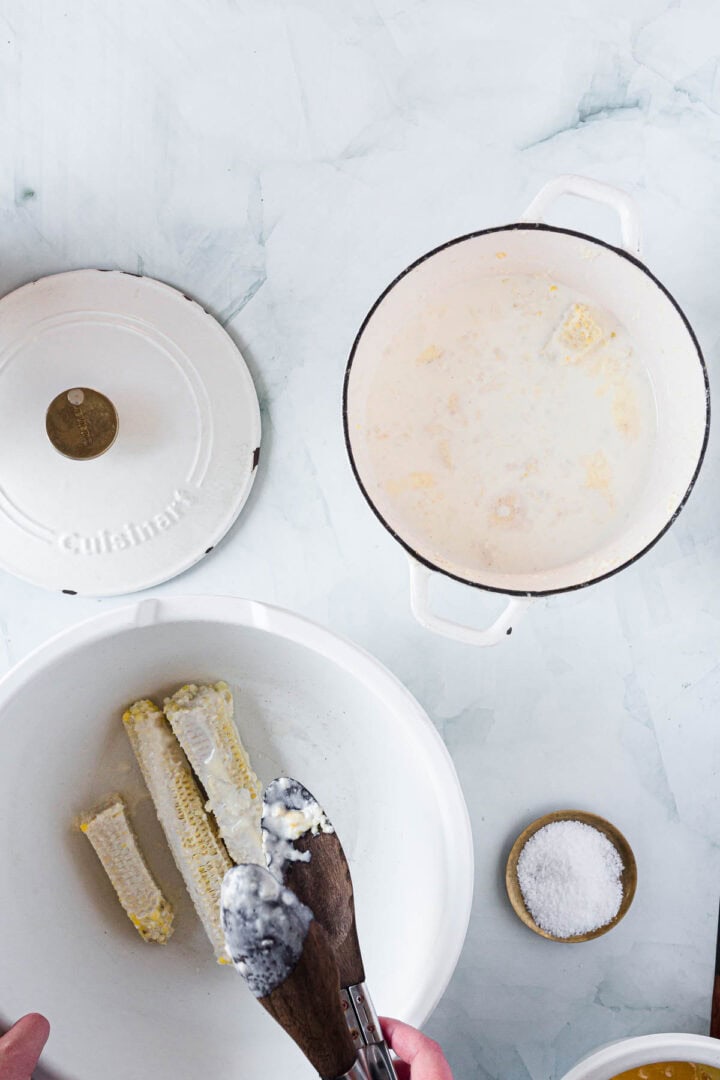
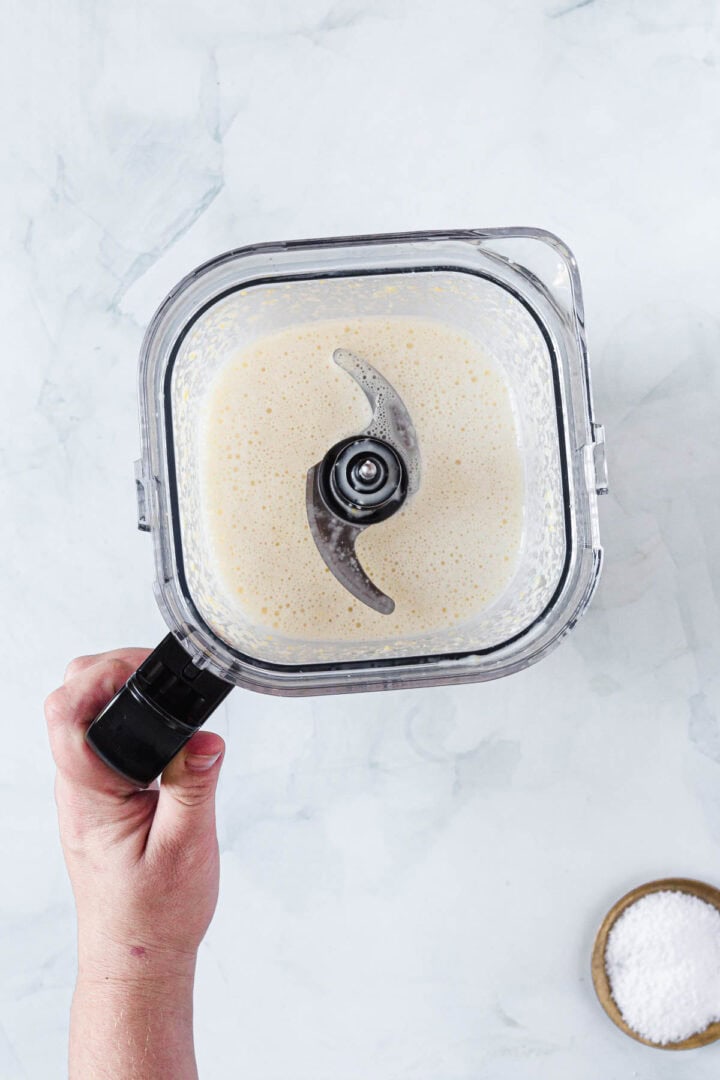
After steeping, discard the cobs. Pour the mixture into a blender and blend until completely smooth. Strain through a fine mesh sieve into a clean bowl, pressing gently to extract as much liquid as possible. Set aside.
Temper the Egg Yolks
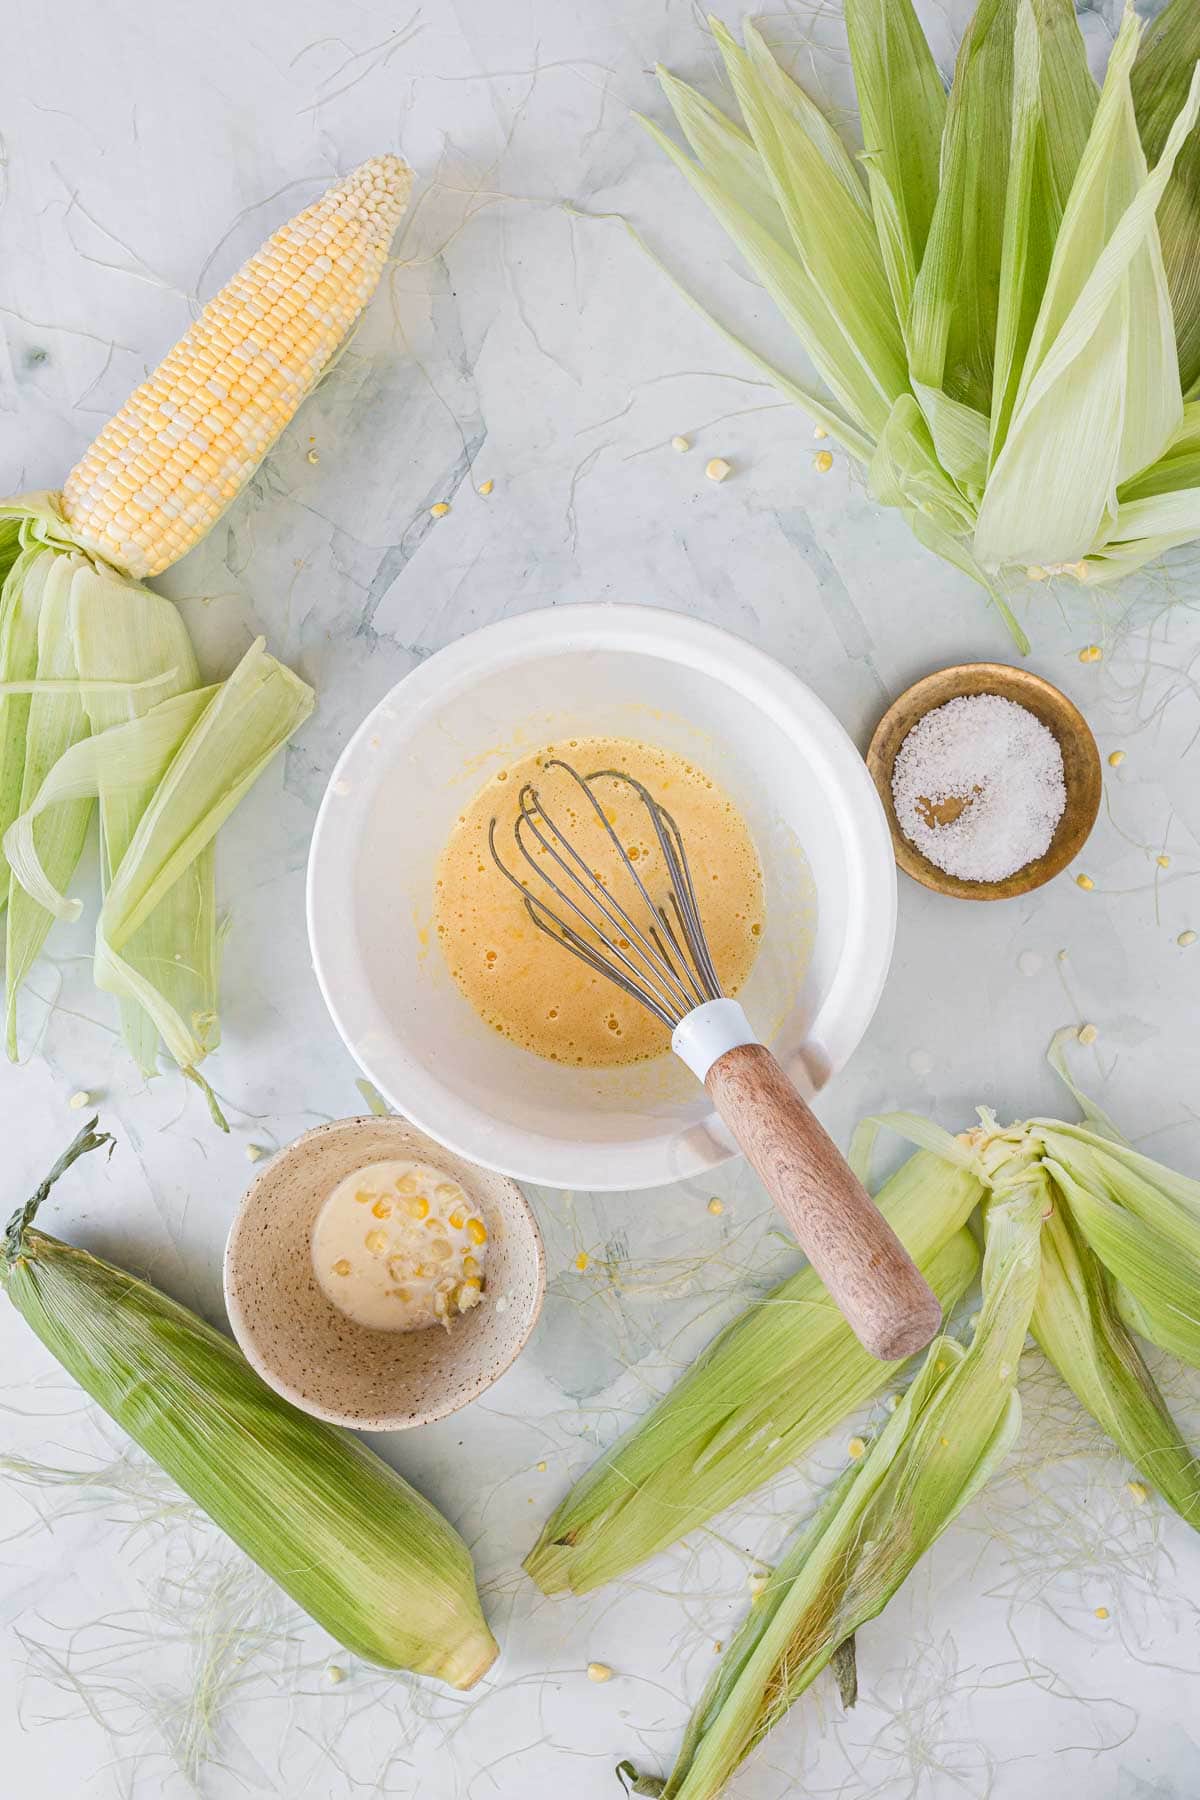
In a separate bowl, whisk the egg yolks with the remaining ¼ cup sugar until smooth and pale. Slowly drizzle in about 1 cup of the warm corn mixture while whisking constantly—this step gently raises the temperature of the yolks so they don’t scramble.
Combine and Blend Again
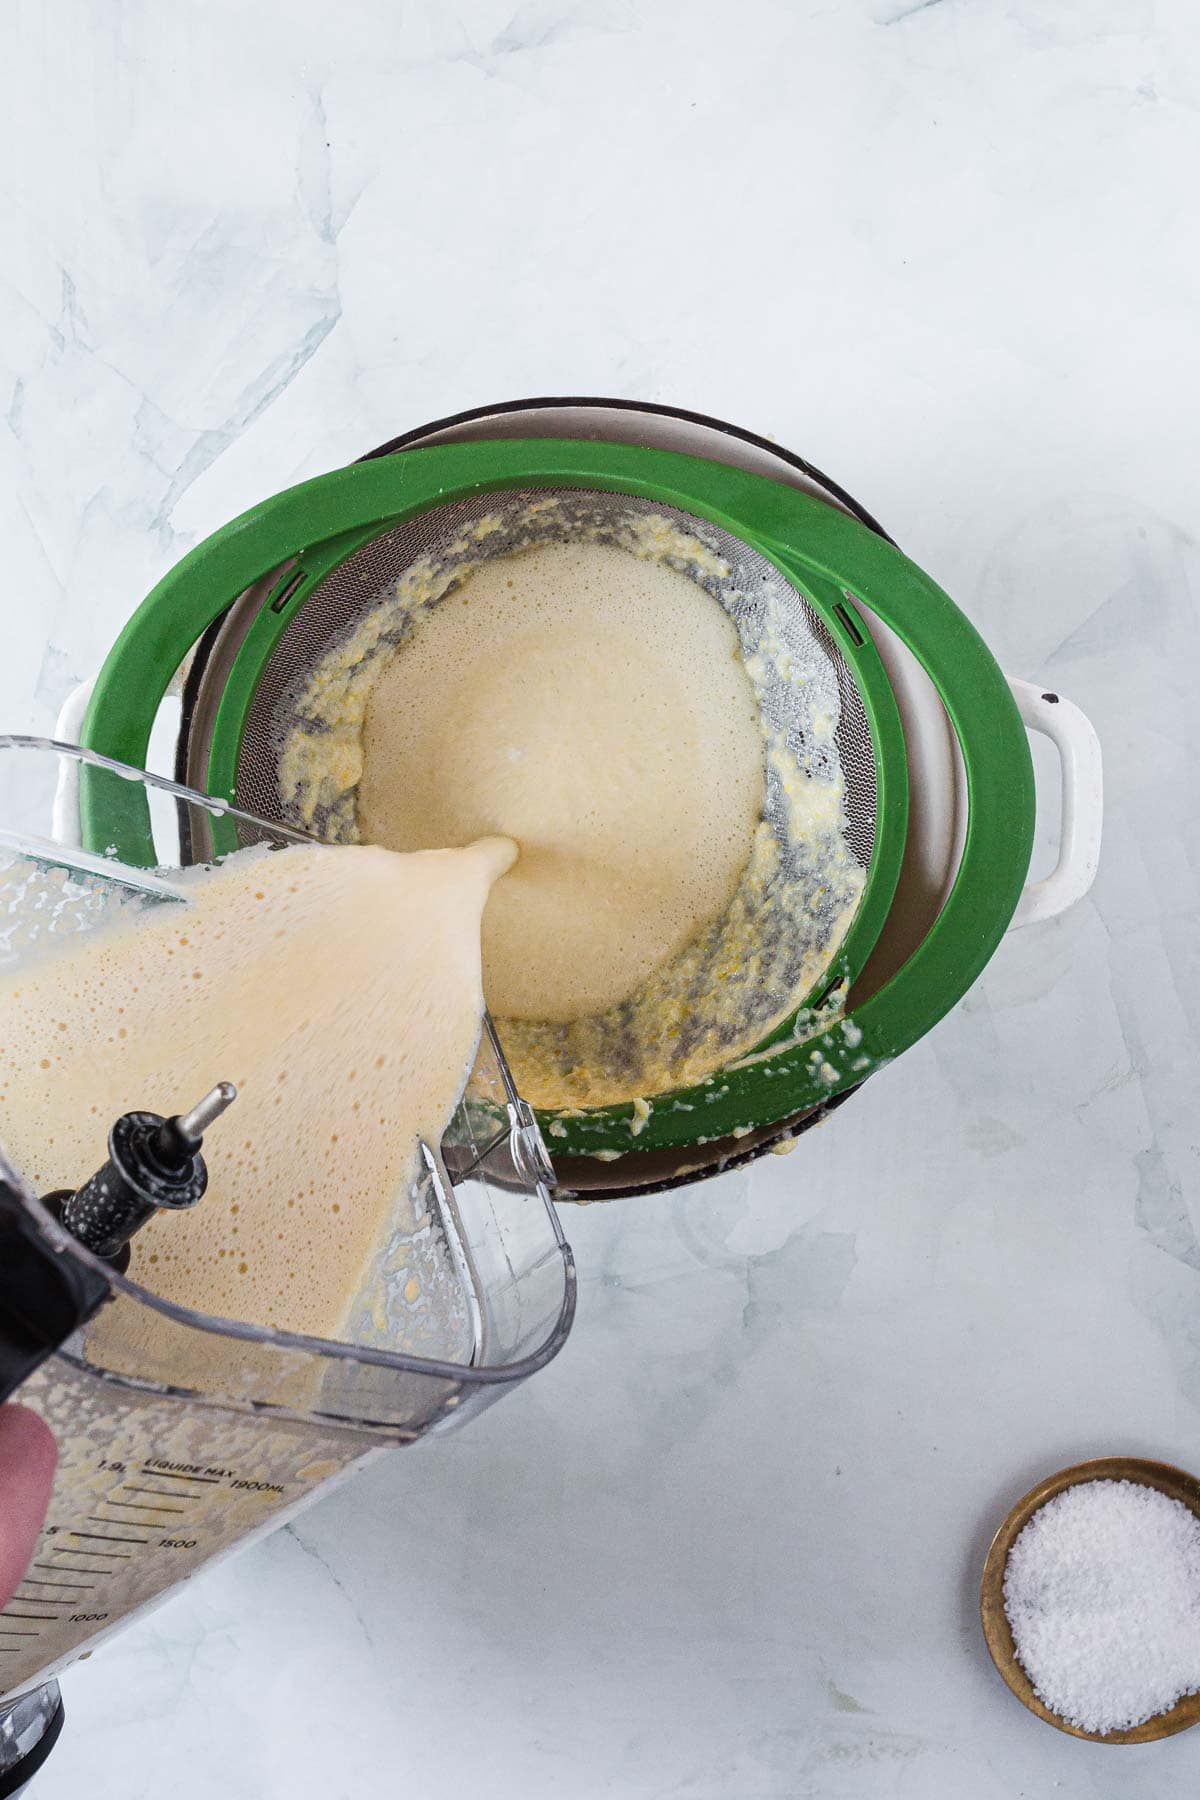
Pour the warmed egg mixture back into the rest of the corn base and whisk to combine. If it’s not fully smooth, you can blend it again briefly for a silky finish.
Cook the Custard
Return the mixture to the saucepan and cook over medium heat, stirring constantly with a wooden spoon or heatproof spatula. Keep stirring until the custard thickens enough to coat the back of a spoon, about 170°F. Don’t rush this part! Gentle heat is key.
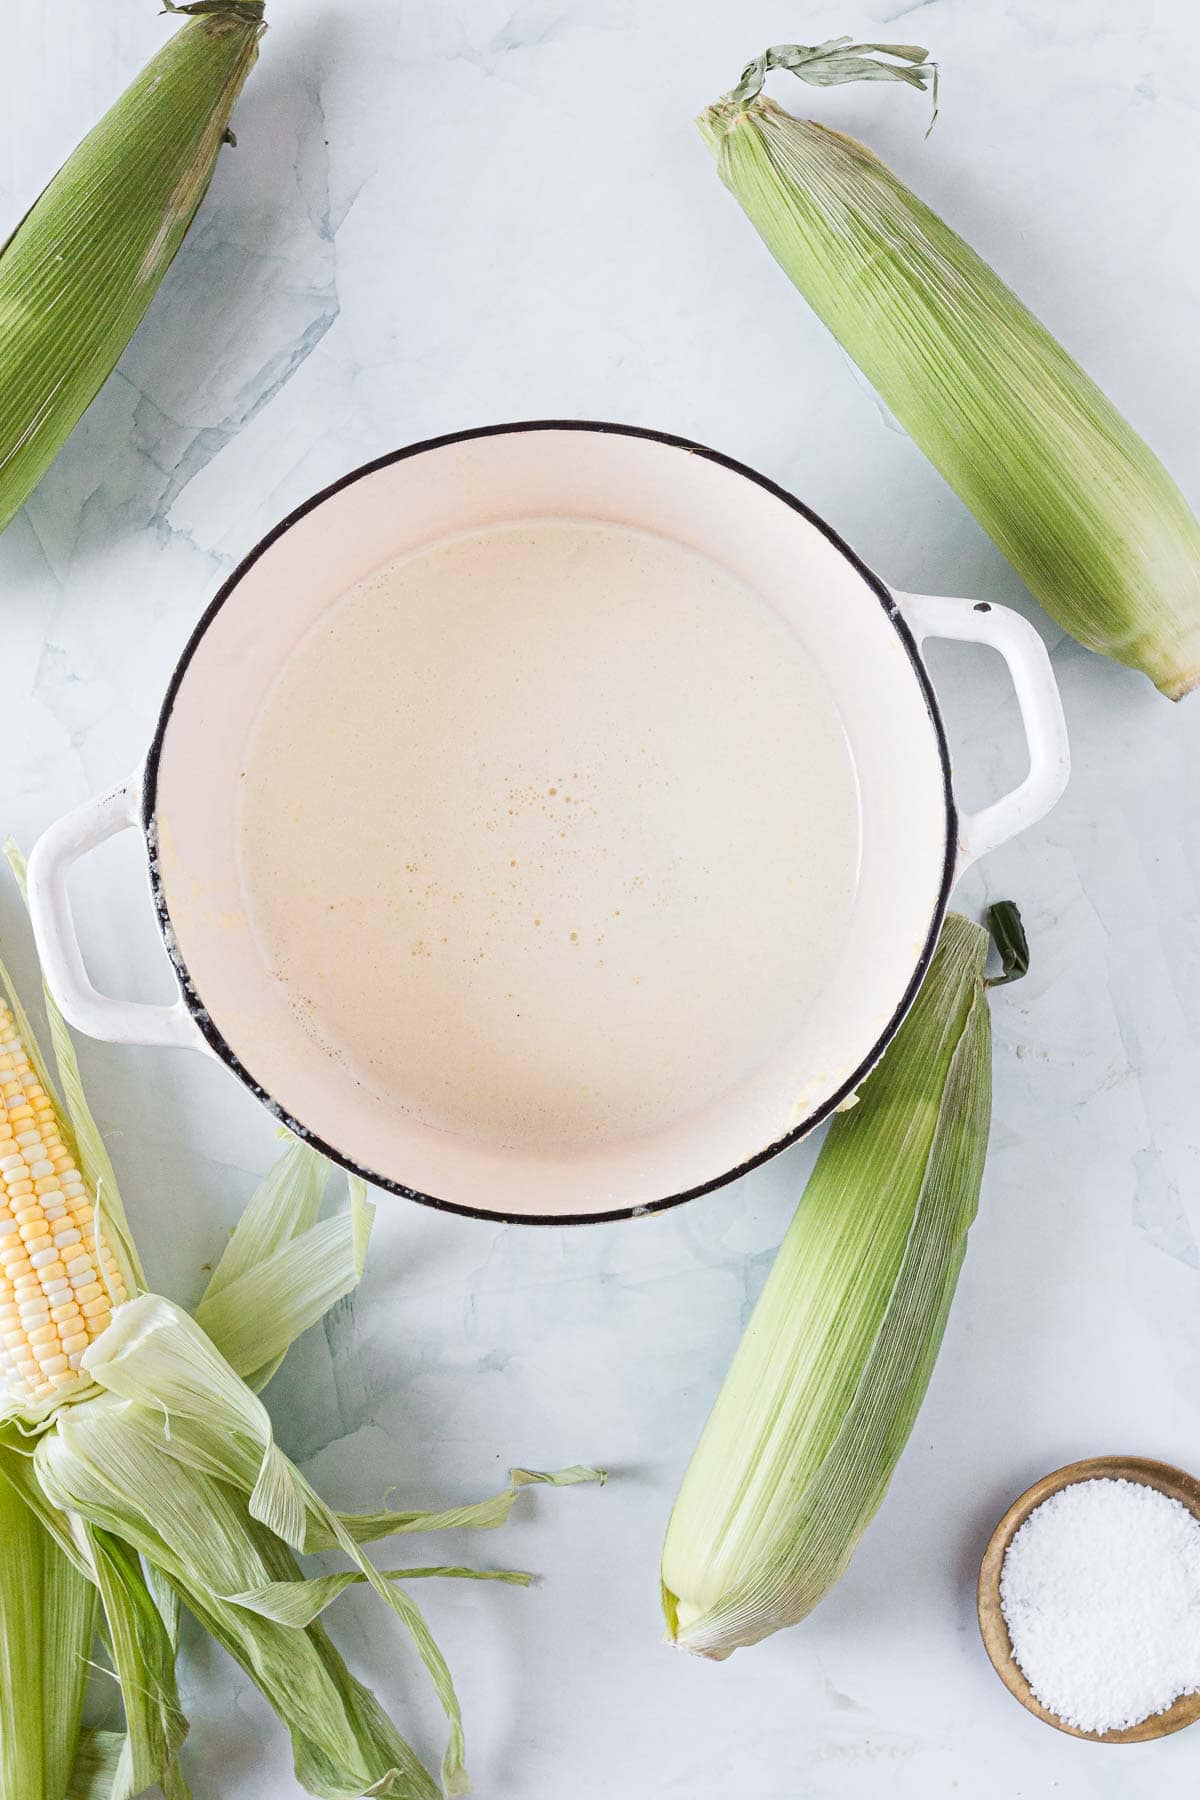
Add Vanilla and Chill
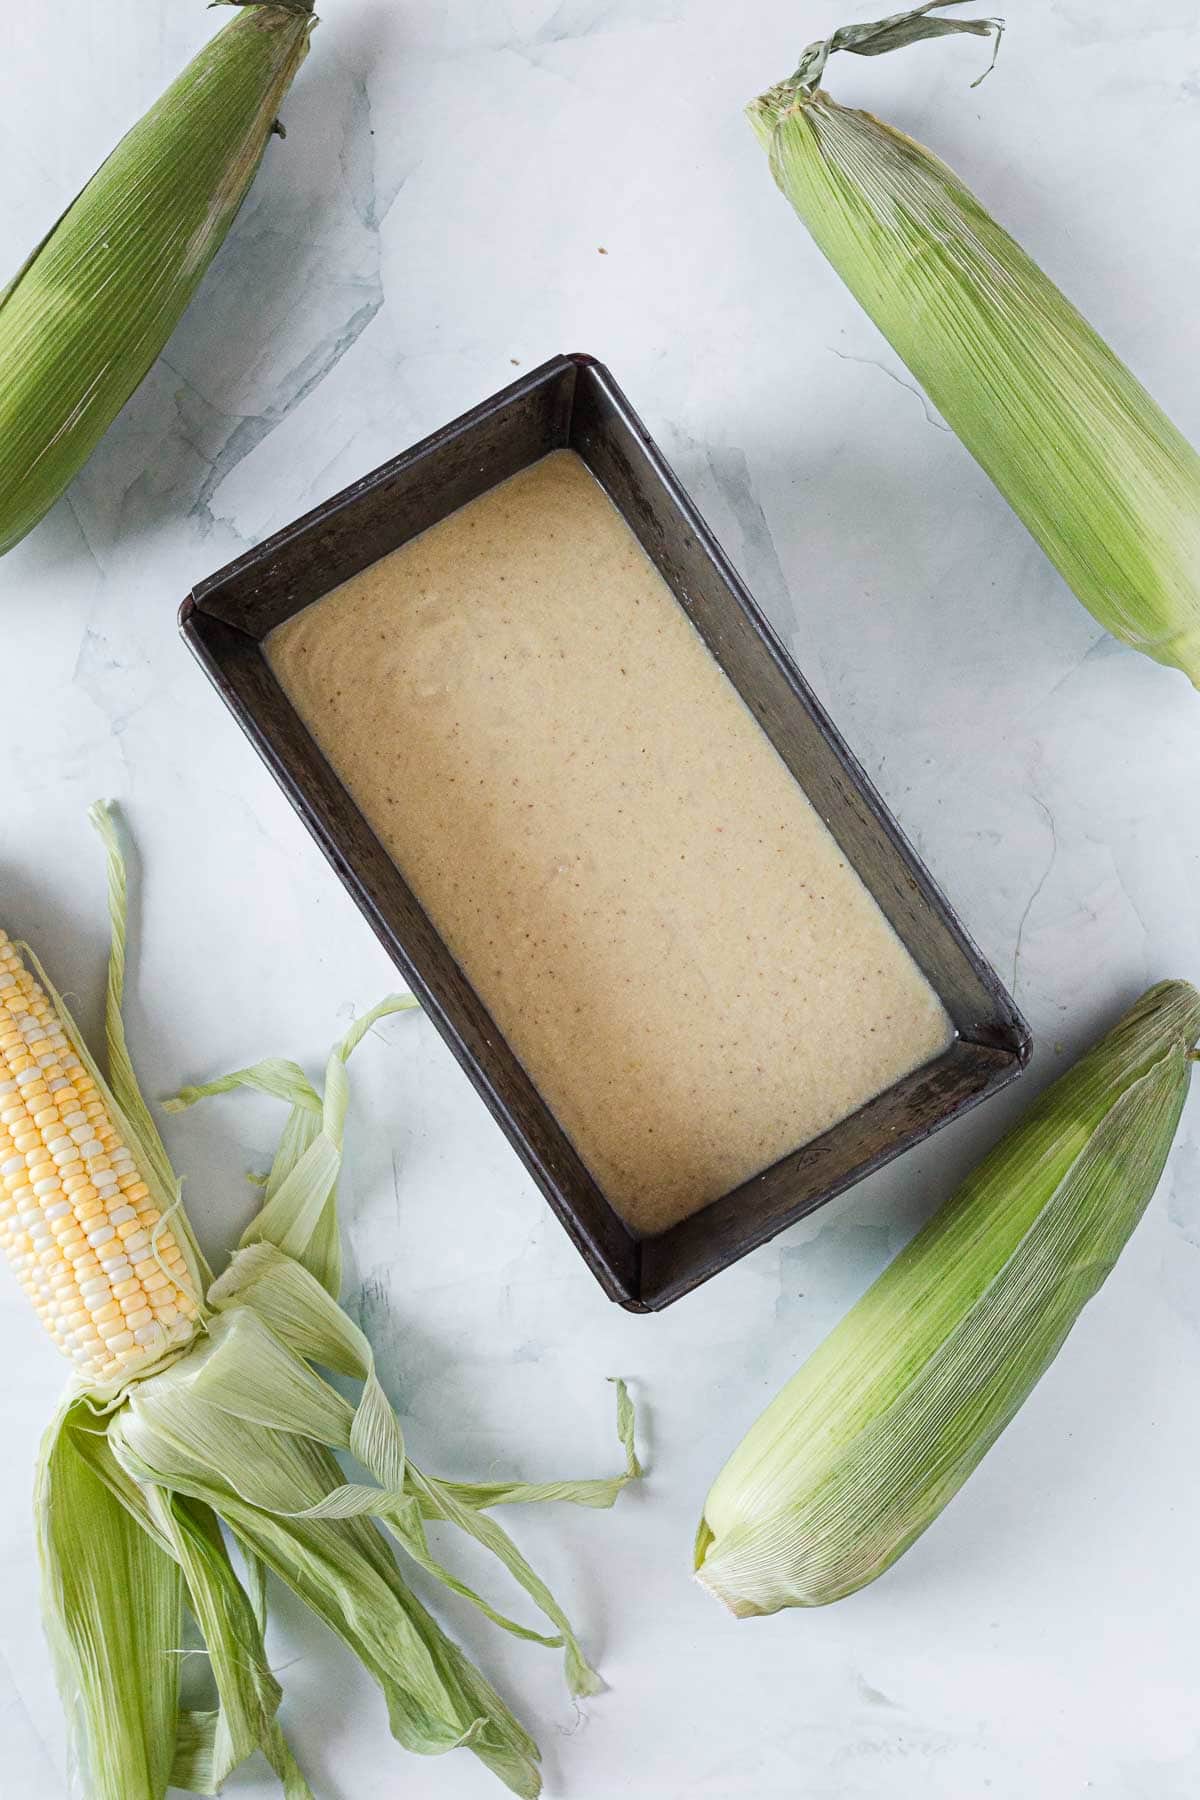
Remove from heat and stir in the vanilla extract. Strain one final time into a clean bowl to remove any bits of cooked egg. Cover and chill the custard in the fridge for at least 4 hours, or overnight if you can. A fully chilled base will churn beautifully.
Churn the Ice Cream
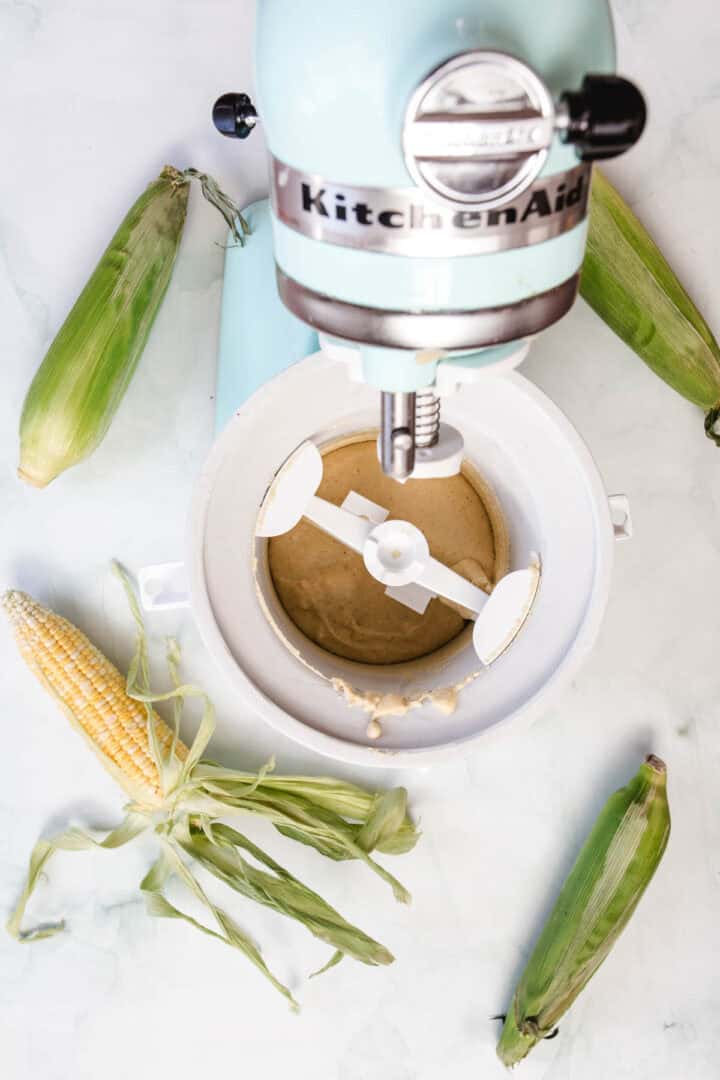
Pour the chilled custard into your ice cream maker and churn according to the manufacturer’s instructions. It should reach a soft-serve consistency after about 20–30 minutes.
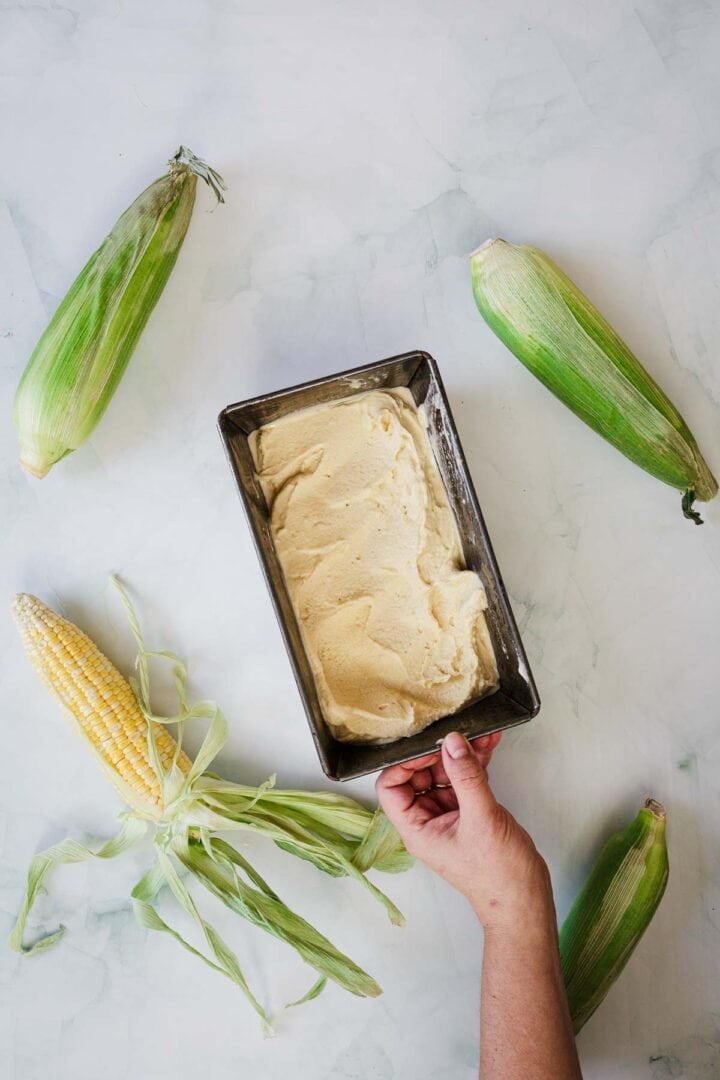
Freeze Until Firm

Transfer the churned ice cream into a freezer-safe container. Press a piece of parchment directly onto the surface to prevent ice crystals, then seal and freeze for at least 4 hours, or until firm.
Serve
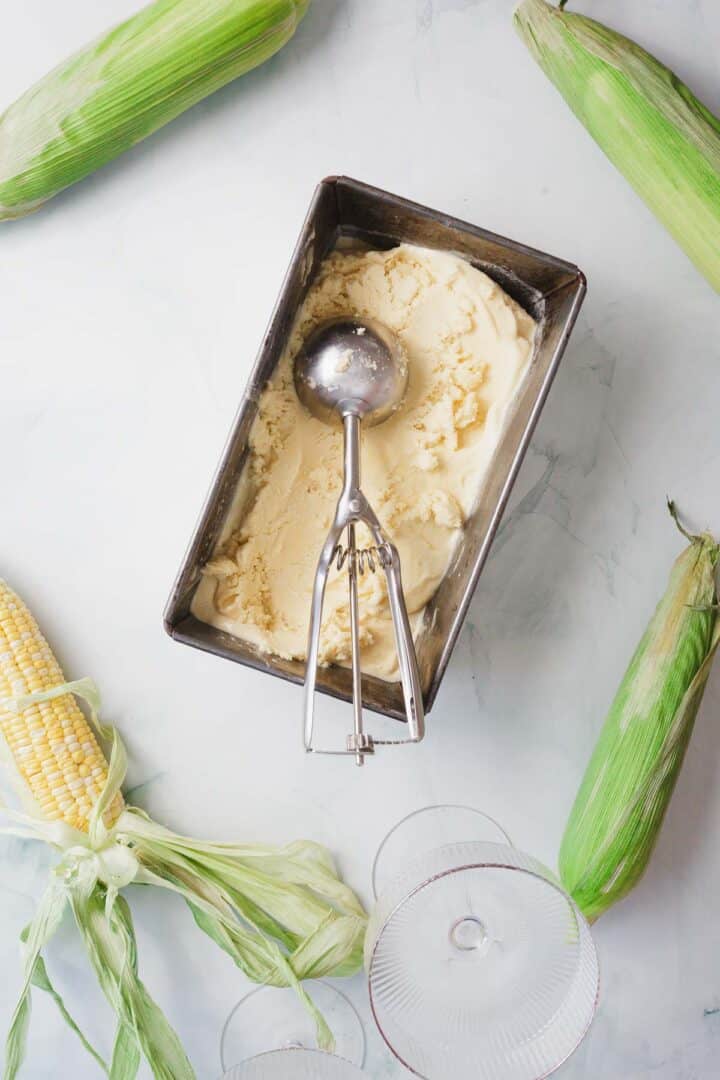

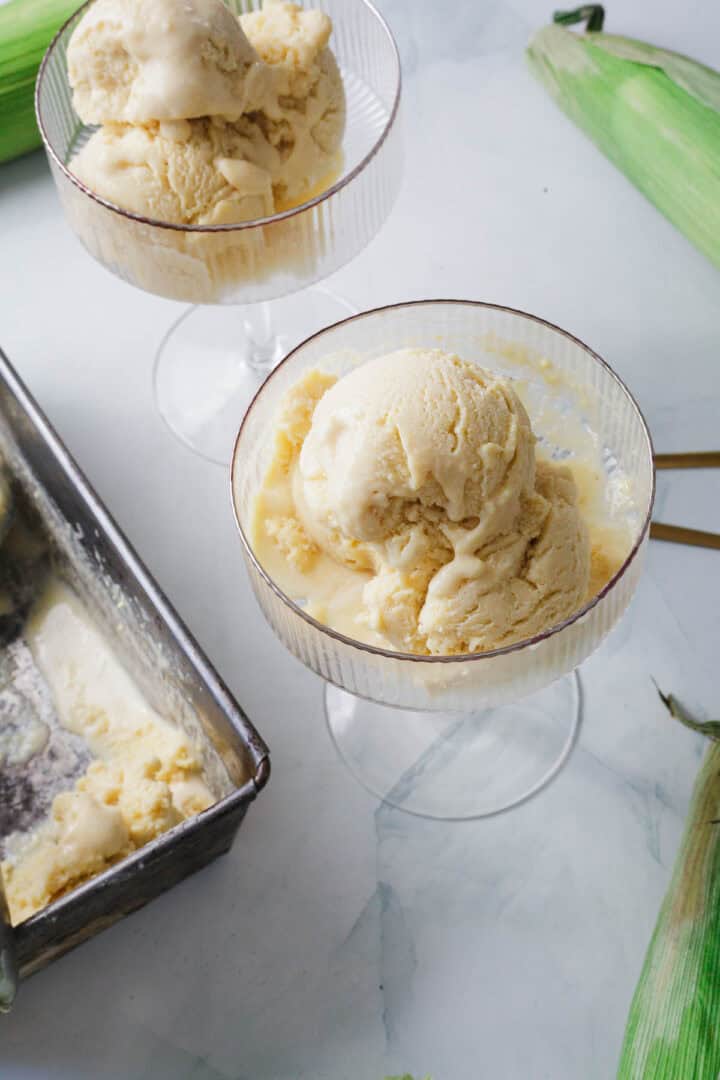
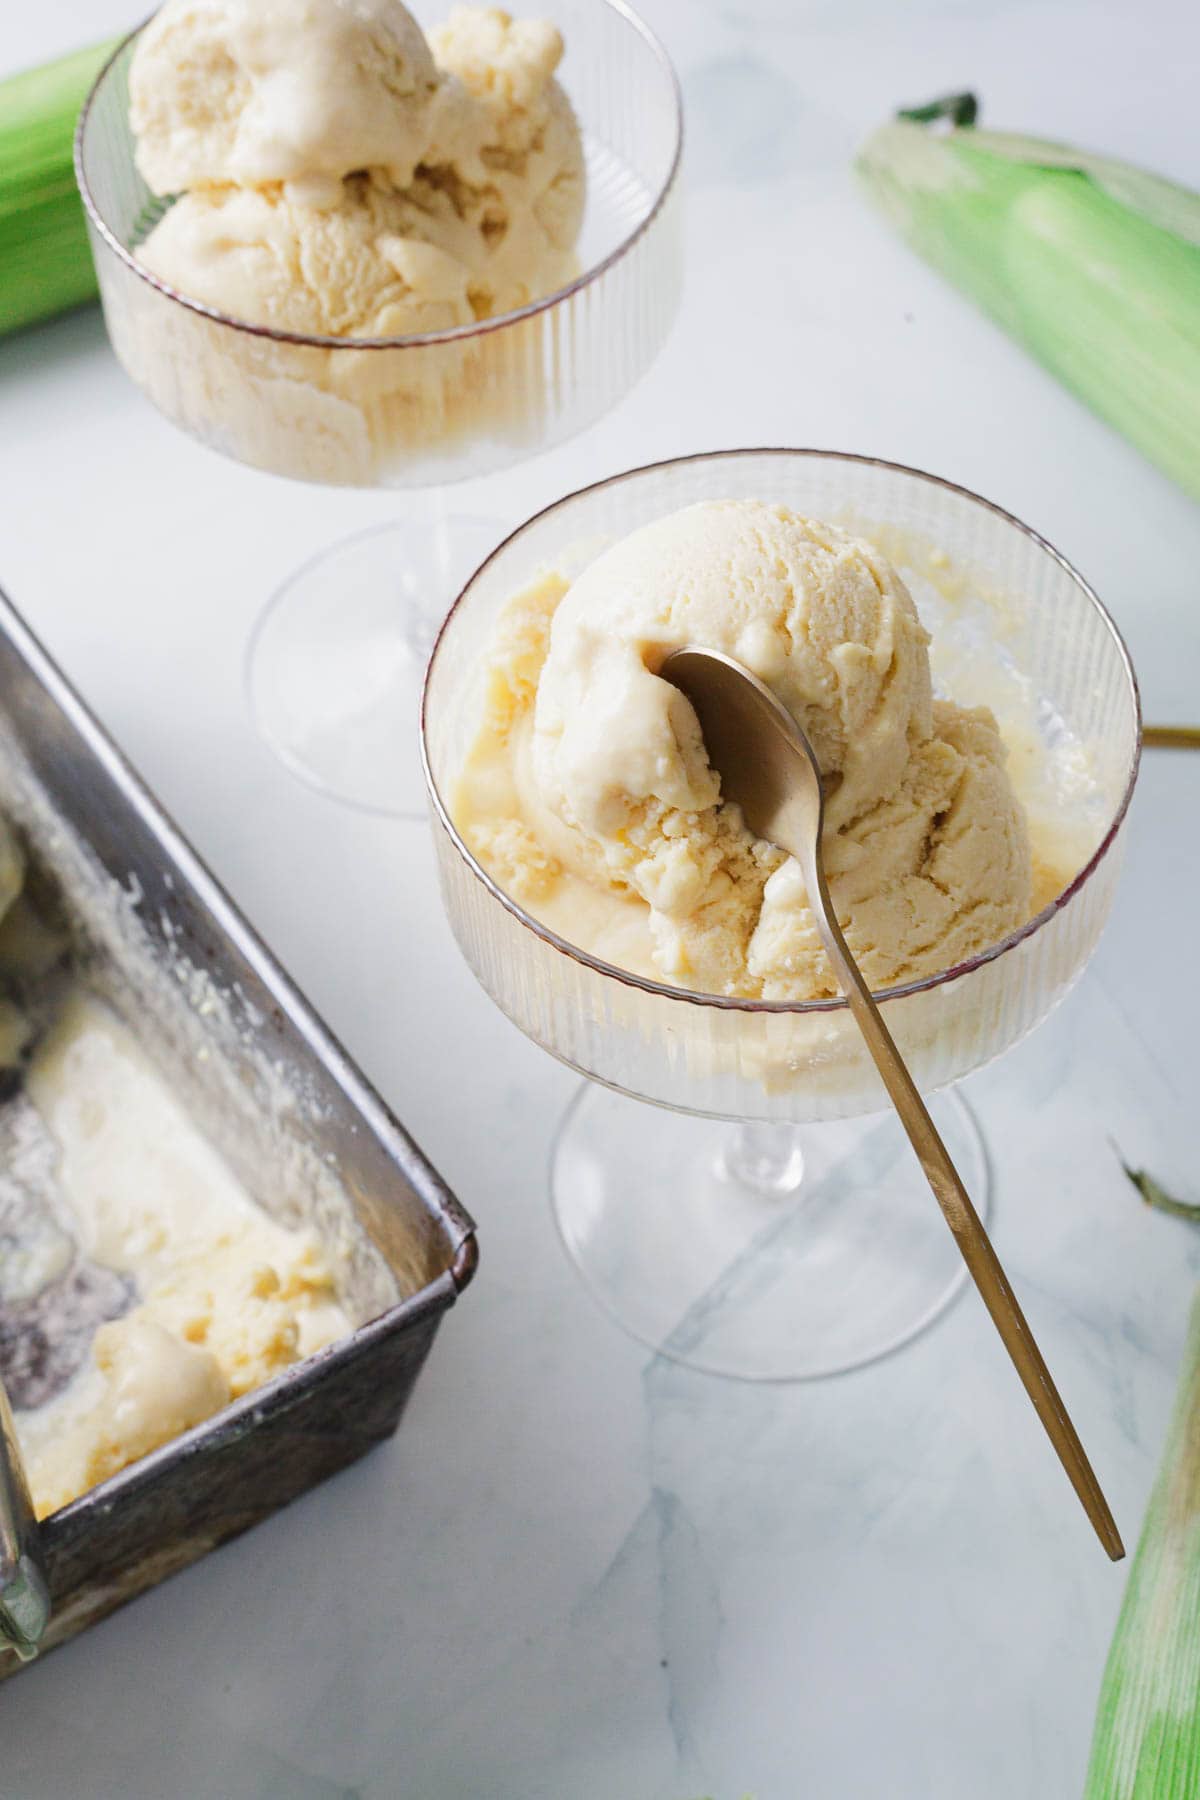
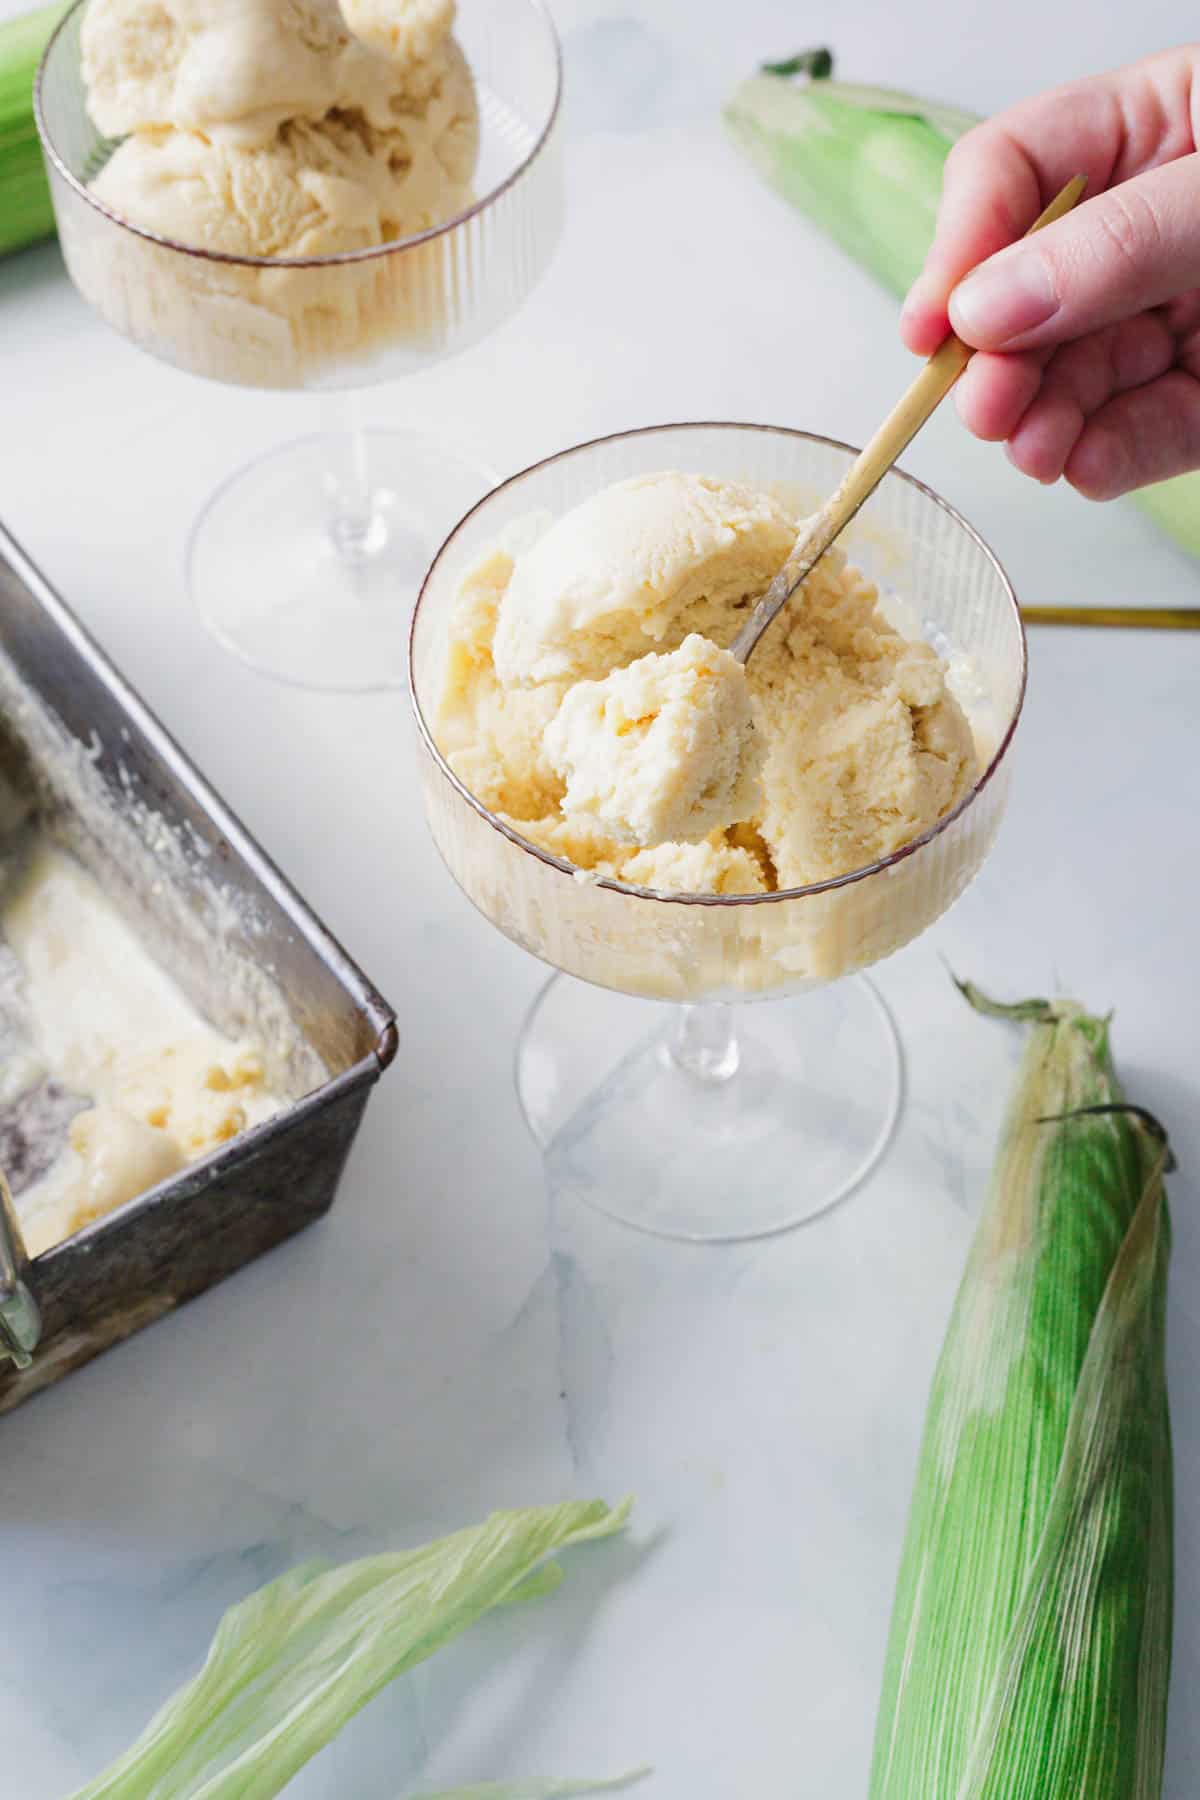
Scoop into bowls and serve as is, or garnish with a drizzle of honey, a spoonful of caramel, or a few toasted corn kernels for crunch.
Storage
If you manage to have any corn ice cream left, it keeps well in the freezer for up to five weeks. Store it in an airtight container with a layer of parchment pressed gently on top to help prevent ice crystals from forming. I like to use an old metal loaf pan with a tight lid, it chills evenly.
The texture is at its best in the first few days: creamy, soft, and easy to scoop after a short rest on the counter (about 5–10 minutes does the trick). After a week, it can start to harden a bit, especially around the edges, but the flavor holds strong.
Top Tips
Save the Corn Cob – it’s tempting to toss them once the kernels are cut, but the cobs are where much of the corn’s depth hides. Simmering them with the cream pulls out extra sweetness and starch that gives the ice cream its signature texture. I’ve skipped them once—just once—and the result was noticeably flatter. Lesson learned.
Strain Twice, Always – after blending, and again after cooking the custard. Even with a high-speed blender, little corn skins can sneak through and ruin that silky finish. The second strain might seem fussy, but it’s what turns this from “homemade” to “how did you make this so smooth?”
Don’t Rush the Chill – I’ve tried cutting corners before, churning the base while still a bit warm. The texture suffered and the ice cream froze grainy. Letting it rest overnight in the fridge gives the custard time to settle and set, making a noticeable difference in the final scoop.
Recipe
Tried and loved this recipe? Please leave a 5-star review below! Your reviews mean a lot to me, so if you've got any questions, please let me know in a comment.
Corn Ice Cream
Equipment
- Fine mesh strainer
Ingredients
- 4 ears fresh corn kernels removed (reserve cobs)
- 2 cups heavy cream
- 1 cup whole milk
- ¾ cup granulated sugar divided
- ¼ teaspoon salt
- 5 large egg yolks
- 1 teaspoon vanilla extract
Instructions
- In a medium saucepan, combine the corn kernels, reserved cobs, cream, milk, ½ cup sugar, and salt. Bring to a gentle simmer over medium heat, then remove from heat, cover, and let steep for 1 hour to infuse with corn flavor.
- Remove and discard the cobs. Blend the mixture until smooth, then strain through a fine mesh sieve into a clean bowl, pressing down to extract all the liquid.
- In a separate bowl, whisk the egg yolks with the remaining ¼ cup sugar until pale and smooth. Slowly whisk in about 1 cup of the warm corn mixture to temper the yolks.
- Pour the yolk mixture back into the rest of the corn base and whisk to combine. Blend again briefly if needed for a silky texture.
- Return the mixture to the saucepan. Cook over medium heat, stirring constantly, until it thickens slightly and coats the back of a spoon (around 170°F).
- Remove from heat and stir in the vanilla. Strain once more to remove any cooked egg bits. Chill in the fridge for at least 4 hours, or overnight.
- Pour the chilled custard into your ice cream maker and churn according to the manufacturer’s instructions (usually 20–30 minutes), until it reaches soft-serve consistency.
- Transfer the churned ice cream to a freezer-safe container. Press parchment paper on the surface, seal, and freeze for at least 4 hours until scoopable.
- Scoop and serve as is, or top with honey, caramel, or toasted corn kernels.
Nutrition


Tell Me What You Think!