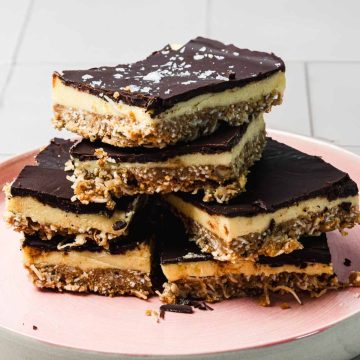
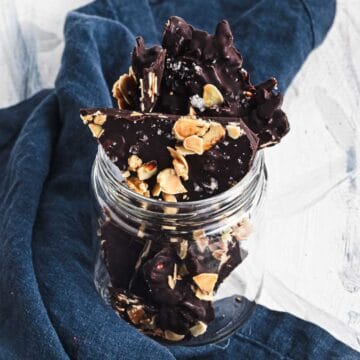
Maple almonds, dark chocolate, flaky sea salt and zero oven drama. This dark chocolate almond bark is my go to for gift boxes, snack boards and late coffee breaks.

In our house, the tree goes up before any serious baking begins. I learned that the hard way. One December early in our marriage, I tried to do both at once. Dough resting on the counter, oven timer going off, ornaments half unpacked, lights tangled beyond reason.
By the time the last branch was fluffed, the kitchen felt heavy, and the joy I wanted for the season had slipped somewhere between cooling racks and sugar-dusted sleeves.
These days, December evenings move differently. the kids hover with ornament hooks in their hands, waiting for instructions that change every few seconds. F stands near the tree, holding a string of lights like a puzzle that refuses to solve itself. I am in the kitchen, but only halfway there, wanting something sweet on the table later while still keeping the evening intact.
That is where this dark chocolate almond bark found its place.

Back home, trays of nut-studded chocolate bark appeared in bakeries before holidays, wrapped simply and meant for breaking and sharing. In other kitchens I spent time in, chocolate sweets lived in the refrigerator, set firm without ovens or timers, sliced when guests arrived. Colombian friends showed me that chocolate belongs at the center of the table even when the kitchen stays quiet.
This bark follows that mindset. It asks little and returns something steady. Almonds coated in maple syrup, chocolate melted gently until glossy, salt scattered with care. No thermometer, no precise shaping, no panic if the tree lights flicker mid-step.
When I want something more formal, I lean on a healthy dark chocolate tart for long dinners or a dark chocolate orange tart when citrus is piled high. For sweets that travel, I pack stuffed dates with chocolate almond butter.

This bark belongs to other evenings, the ones when the tree is half decorated, pine needles already on the floor, and dessert needs to slip into the spaces between real life.
By the time the last ornament is hung, the chocolate has set, the almonds crack softly under the knife, and the salt catches the light, waiting quietly to be shared.
Ingredients

- Dark Chocolate - I use good-quality bar chocolate because it sets firm, snaps cleanly, and melts into a glossy sheet that hugs every slice of almond. Chips are formulated to hold their shape and can stay waxy or soft. Choose a bar in the 60-75% range for a dessert that feels rich but still kid friendly. Vegan chocolate works beautifully here and keeps the bark dairy free.
- Maple Syrup - This is what turns plain nuts into maple candied almonds. It reduces into a glossy coating that clings to the slices without forming hard sugar shards. I reach for maple syrup when I want sweetness with a bit more depth. Good-quality honey can stand in for a different flavor, though the taste will lean more floral than maple.
- Coconut Oil - A small spoonful of coconut oil loosens the maple syrup in the pan and helps it coat the almonds evenly. Without it, the syrup can reduce in spots and leave some nuts bare. Refined coconut oil keeps the flavor neutral. A mild-tasting vegetable oil can be used if coconut is not an option.
See the recipe card for full list and exact quantities.
How to Make this Dark Chocolate Almond Bark Recipe

If your December baking already feels full of cakes and cookies, dark chocolate almond bark is the one to make this recipe that still feels special without much work. Crunchy roasted almonds, rich dark chocolate, and flaky salt come together in a single tray that works for gifts, dessert plates, or snack boards. Here is what to watch for so every batch sets glossy, crisp, and ready to break and share:
Candy the almonds


After about 3 minutes, it should look reduced and coat the back of a spoon without feeling grainy. If it starts to darken quickly or smell sharp, lower the heat so it does not burn.
Coat the almonds and cool


Use a fork to separate clumps while the nuts are still hot, or they will dry in large chunks. Let them cool completely. They should feel dry to the touch and lightly crisp, not sticky.
Melt the chocolate gently


If using the microwave, heat in very short bursts, stirring between each one. If the chocolate looks thick and dull or grainy, it has overheated. A small handful of fresh chopped chocolate stirred in can often bring it back to a smoother texture.
Fold in the almonds


The mixture should feel thick but spreadable. If it seems very runny, let it sit for a minute so it can thicken slightly before you pour it.
Spread and top the bark


Try not to scrape it too thin at the edges, or those areas will be fragile and brittle. Finish with the remaining flaky salt scattered across the surface. The salt should sit on top in visible crystals rather than melting in.
Let the bark set and cut

The bark is ready to cut when the center feels solid and no longer looks glossy. Use a sharp knife to cut into 12 to 15 pieces. You should hear a clean snap. If it bends instead of breaking, it needs more time to set.
Store and Enjoy

The key is to protect the bark from moisture so the surface does not bloom or turn sticky. Properly stored, it keeps well for up to 10 days.
Storage

Once the bark is fully set and cut, place pieces in an airtight container with parchment between layers so they do not stick. Keep at cool room temperature, away from heat and sunlight, for up to 7-10 days.

In warm or humid climates, refrigerate in a tightly sealed container, again with parchment between layers. For longer storage, freeze on a tray, then transfer to an airtight container or freezer bag with parchment. Freeze for up to 1 month and thaw in the closed container at room temperature.
Top Tips
Let the almonds cool longer than you think - candied almonds that feel even slightly tacky will soften the chocolate around them and can cause streaks. I give them a full 20-30 minutes on the tray, and if I am unsure, I break one in half. It should snap, not bend.
Keep steam away from the chocolate - when melting chocolate over simmering water, even a small drop of steam or condensation can make it seize into a grainy paste. I wipe the bottom of the bowl before lifting it and keep the water at a gentle simmer, not a vigorous boil.
Recipe
Tried and loved this recipe? Please leave a 5-star review below! Your reviews mean a lot to me, so if you've got any questions, please let me know in a comment.
Dark Chocolate Almond Bark
Equipment
- Small pot
- Spatula or wooden spoon
- Knife
Ingredients
- 1½ cups (180g) roasted sliced almonds unsalted
- ¼ cup (60ml) maple syrup
- 1 tbsp (15ml) coconut oil
- 1½ tsp (3g) flaky sea salt
- 10 oz (300g) dark chocolate vegan
Instructions
- Add the maple syrup and coconut oil to a medium saucepan. Bring to a steady boil over medium heat, swirling the pan occasionally. The syrup should bubble evenly and thicken slightly, like a loose caramel that coats the back of a spoon. Boil for about 3 minutes, watching that it does not darken too quickly.
- Stir in the sliced almonds and about ½ teaspoon of the flaky salt. Keep stirring until all the almonds look glossy and evenly coated, with no dry spots. Pour the mixture onto a parchment lined baking sheet and spread into a thin layer. Use a fork to separate clumps while the nuts are still hot. Let the almonds cool completely until dry and crisp to the touch, not sticky.
- Line a second baking sheet with parchment. Place the chopped dark chocolate in a heatproof bowl set over a small pot of gently simmering water. The bottom of the bowl should not touch the water. Stir until most of the chocolate is melted, then remove from the heat and keep stirring until smooth and shiny. If using a microwave, heat in 10-15 second bursts, stirring between each, until smooth.
- Reserve about one third of the candied almonds for the topping. Add the remaining almonds to the melted chocolate and fold gently until they are coated and distributed. The mixture should be thick but spreadable. If it looks very loose, let it sit for a minute so it firms up slightly.
- Pour the chocolate and almond mixture onto the prepared parchment lined baking sheet. Use a spatula to spread it into an even layer, about ¼ inch (6 mm) thick. Keep the edges from getting too thin so they do not crumble. Scatter the reserved candied almonds over the top and press them lightly into the surface. Sprinkle the remaining flaky salt evenly over everything.
- Leave the tray at cool room temperature until the chocolate is completely firm, or place it in the freezer to speed up the setting. The bark is ready when the center feels solid and the surface is no longer glossy. Use a sharp knife to cut into 12-15 pieces. You should hear a clean snap as it breaks.