I've been making this gluten-free Queen Elizabeth Cake since my grandmother and I stumbled across the recipe in an old cookbook during one rainy spring. Through plenty of batches and a few over broiled topping, I knew I had found one of those rare cakes worth making again and again.
One spring before June, my grandmother came to stay with us for a few weeks. The weather could not seem to settle. One morning, sunlight poured through the kitchen windows and Leo insisted on eating breakfast outside. By afternoon, rain tapped against the glass hard enough to send us back indoors with sweaters and socks. It felt like the season itself had not decided whether it was ready to let go of spring.
Those quiet weeks brought us into one of those habits immigrants seem to fall into so naturally. We compared old stories with new discoveries. My grandmother would talk about cakes she remembered from Soviet kitchens, simple desserts made from whatever was available, while I brought home stacks of secondhand cookbooks from library sales and thrift shops.
Somewhere between tea and conversations about Israel, Ukraine, and relatives scattered across continents, we found ourselves leafing through a cookbook neither of us had seen before.
Between tea and turning another yellowed page, we came across a recipe called Queen Elizabeth Cake. Neither of us had heard of it before. The title felt regal, though the ingredients felt surprisingly close to home. Dates reminded my grandmother of fillings she used in pastries. Walnuts belonged in nearly every family gathering dessert we remembered. Coconut was something I associated with Colombian treats and holiday baking.
Curiosity carried us into the kitchen. The dates softened in hot water while rain streaked down the windows. Brown sugar and butter filled the apartment with that gentle sweetness that always makes a gray afternoon feel softer. By the time the coconut topping bubbled beneath the broiler, the kitchen felt brighter than it had all day.
Years later, whenever spring lingers too long before summer arrives, I think about that cake. I have come to learn that Queen Elizabeth Cake is a Canadian classic dating back to the 1950s! Despite its royal name, it is surprisingly humble. Some believe it was created to commemorate Queen Elizabeth II's coronation, though the recipe itself feels far more like the kind of cake families pass between neighbors, church gatherings, and handwritten recipe cards.
Maybe that's why I am drawn to simple cakes. The gluten-free almond eclair cake became one of my favorite make-ahead desserts during busy weeks with Leo and Lin. In winter, I often turn to my blood orange cake, whose bright citrus scent fills the house when days feel short. During strawberry season, the lemon almond yogurt cake with strawberries finds its way onto our table almost every weekend, especially when family visits.
This Queen Elizabeth cake belongs to that same part of life. The part where cakes are baked because rain keeps everyone indoors. Because grandparents are visiting. Because tea tastes better with something sweet beside it.
Or because a recipe hidden inside an old cookbook catches your eye and asks to be given another chance.
Ingredients
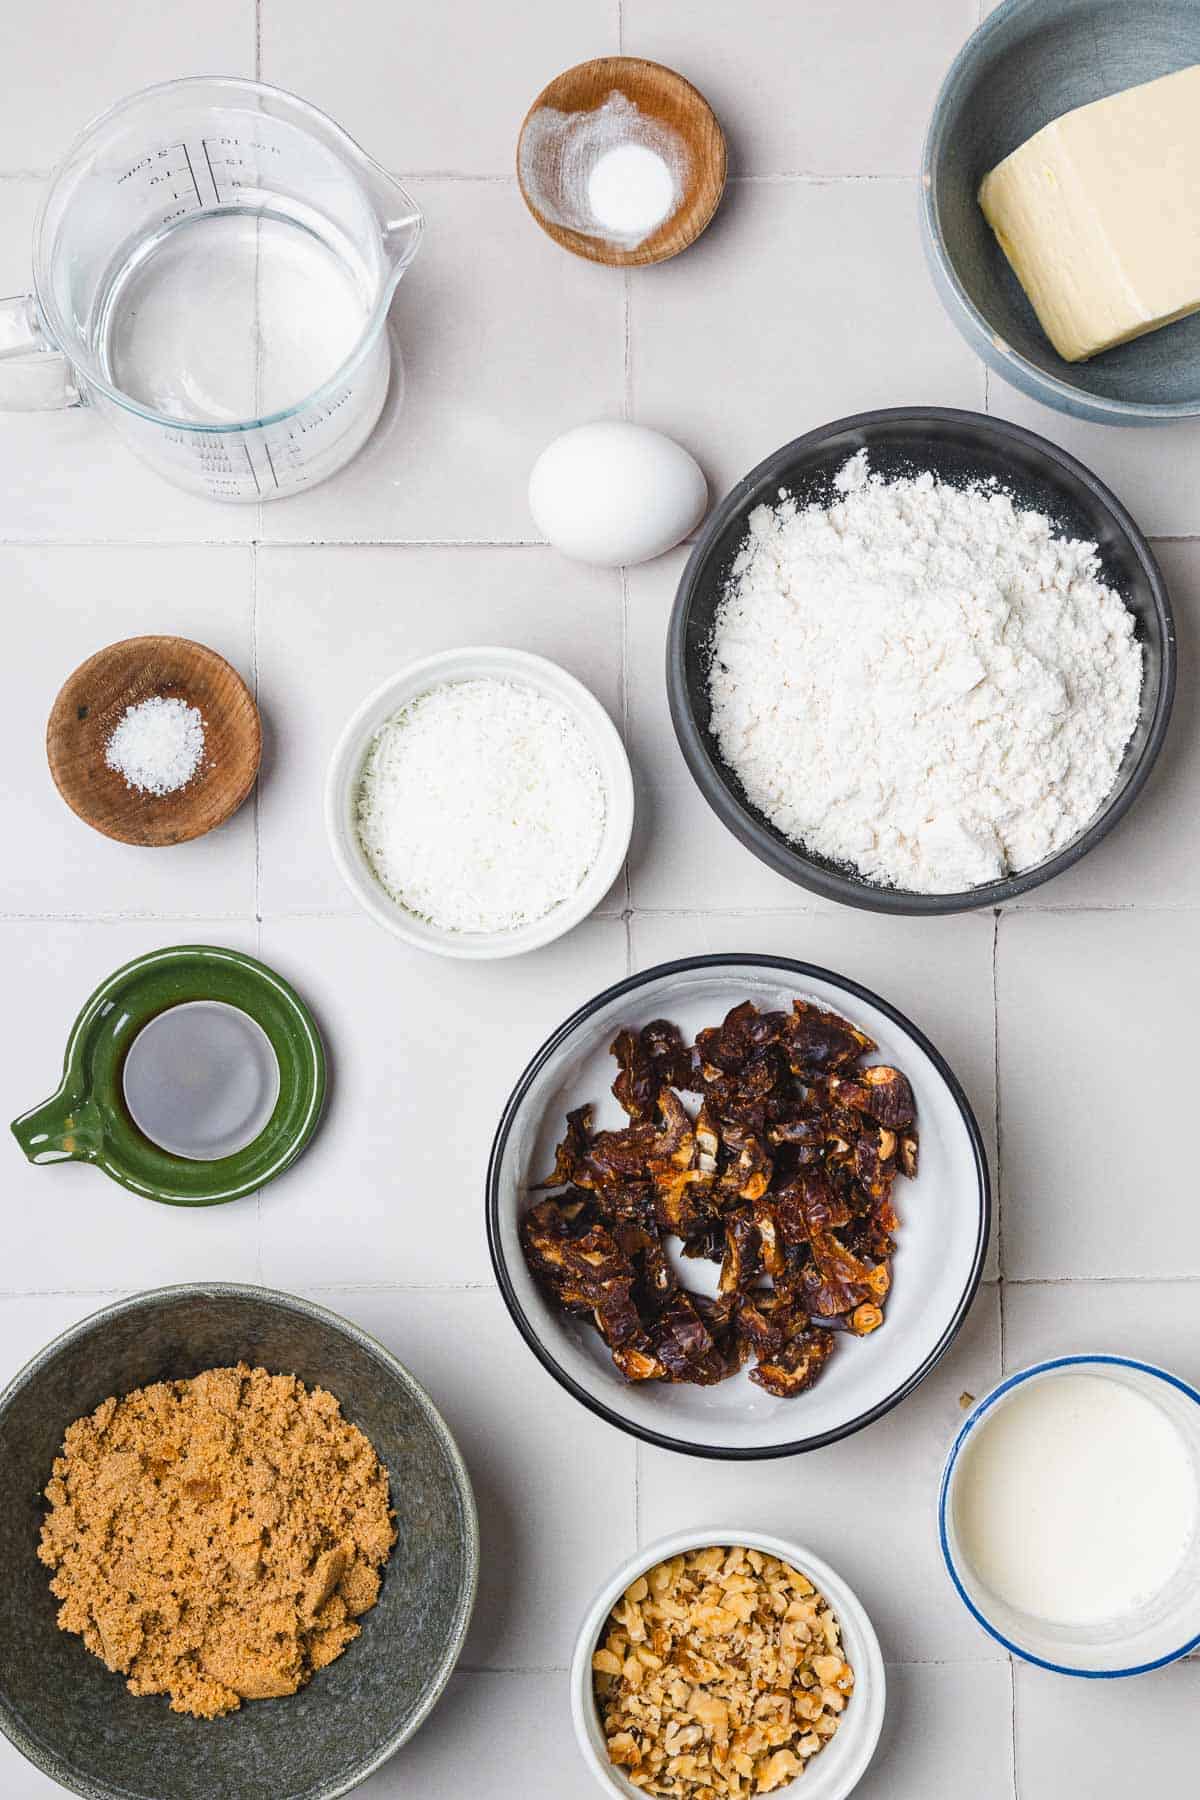
Dates are what give Queen Elizabeth cake its character. Once soaked, they soften into the batter and create that moist, tender crumb that keeps the cake from feeling dry. They remind me of ingredients I first learned to appreciate in Israel, where dates appeared everywhere from breakfast spreads to pastries. I prefer Medjool dates because they break down beautifully and have a deeper flavor, though Deglet Noor dates work well too.
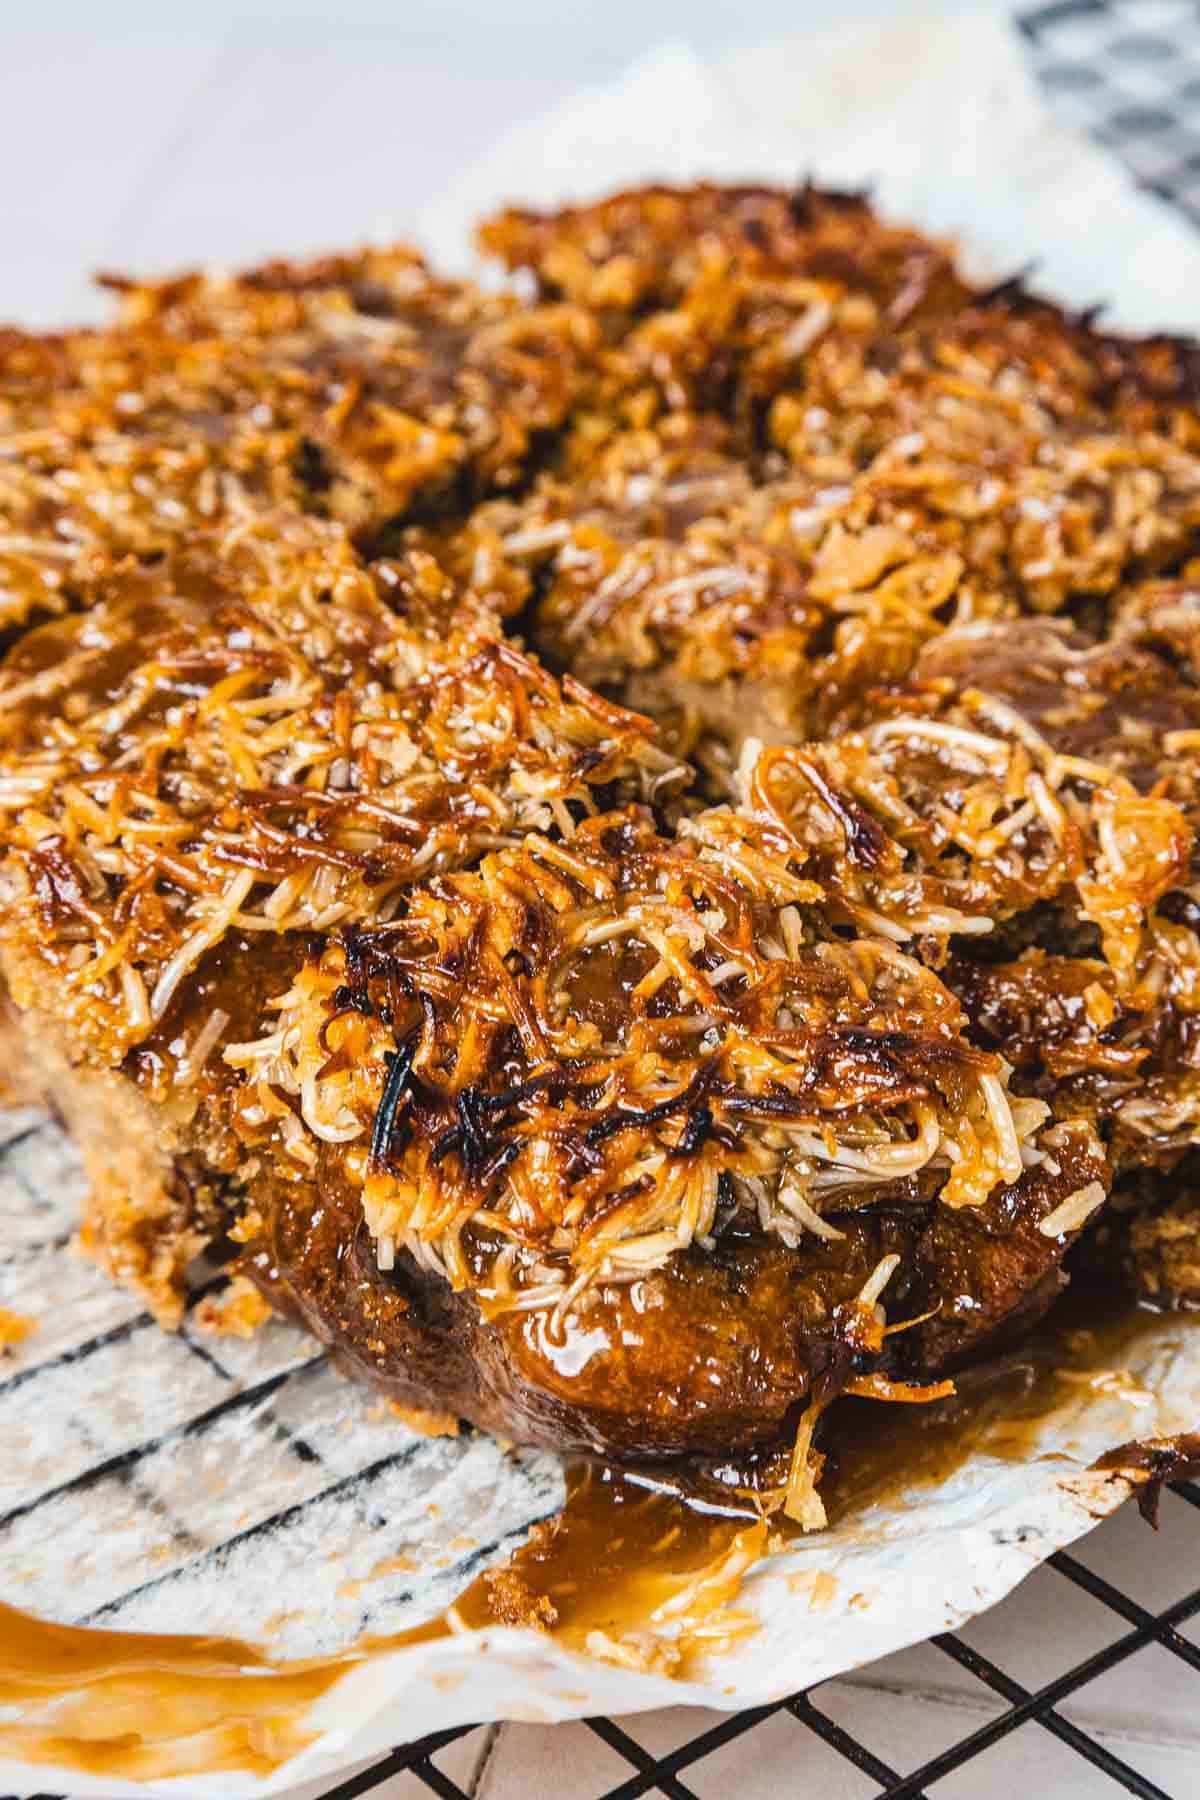
Shredded coconut is what makes this old-fashioned cake instantly recognizable. Under the broiler, it turns golden and develops those lightly crisp edges that everyone fights over. I grew up seeing coconut in Colombian desserts and holiday treats, so it always feels familiar to me. Unsweetened coconut gives the topping a more balanced flavor, though sweetened coconut can be used if that's what you have on hand.
Heavy cream brings the topping together and helps it cook into that caramel-like layer. I have occasionally used full-fat coconut cream when serving dairy-free guests, and it creates a rich topping with a slightly tropical note that pairs naturally with the coconut.
See the recipe card for the full list and exact quantities.
Top Tips
Chop the dates smaller than you think - the first time I made this cake with my grandmother, I left the dates in larger pieces because I thought they would melt away during baking. They didn't. Finely chopping them helps them almost disappear into the batter, creating that soft texture Queen Elizabeth Cake is known for instead of pockets of chewy fruit.
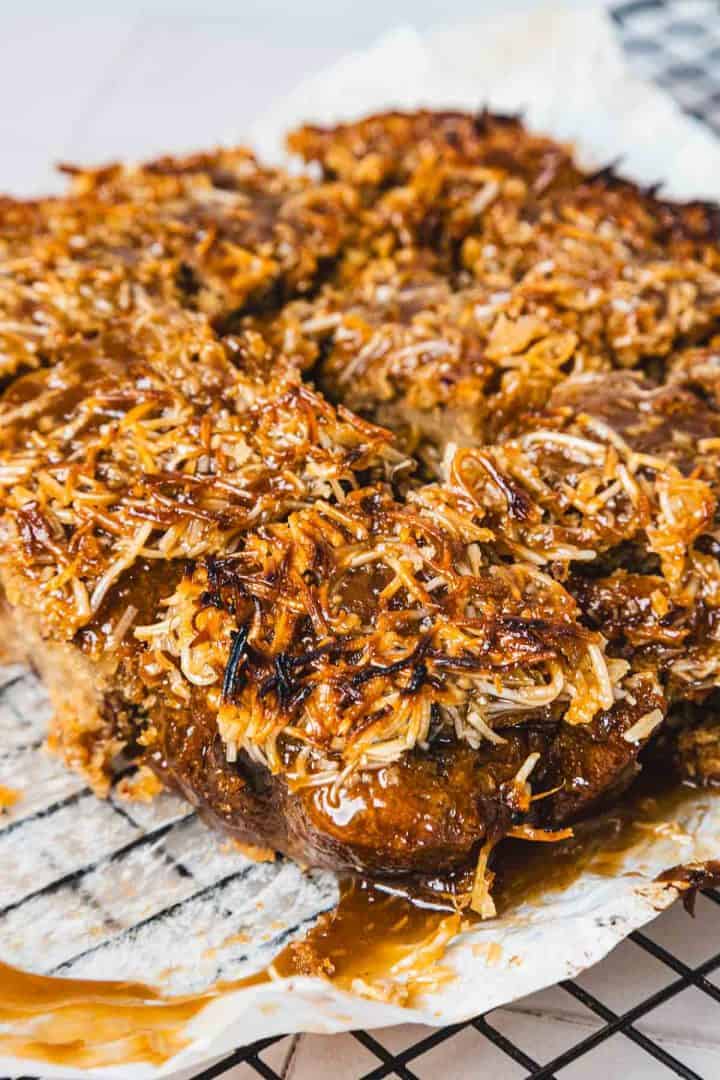
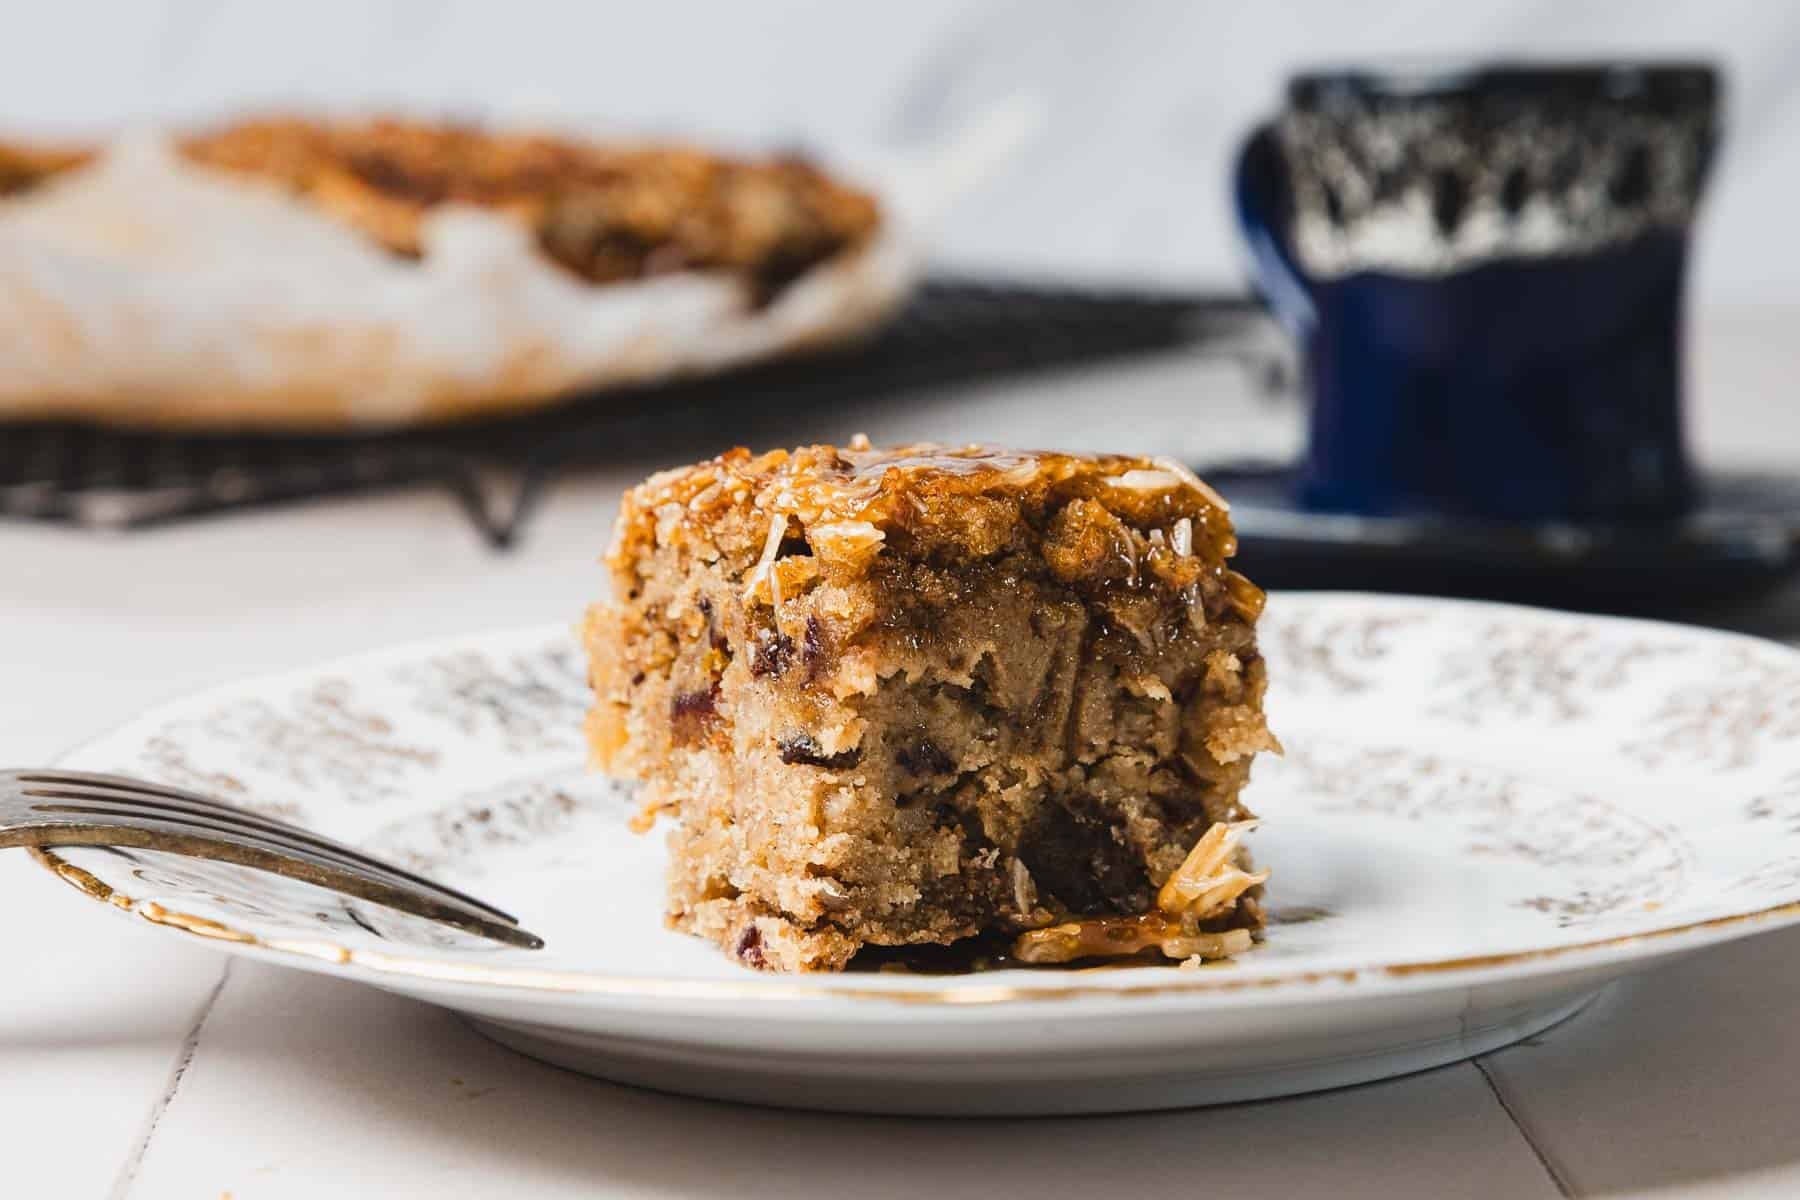
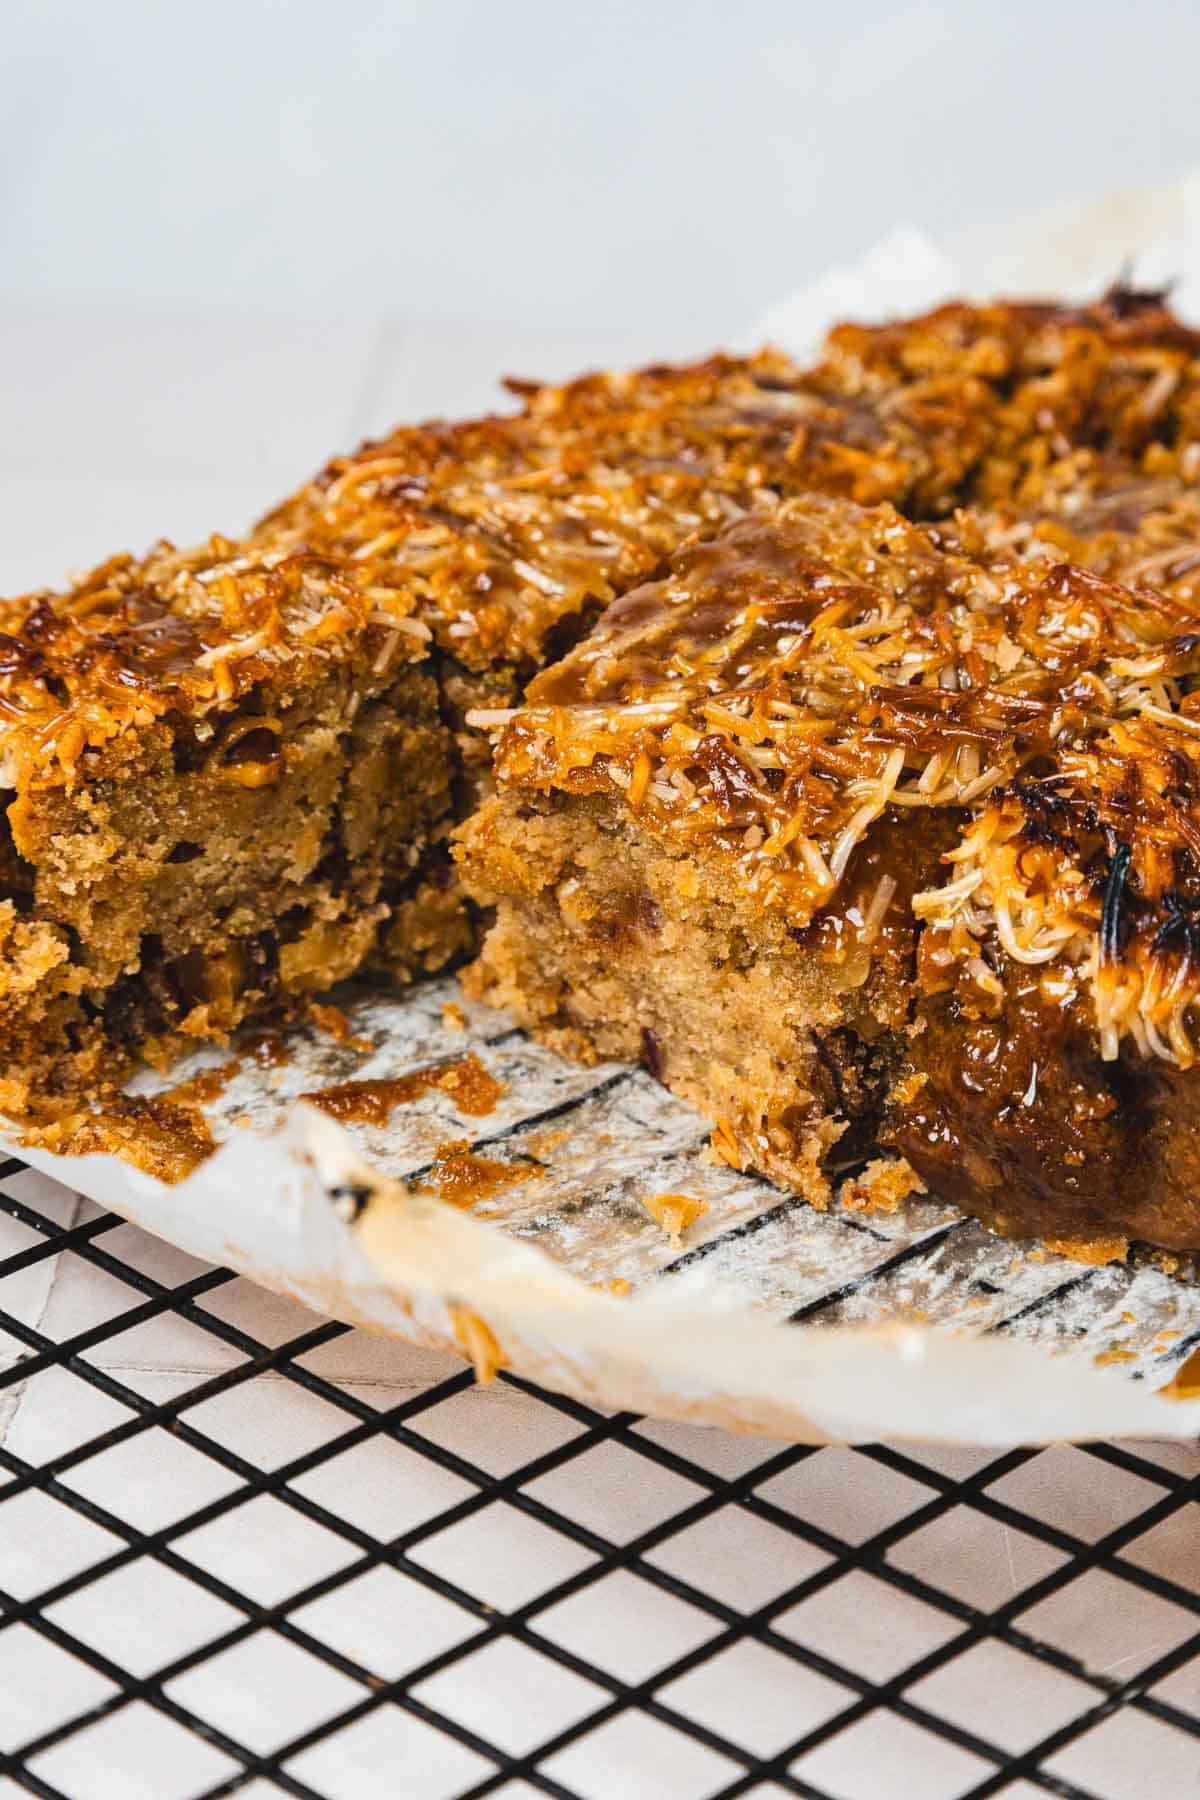
Toasted edges are better than pale ones - many recipes tell you to broil the topping, though they rarely mention what you're looking for. I pull the cake out when the coconut around the edges turns deeply golden and bubbles gently across the surface. A pale topping stays soft, while those darker spots create the contrast that makes people come back for a second square.
Use an aluminum pan if you have one - after making this cake several times, I noticed that metal pans give the most even results. Glass baking dishes hold onto heat longer and can make the edges firmer before the center fully cools. My old square aluminum pan, picked up from a thrift store years ago, has become my favorite for this recipe.
How to Make Queen Elizabeth Cake
This old-fashioned Queen Elizabeth Cake recipe comes together in layers, and each one contributes to the contrast between the soft date cake and the golden coconut topping. Pay attention to how the batter and topping look rather than relying entirely on the clock:
Prepare the Pan and Soften the Dates
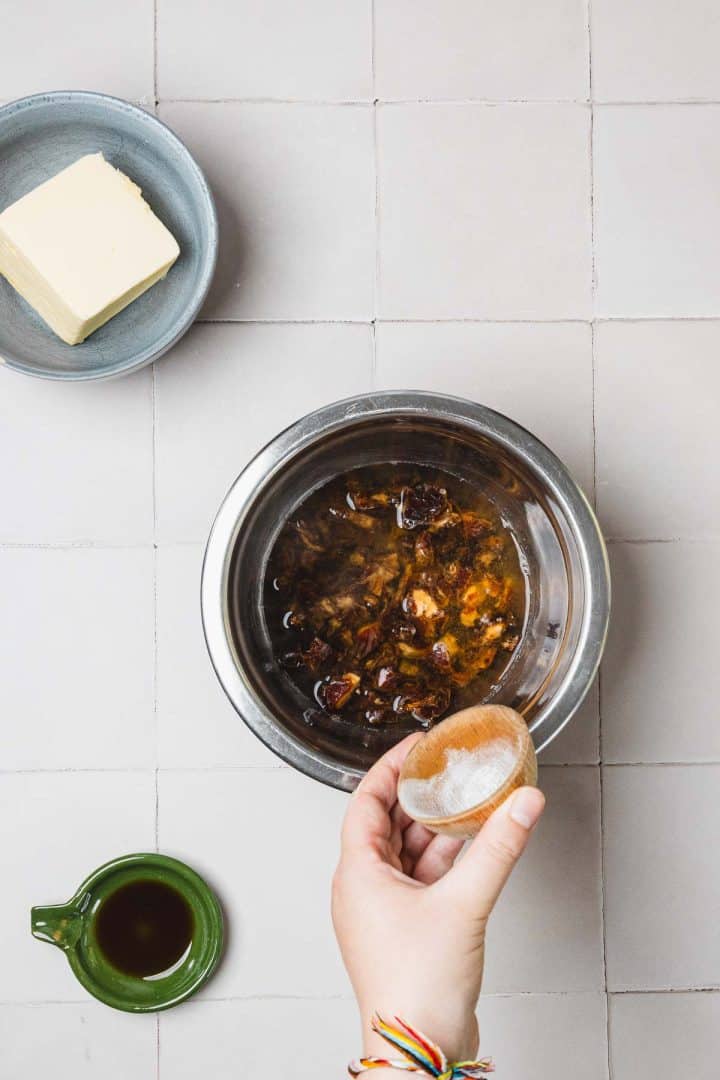
- Start to preheat the oven and preparing your baking pan. I like using parchment paper because the cake releases easily once the topping firms up.
- The mixture will foam immediately, which is exactly what you want. At first, it may look strange and watery, though after resting it transforms into something closer to a loose jam.
- Give the dates enough time to cool. If they're still hot when added later, they can affect the texture of the batter and melt the butter mixture too quickly.
Cream the Butter and Brown Sugar
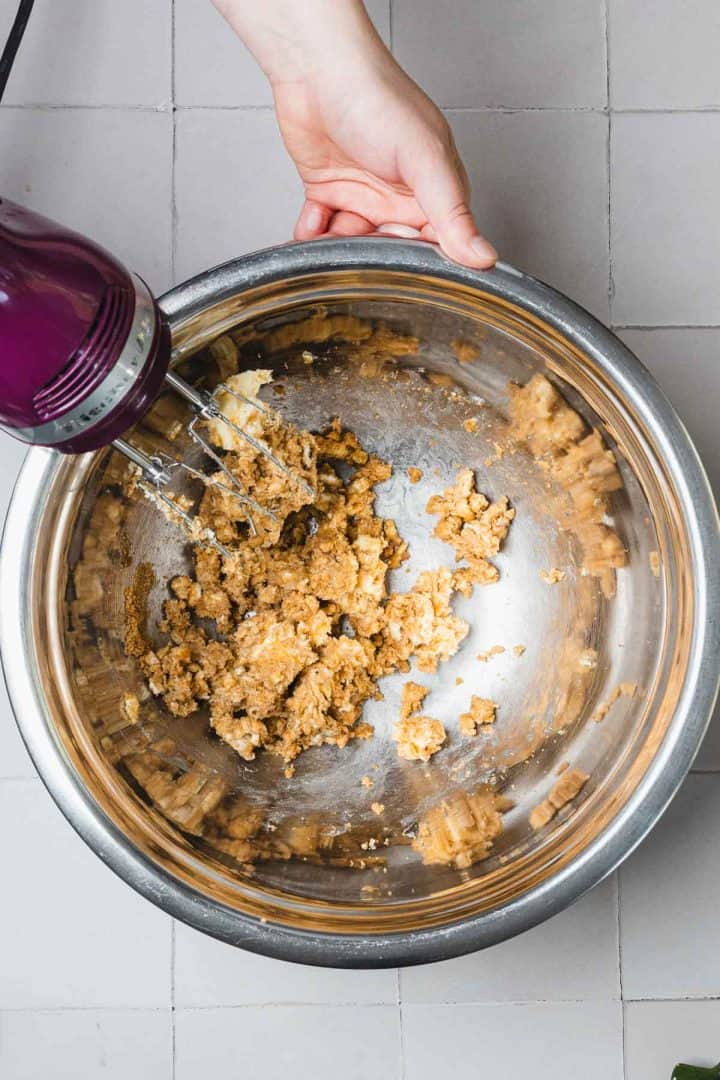
- I used to stop mixing too early, and the finished cake came out heavier than it should. A few extra minutes here make a difference. Scrape the bowl occasionally so everything incorporates evenly.
Add the Egg and Vanilla
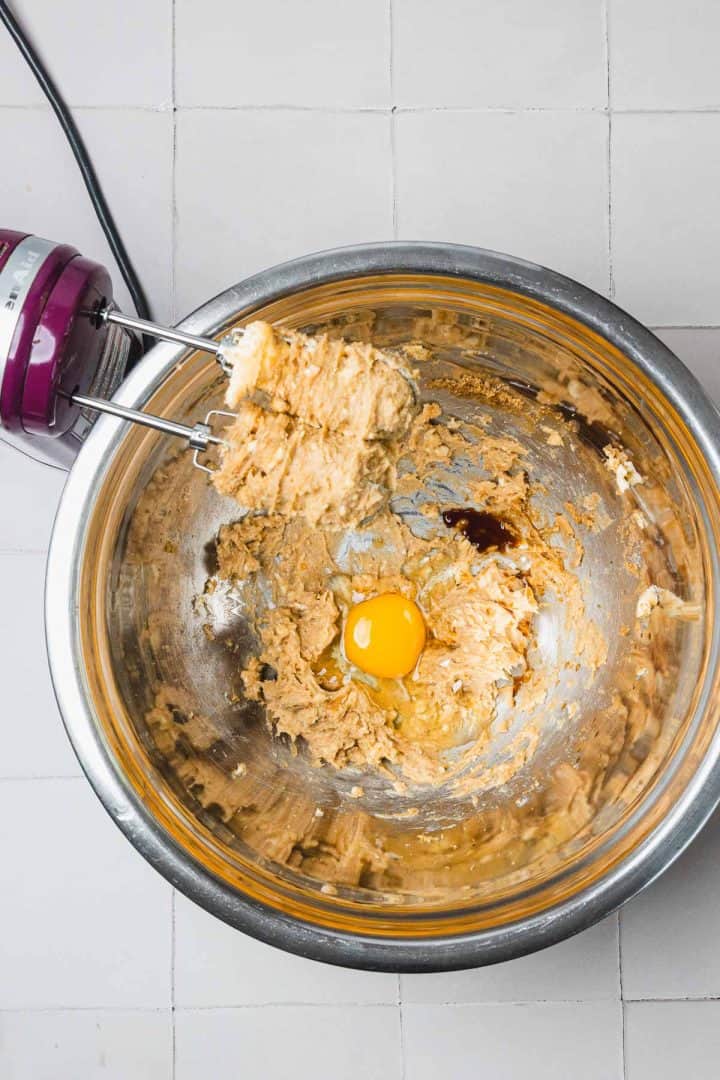
- If the mixture looks slightly separated at first, keep mixing. It should come together into a silky consistency.
- Avoid adding the egg while the butter is too cold, since this can create a curdled appearance. Room-temperature ingredients make this step much easier.
Combine the Dry Ingredients
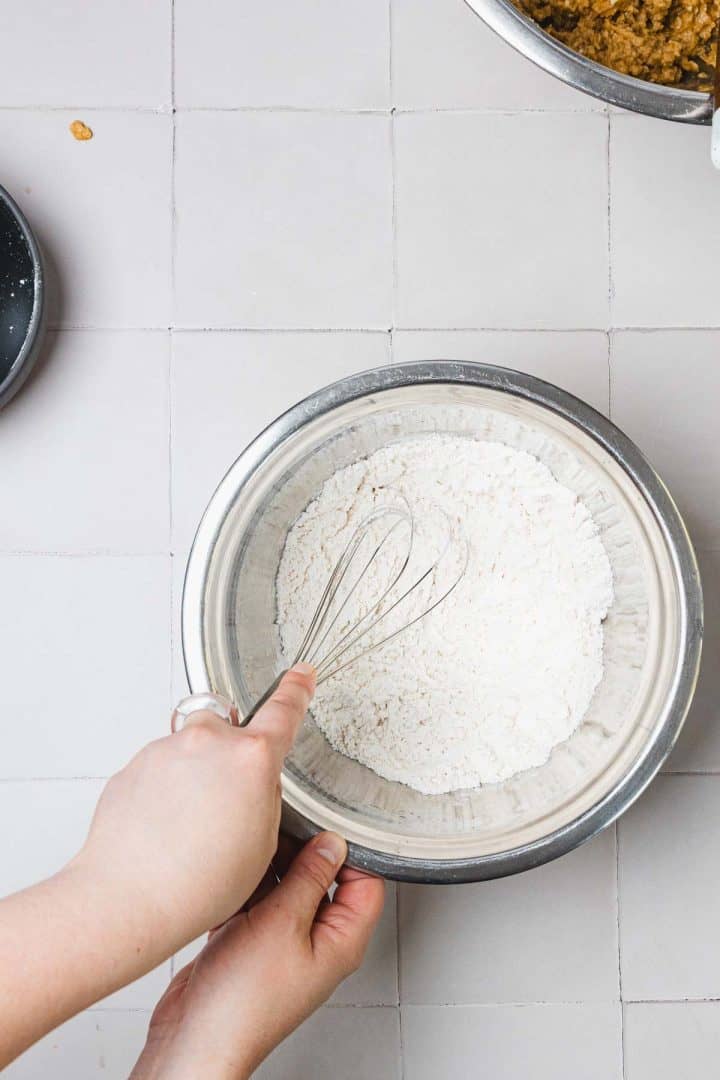
- This prevents pockets of flour later.
- I have found that gluten-free flour benefits from an extra whisking. Since there are different starches in the blend, distributing them evenly helps create a more consistent crumb.
Alternate the Flour and Date Mixture
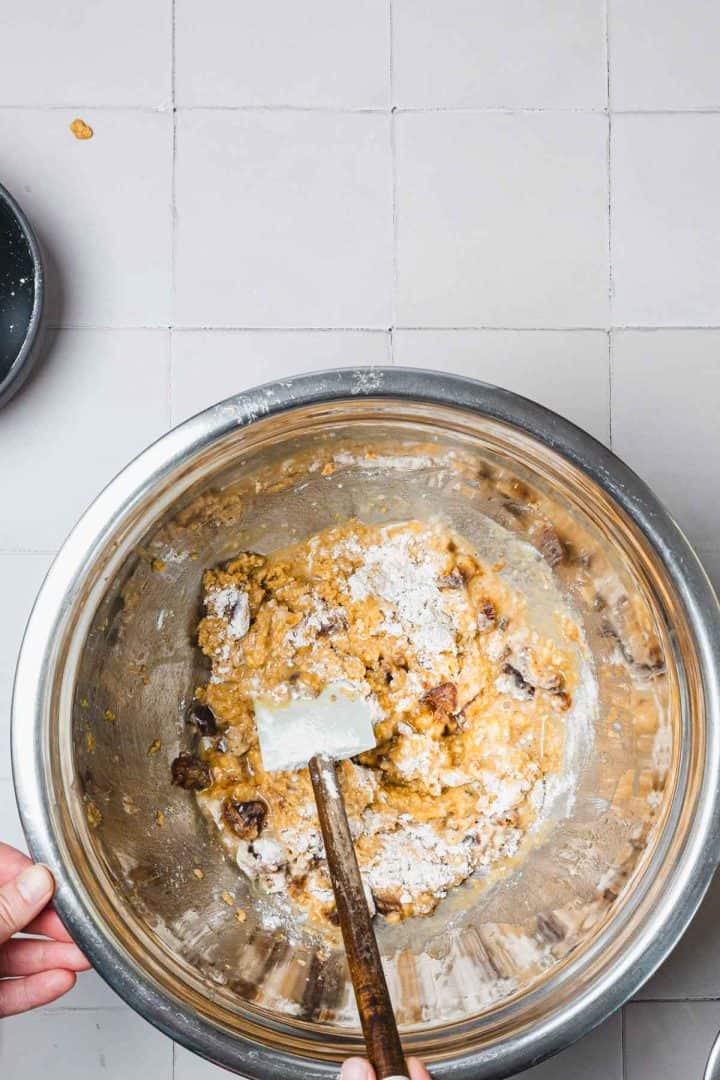
- The batter will become thicker with each addition, though it should remain easy to spread.
- Don't panic when the date mixture makes the batter look slightly uneven! Those little flecks are what give Queen Elizabeth Cake its character.
- Mix only until everything disappears into the batter. Too much mixing develops a heavier texture, especially with gluten-free flour.
Fold in the Walnuts
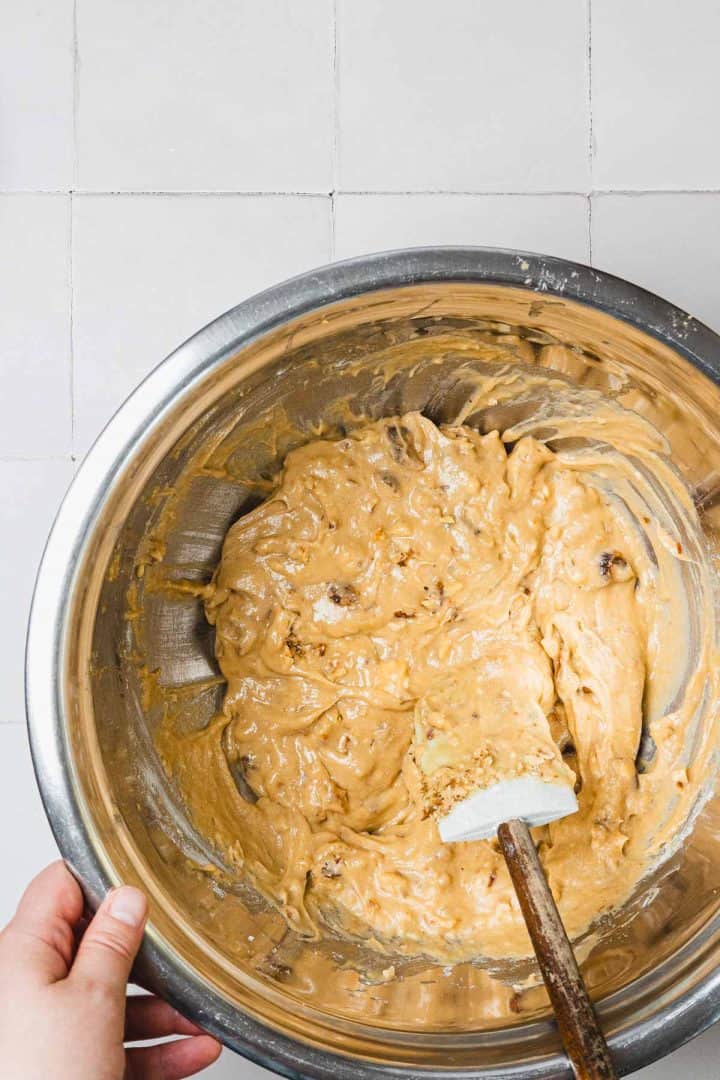
- The batter at this stage should feel thick and soft, almost like a very loose muffin batter. If it appears dry or stiff, double-check that the date mixture was fully incorporated.
Spread and Bake the Cake
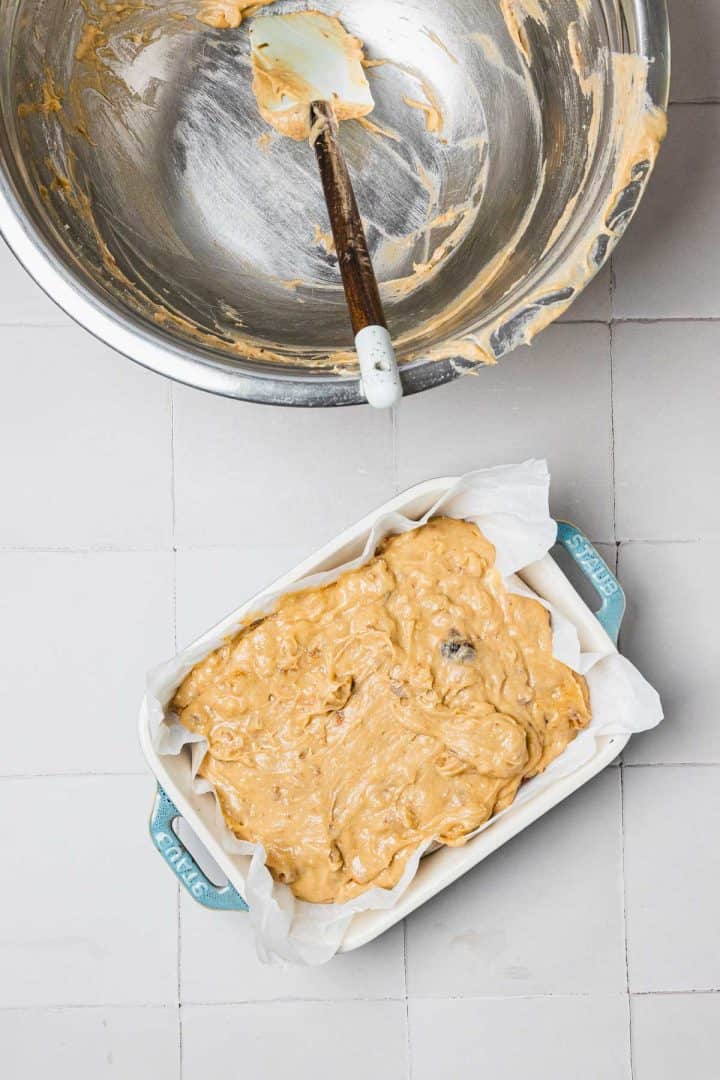
- As it cooks, the kitchen begins to smell of brown sugar and vanilla. Around the end of baking, the top turns golden and develops a slight spring when gently pressed with your fingertip.
- A toothpick should come out with a few moist crumbs attached. Completely dry crumbs usually mean the cake has baked a little too long.
Prepare the Caramel Coconut Topping
- Keep stirring constantly. The mixture starts out thin and gradually becomes glossier after several minutes. You're not looking for a thick caramel. It should still pour easily when removed from the heat.
- I learned after one batch that walking away from the stove for even a minute can lead to scorching around the edges, which gives the topping a bitter flavor.
Add the Coconut
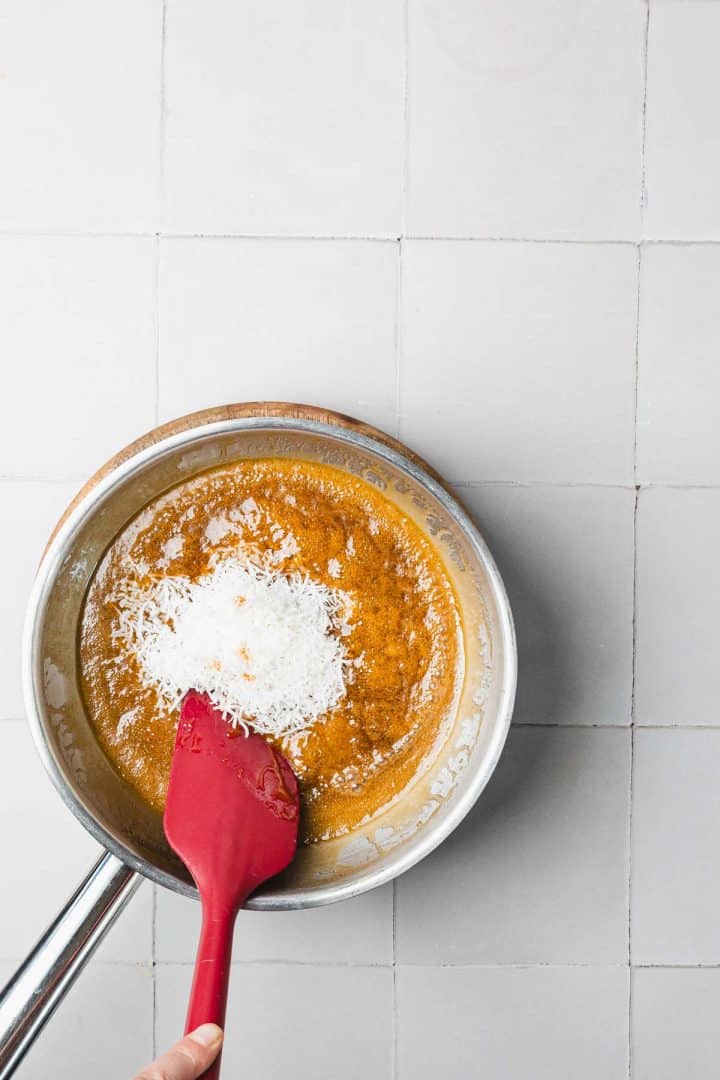
- The topping may seem too thin at first, though the coconut absorbs some of the liquid as it sits. Resist adding extra coconut because it thickens further under the broiler.
Cover the Hot Cake
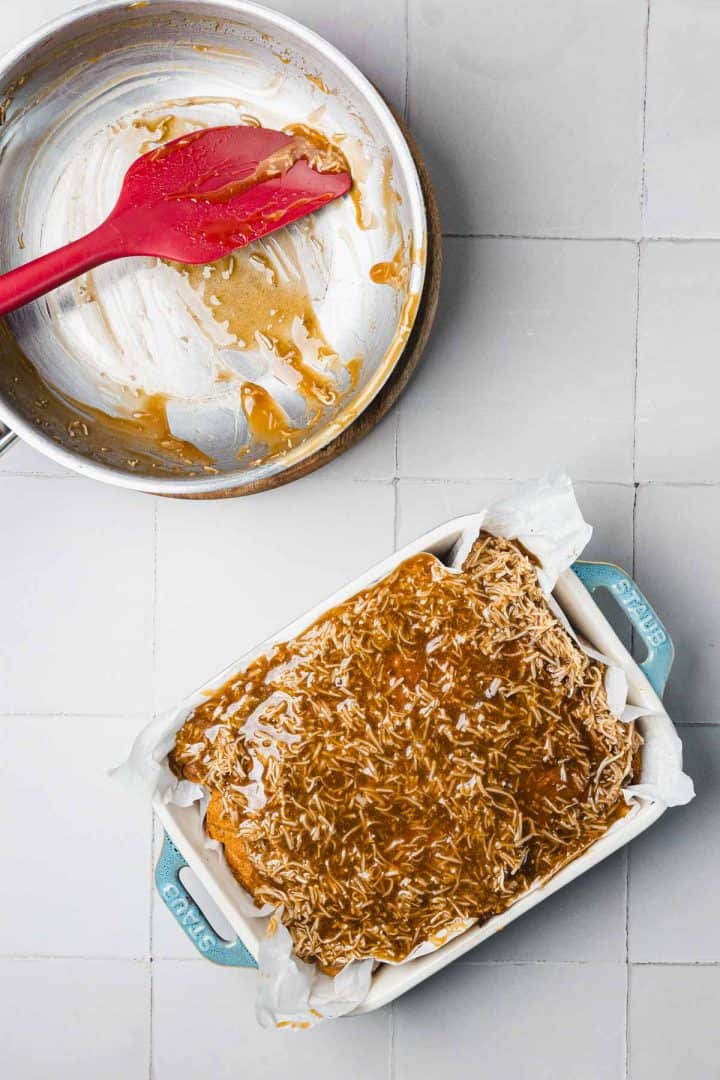
- Because the cake is still hot, the topping spreads easily and settles into an even layer. Take your time reaching the corners so every square gets some of that golden coconut finish.
Broil Until Golden
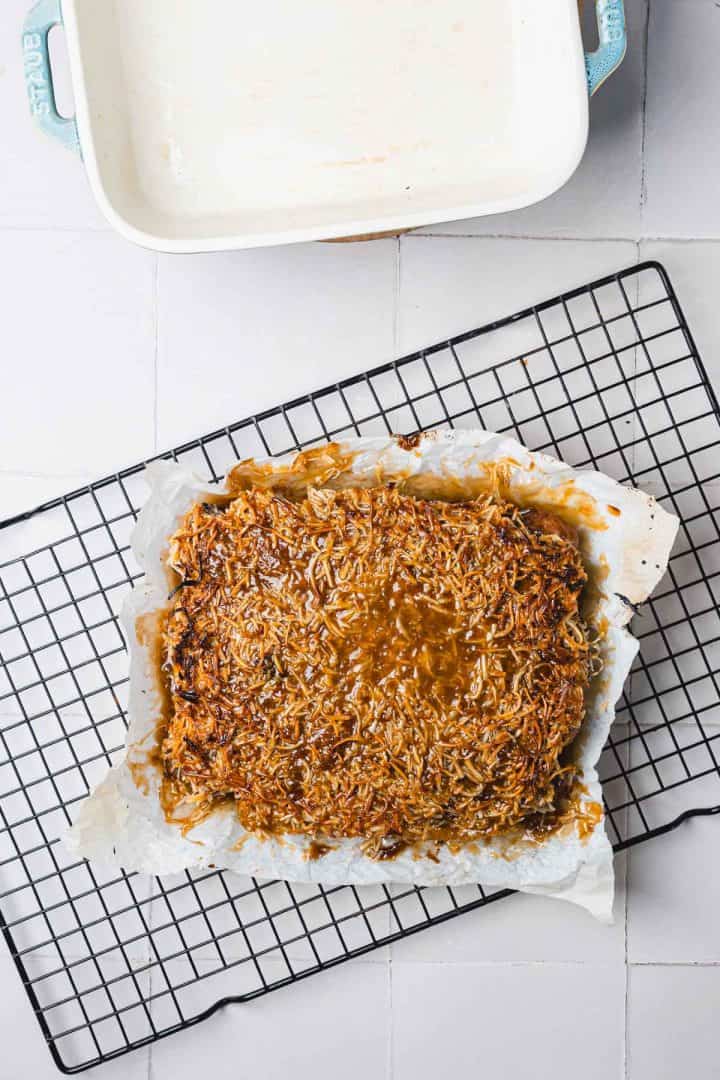
- This is probably the only step where I refuse to leave the kitchen. Coconut changes quickly. One moment it looks pale and the next it turns deep golden.
- You're looking for bubbling across the surface and darker toasted spots around the edges. If it becomes dark brown, it can develop a burnt taste.
Cool Completely Before Cutting
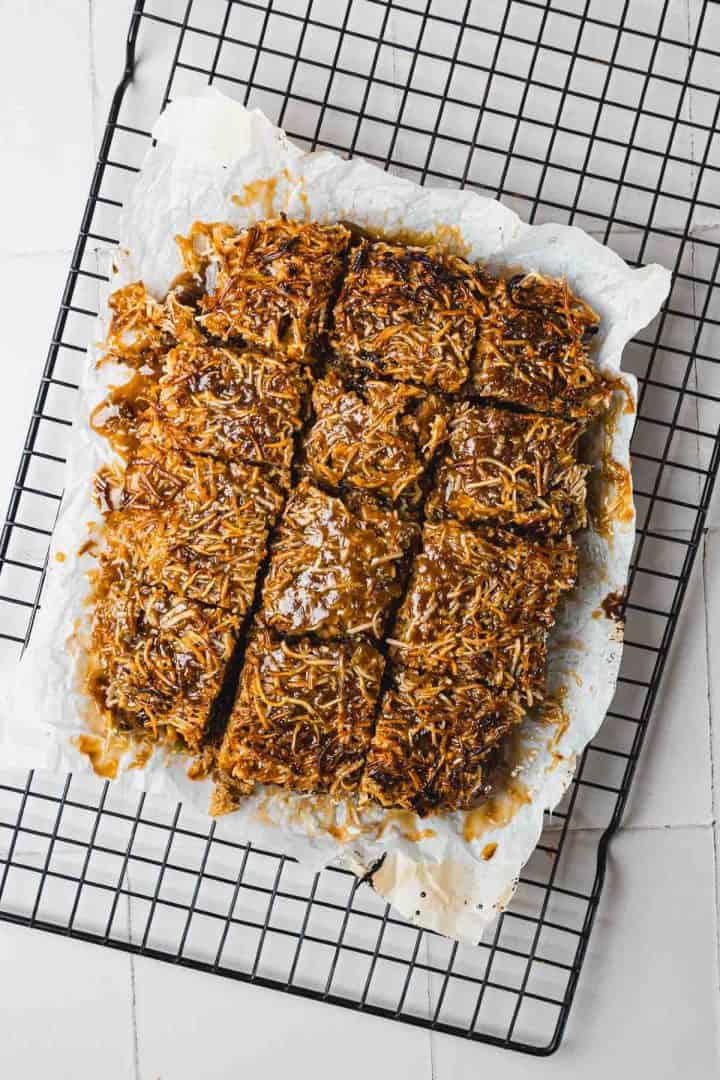
- As the cake cools, the coconut layer settles and develops a lightly crisp surface while the inside stays moist and tender. Cutting too soon causes the topping to slide and makes the squares difficult to remove neatly.
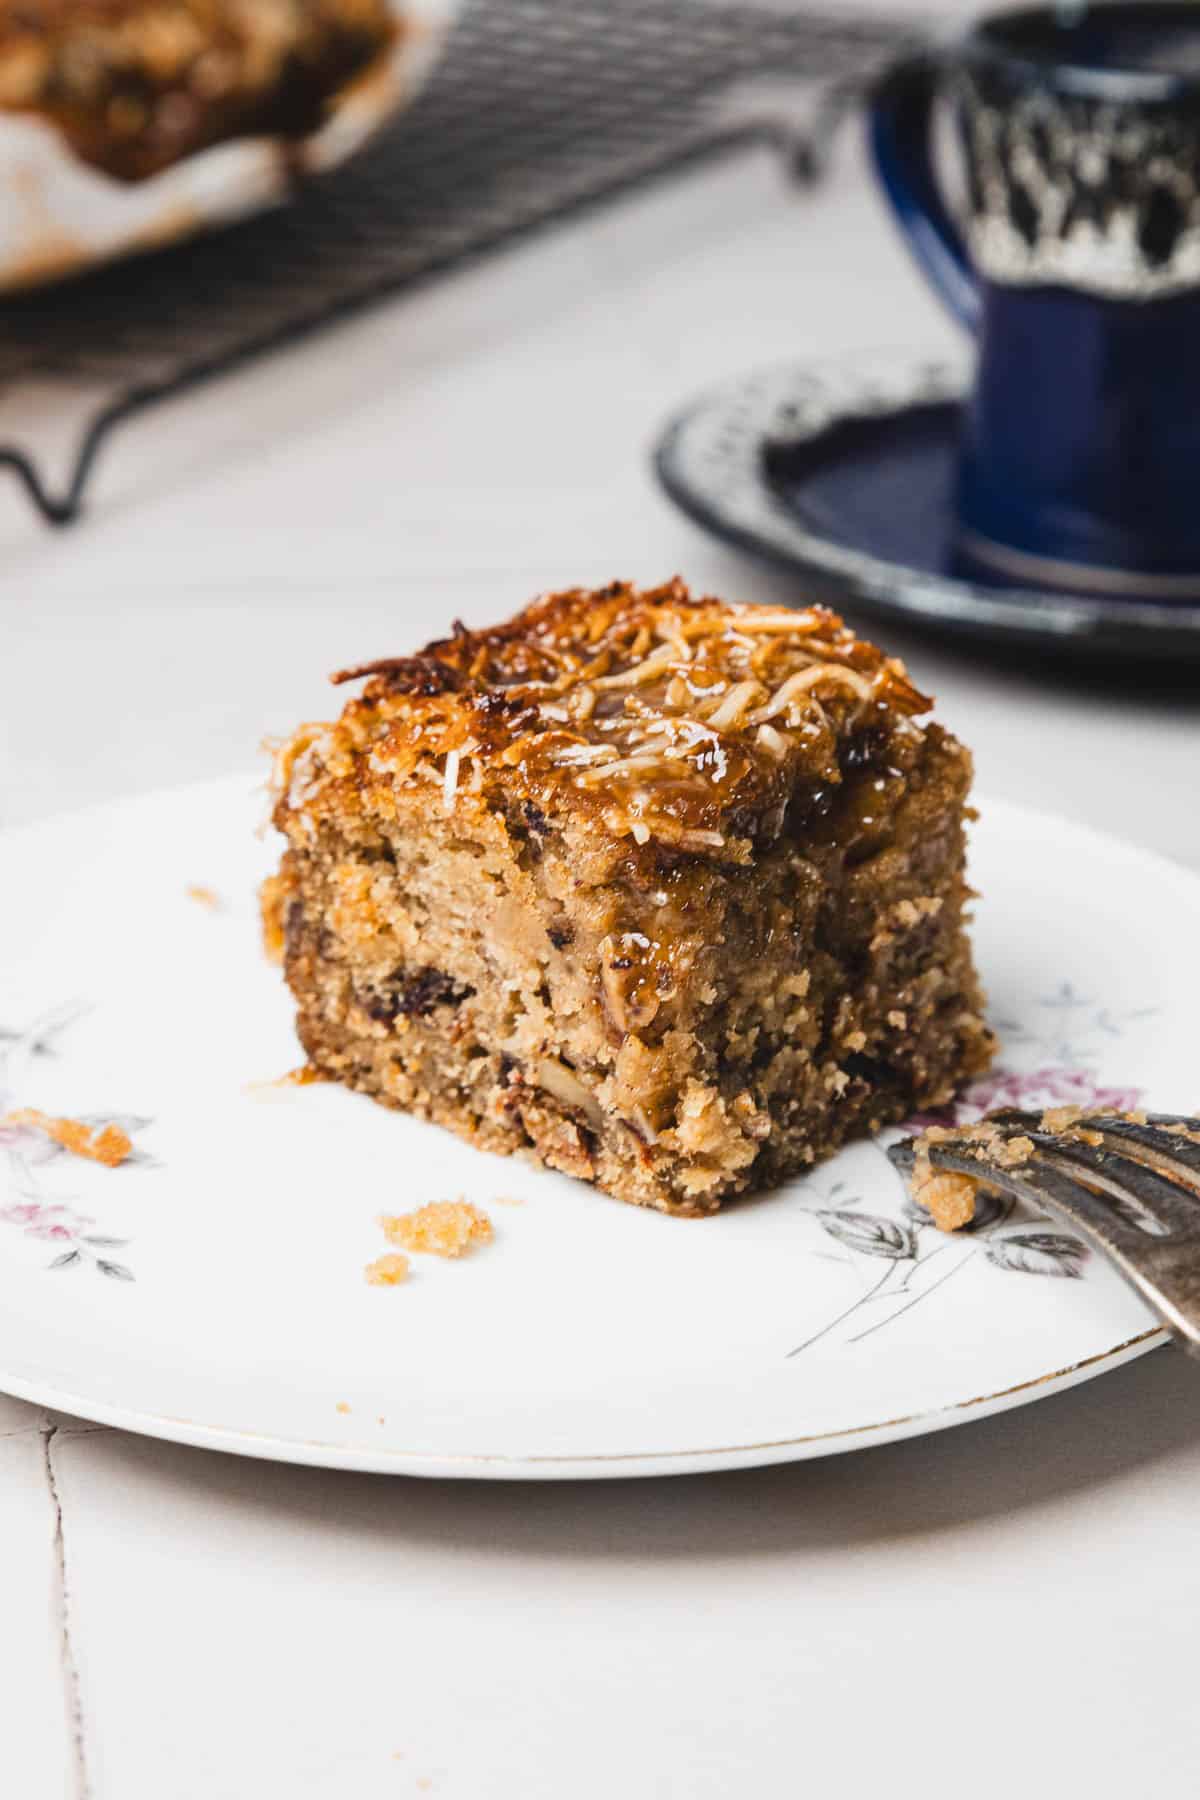
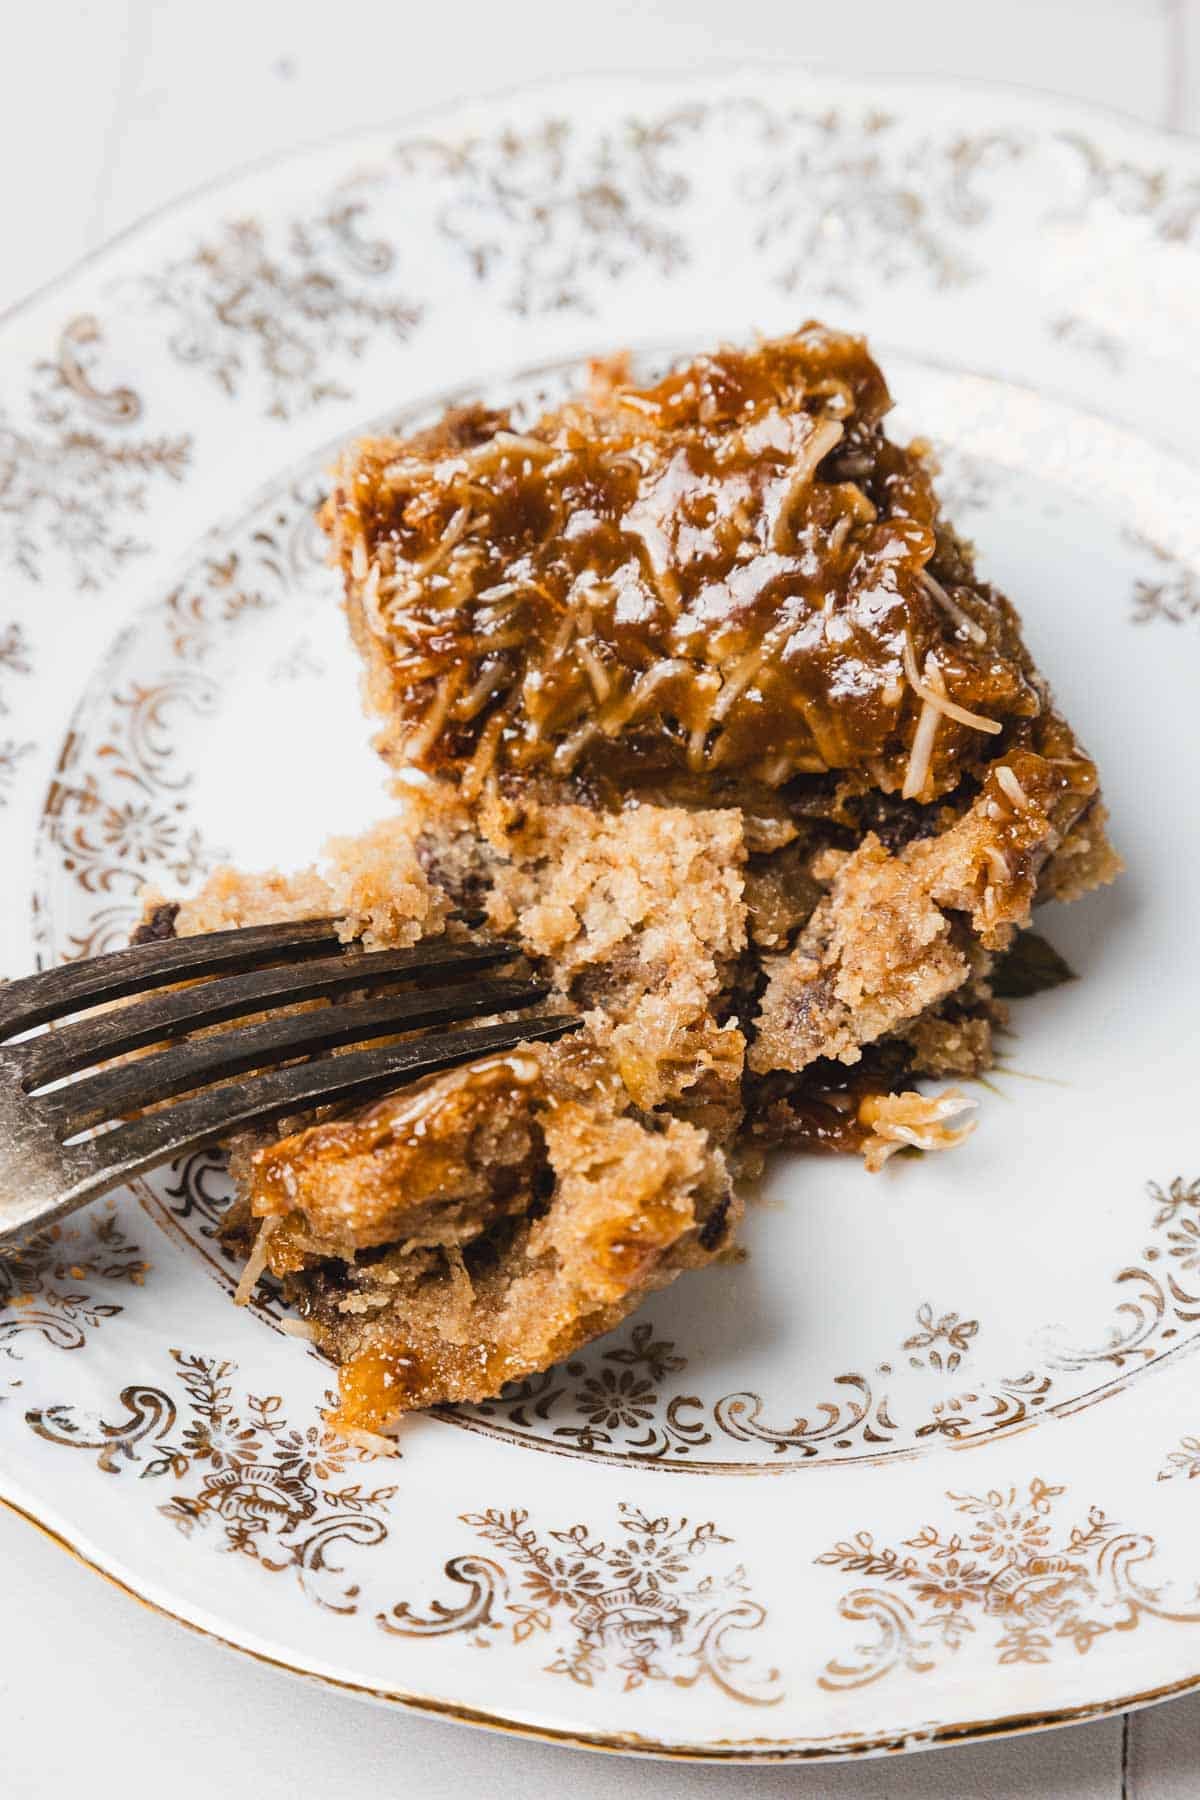
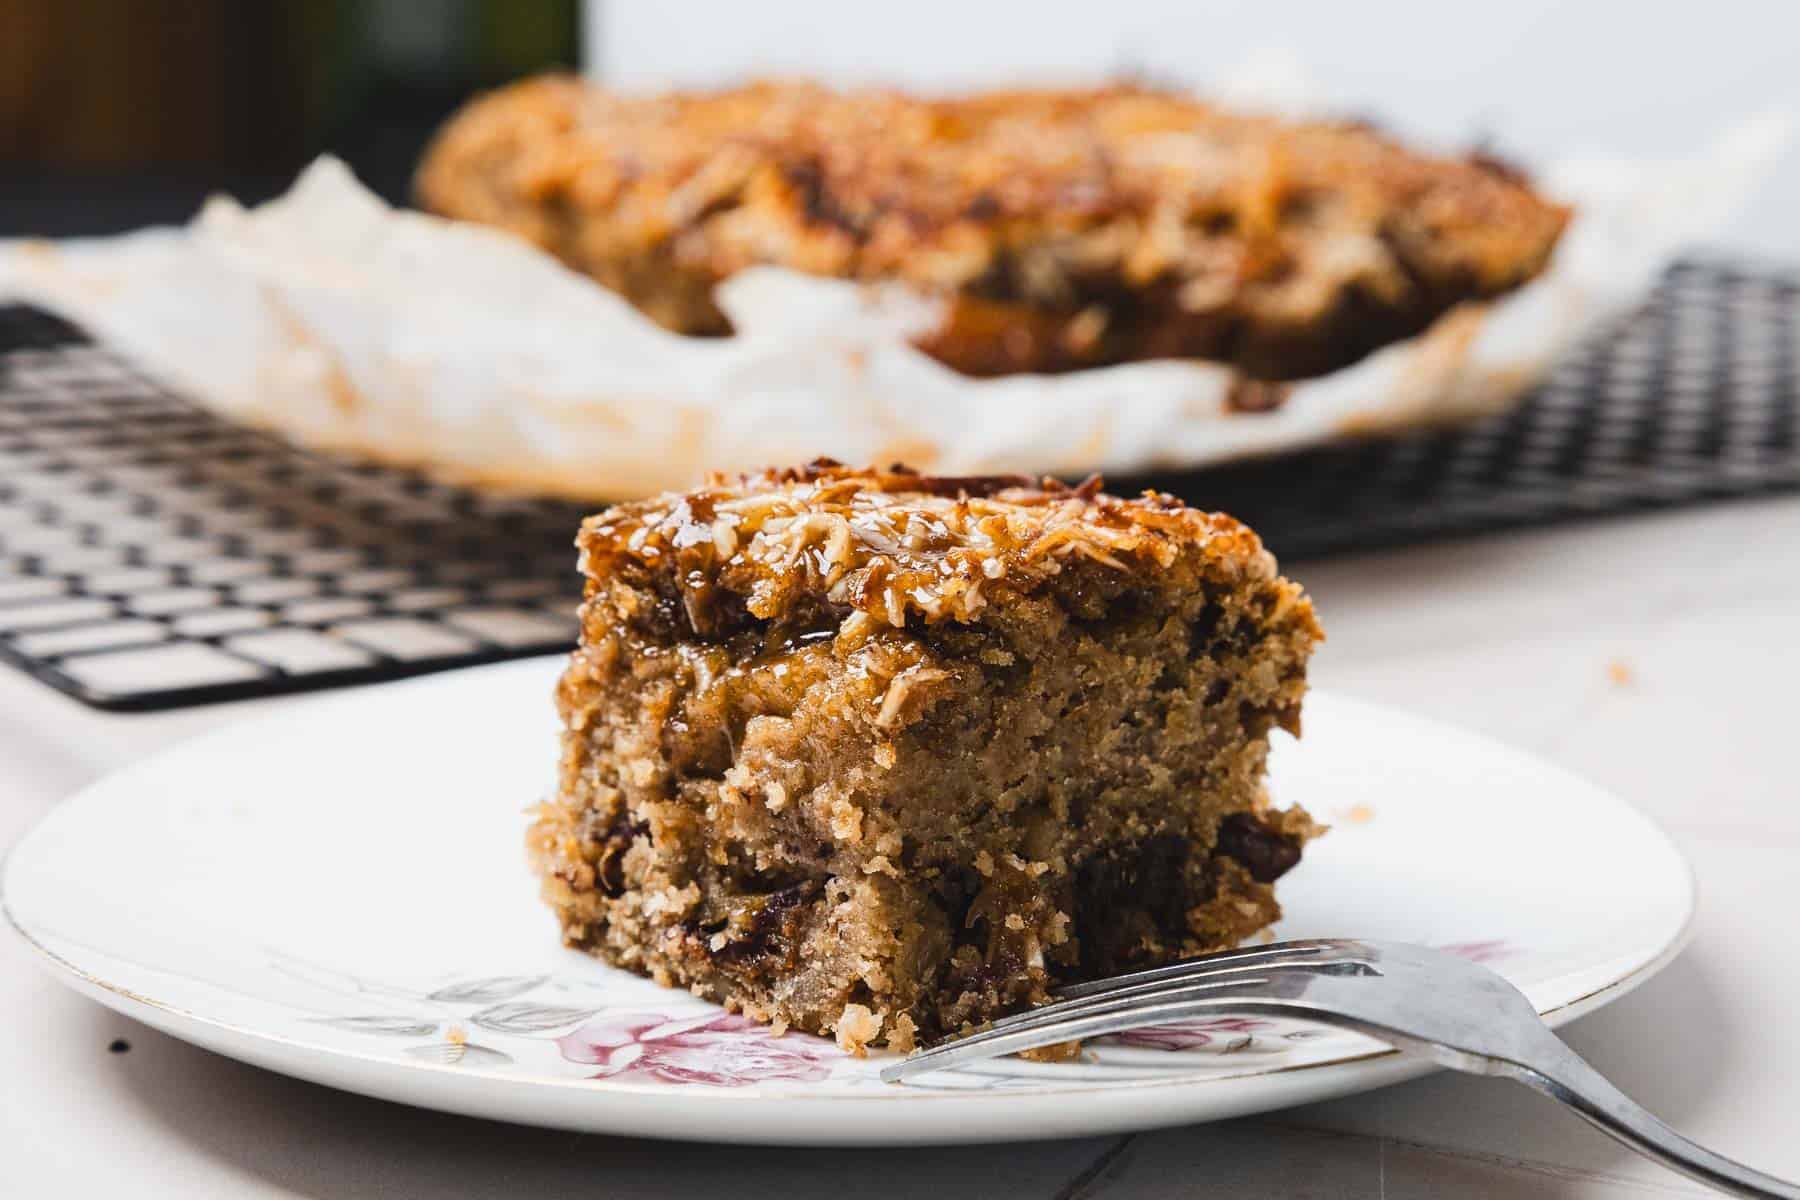
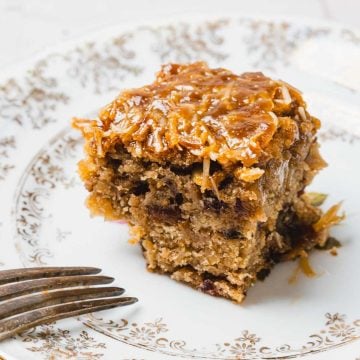
- By the time the cake reaches room temperature, you'll have those classic Queen Elizabeth Cake squares with a soft date crumb underneath and a caramelized coconut layer on top.
Storage
Store leftover Queen Elizabeth Cake in an airtight container at room temperature for up to 3 days. The cake stays moist thanks to the dates, while the coconut topping keeps a slight chew. If your kitchen runs hot or humid, transfer the container to the refrigerator, where the cake will keep well for up to 1 week. I like letting refrigerated slices sit on the counter for 20 to 30 minutes before serving so the crumb softens again.
For longer storage, freeze individual squares in a freezer-safe container with parchment between the layers to prevent sticking. They can be frozen for up to 3 months. Thaw the cake overnight in the refrigerator or for a few hours at room temperature. Avoid microwaving for too long, since the coconut topping can become overly soft.
FAQs
A dry Queen Elizabeth cake usually means it baked too long or the batter was overmixed. This cake should come out of the oven when a toothpick still has a few moist crumbs attached. The dates add plenty of moisture, though they can't compensate for too much time in the oven. Mixing only until the flour disappears also helps keep the crumb tender.
The topping may seem loose when it comes off the stove, though it thickens as it cools and again under the broiler. If it remains very runny, it likely wasn't boiled long enough. A few minutes of steady simmering help the butter, cream, and brown sugar come together into a glossy topping that sets as the cake cools.
Soaking softens the dates and helps them blend into the cake instead of remaining in large pieces. This step is what gives Queen Elizabeth Cake its characteristically moist crumb and prevents dry pockets throughout the cake.
Recipe
Tried and loved this recipe? Please leave a 5-star review below! Your reviews mean a lot to me, so if you've got any questions, please let me know in a comment.
Gluten-free Queen Elizabeth Cake
Equipment
- 9x9-inch baking pan
- Medium mixing bowl
- Electric mixer
- rubber spatula
- wire cooling rack
- Measuring Cups and Spoons
Ingredients
For the Cake
- 1 cup pitted dates finely chopped
- 1 cup boiling water
- 1 teaspoon baking soda
- ½ cup butter softened
- 1 cup packed brown sugar
- 1 large egg
- 1 teaspoon vanilla extract
- 1½ cups gluten-free flour blend with xanthan gum
- ½ teaspoon salt
- ½ cup chopped walnuts
For the Coconut Topping
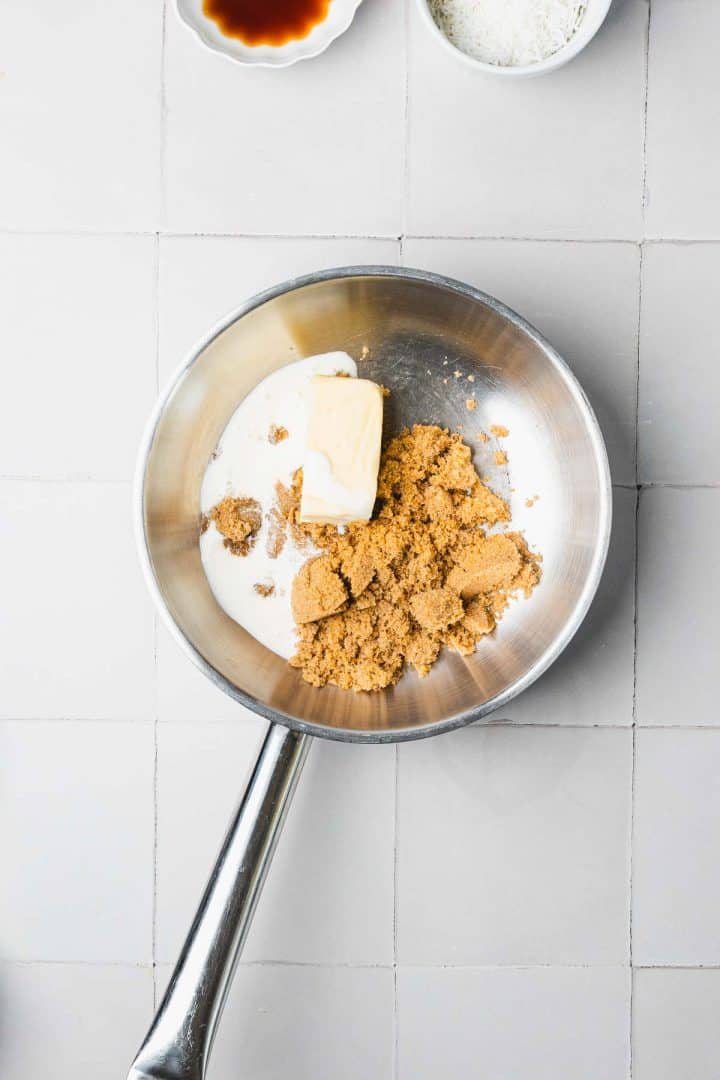
- 6 tablespoons packed brown sugar
- 3 tablespoons butter
- 2 tablespoons heavy cream
- ½ cup shredded coconut
- ½ teaspoon vanilla extract optional
Instructions
Soften the Dates
- Preheat the oven to 350°F (175°C) and prepare a 9x9-inch baking pan. Pour boiling water over the chopped dates, stir in the baking soda, and let the mixture cool. The dates will soften and become almost jam-like.
Cream the Butter and Sugar
- Beat the butter and brown sugar together until light and fluffy. Add the egg and vanilla, mixing until smooth and creamy.
Prepare the Batter
- Whisk together the flour and salt. Alternate adding the flour mixture and cooled dates to the butter mixture, beginning and ending with the dry ingredients. Mix only until combined, then fold in the walnuts.
Bake the Cake
- Spread the batter evenly into the prepared pan. Bake for 30 to 35 minutes, until the cake is golden and a toothpick inserted in the center comes out with a few moist crumbs.
Make the Coconut Topping
- While the cake bakes, combine the brown sugar, butter, and heavy cream in a saucepan. Bring to a boil and cook for 3 minutes, stirring constantly. Remove from the heat and stir in the shredded coconut and vanilla.
Add the Topping
- Let the cake cool for 5 minutes, then spread the coconut mixture evenly over the surface while the cake is still hot.
Broil Until Golden
- Place the cake under the broiler for 1 to 2 minutes. Watch carefully as the topping bubbles and turns golden brown around the edges.
Cool and Serve
- Allow the cake to cool completely on a wire rack. As it cools, the topping becomes lightly crisp while the cake underneath stays moist. Cut into squares and serve.
Nutrition