My grandma's traditional rolled wafers bring crisp, buttery delight to every bite. Prep the batter, cook quickly, and enjoy warm, nostalgic trubochkis with family anytime.
I grew up with the smell of batter warming on hot metal irons, a scent that meant patience and reward. Traditional Russian rolled wafers, also called trubochki, were not a novelty in my family. They were a part of an everyday rhythm in the kitchen. I watched them made at crowded tables, learned the timing by ear, and burned my fingers more than once while learning how fast a wafer must be rolled before it hardens.
That lived experience is what makes me an expert in making this delicious dessert. I do not recreate food from memory alone; I recreate it from years of practice. Countless traditional recipes have been tested in my kitchen along the way, including my grandma's recipe for Russian cured salmon and Russian Jewish carrot tzimmes recipe. I learned how technique, timing, and care shape every dish I make today.
This is a recipe my grandmother has been making since her kids were little, long before I ever stood on a chair to reach the counter. She used a small iron waffle maker, the kind heated on the stove, heavy and unforgiving, nothing like the electrical devices people use now. She trusted that iron more than any written recipe, and she trusted her hands most of all.
My sister and I grew up waiting for those wafers. Trubochkis were our favorite thing to eat, crisp and warm, sometimes filled later, sometimes eaten straight from the towel where they rested. We hovered close, knowing timing mattered, knowing one second too late meant a crack. She let us try anyway.
I remember my grandmother correcting me gently. Too slow, it will crack. Too fast, it will burn. She showed me how to roll with confidence, how to accept imperfect ones, and how to set aside the best for guests. Making this recipe taught me that baking was not about perfection. It was about care.
Today, when I make trubochkis in my own kitchen, I hear those voices again. I roll faster than I used to. I still pause to admire a perfect spiral. These traditional Russian rolled wafers remain unchanged, crisp and light, carrying memory in every bite. Every time I make them, the iron heats slowly, the batter spreads thin, and I feel close to my grandmother again.
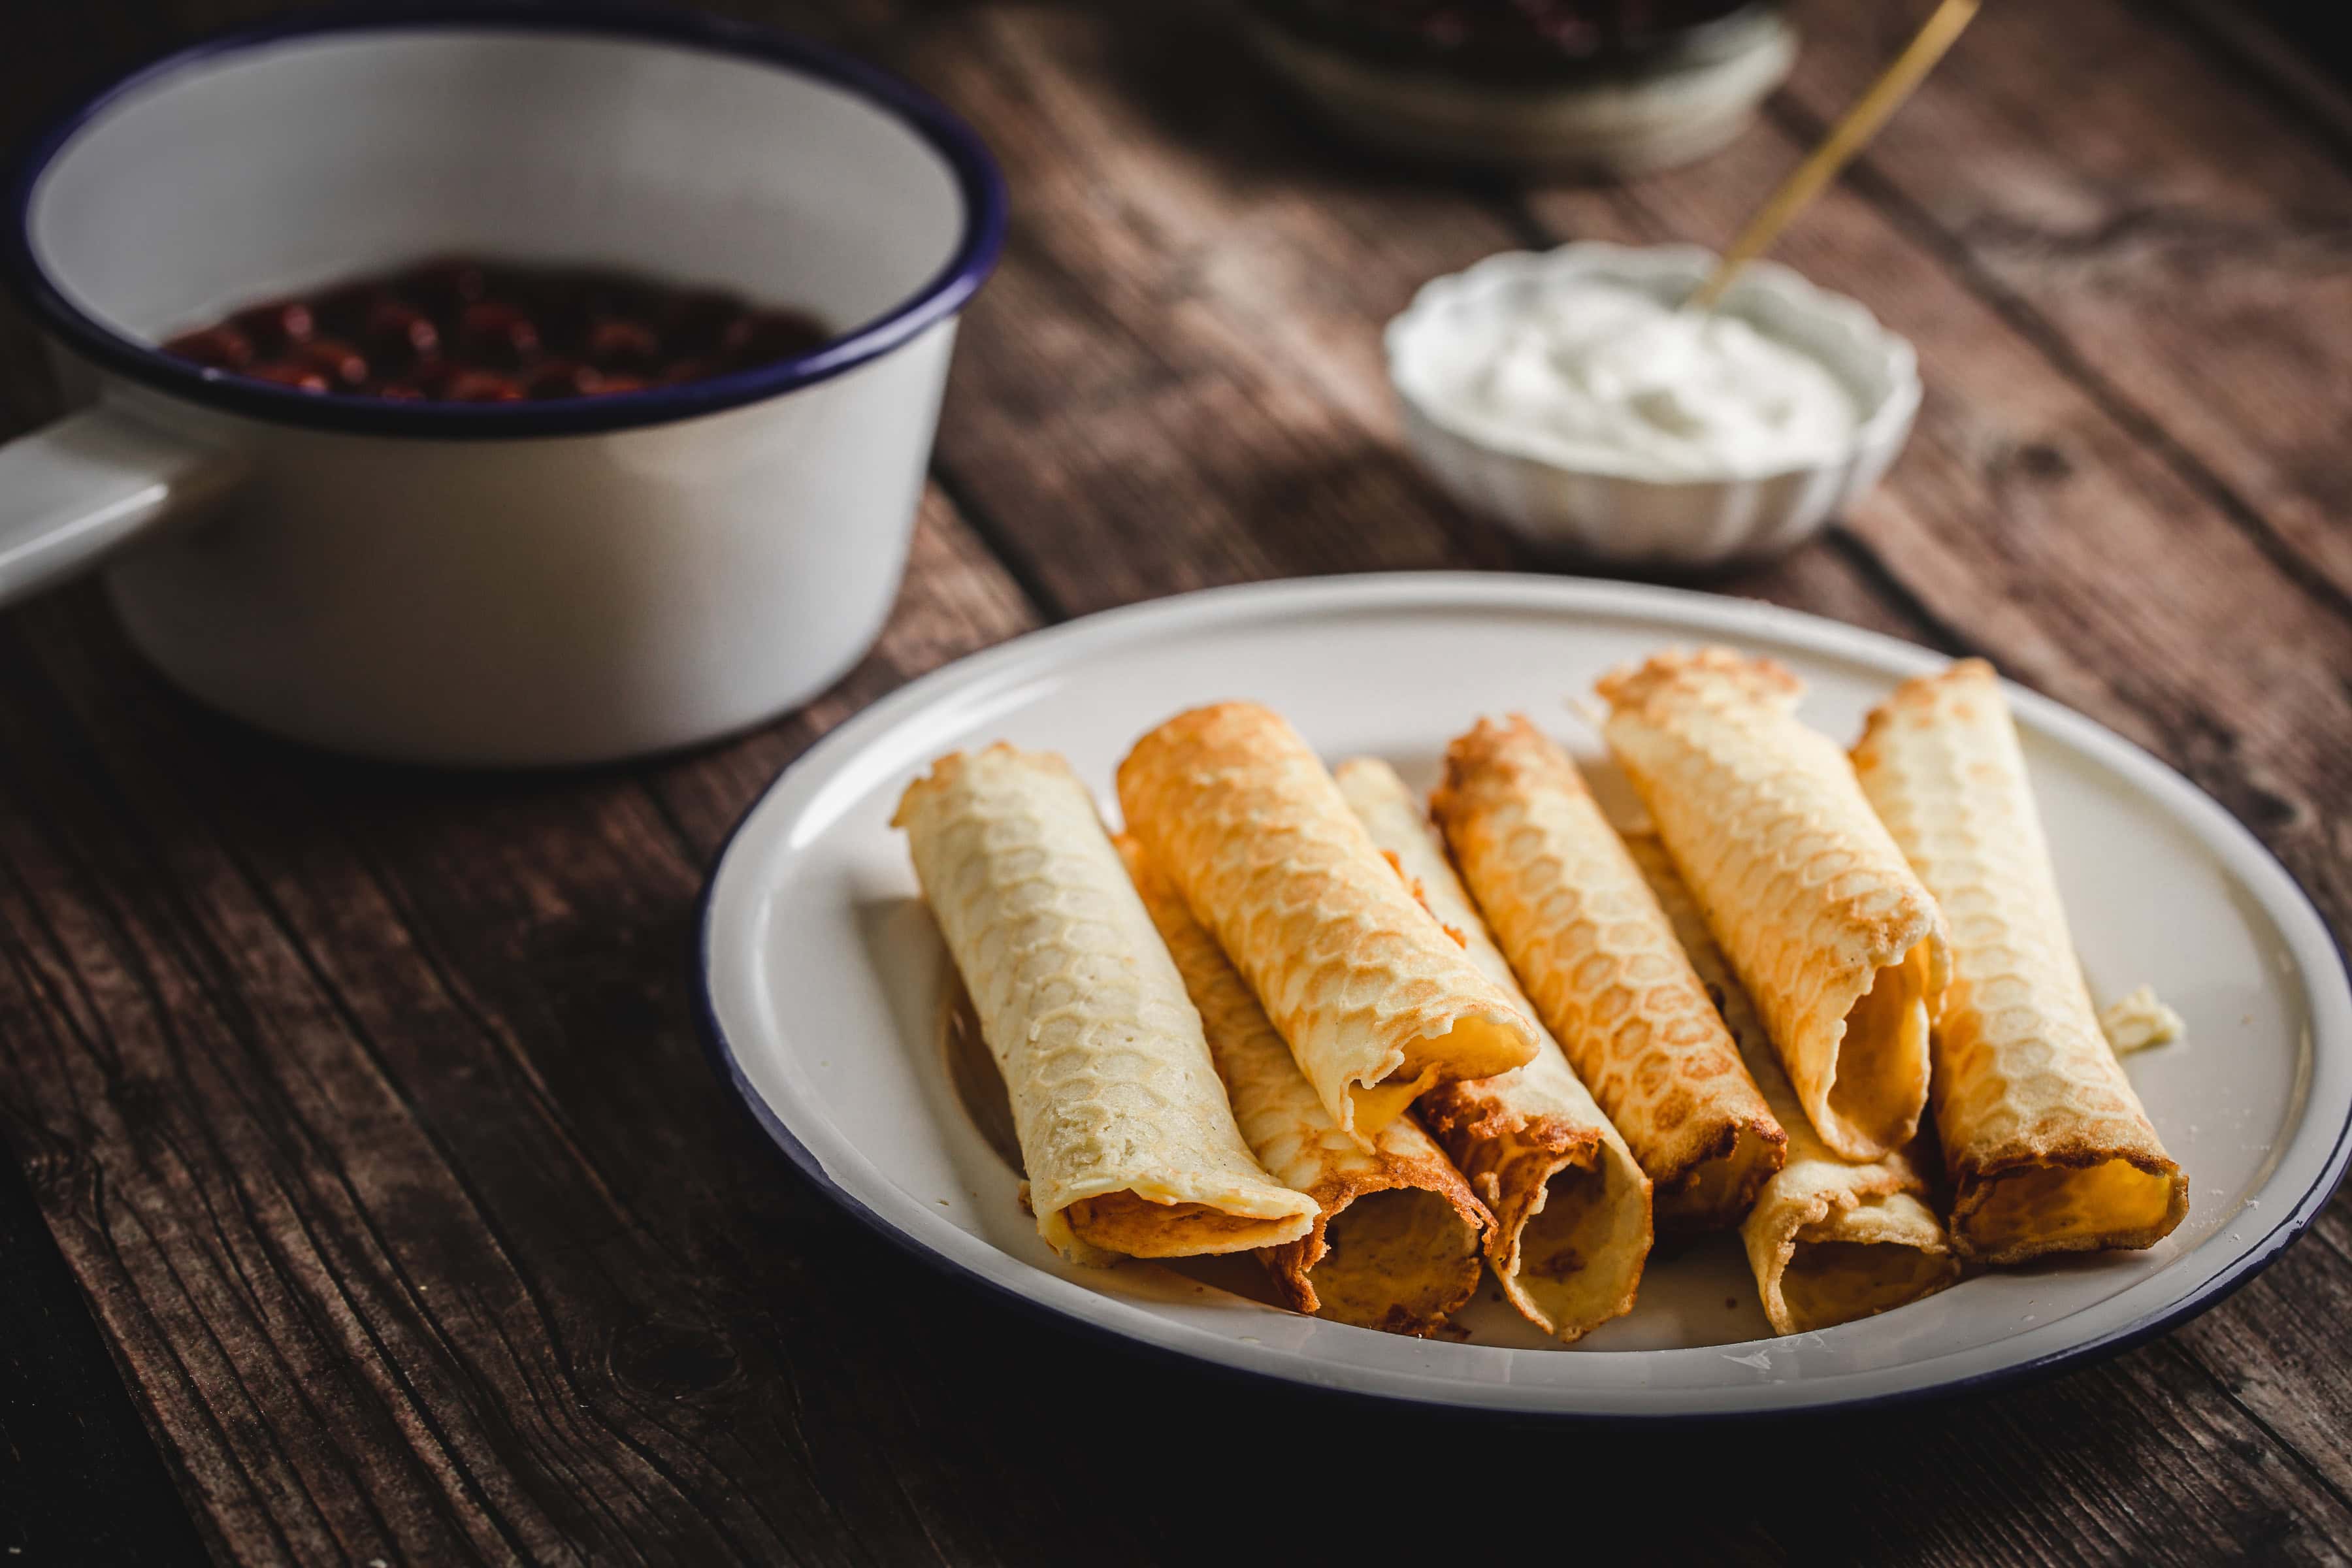
In our house, these trubochkis rarely last long enough to cool completely. My kids absolutely love them. They fit naturally into our days, showing up after school, alongside tea, or slipped into small hands that already know the sound of a crisp bite. Trubochkis are familiar here, yet they never feel ordinary.
Ingredients
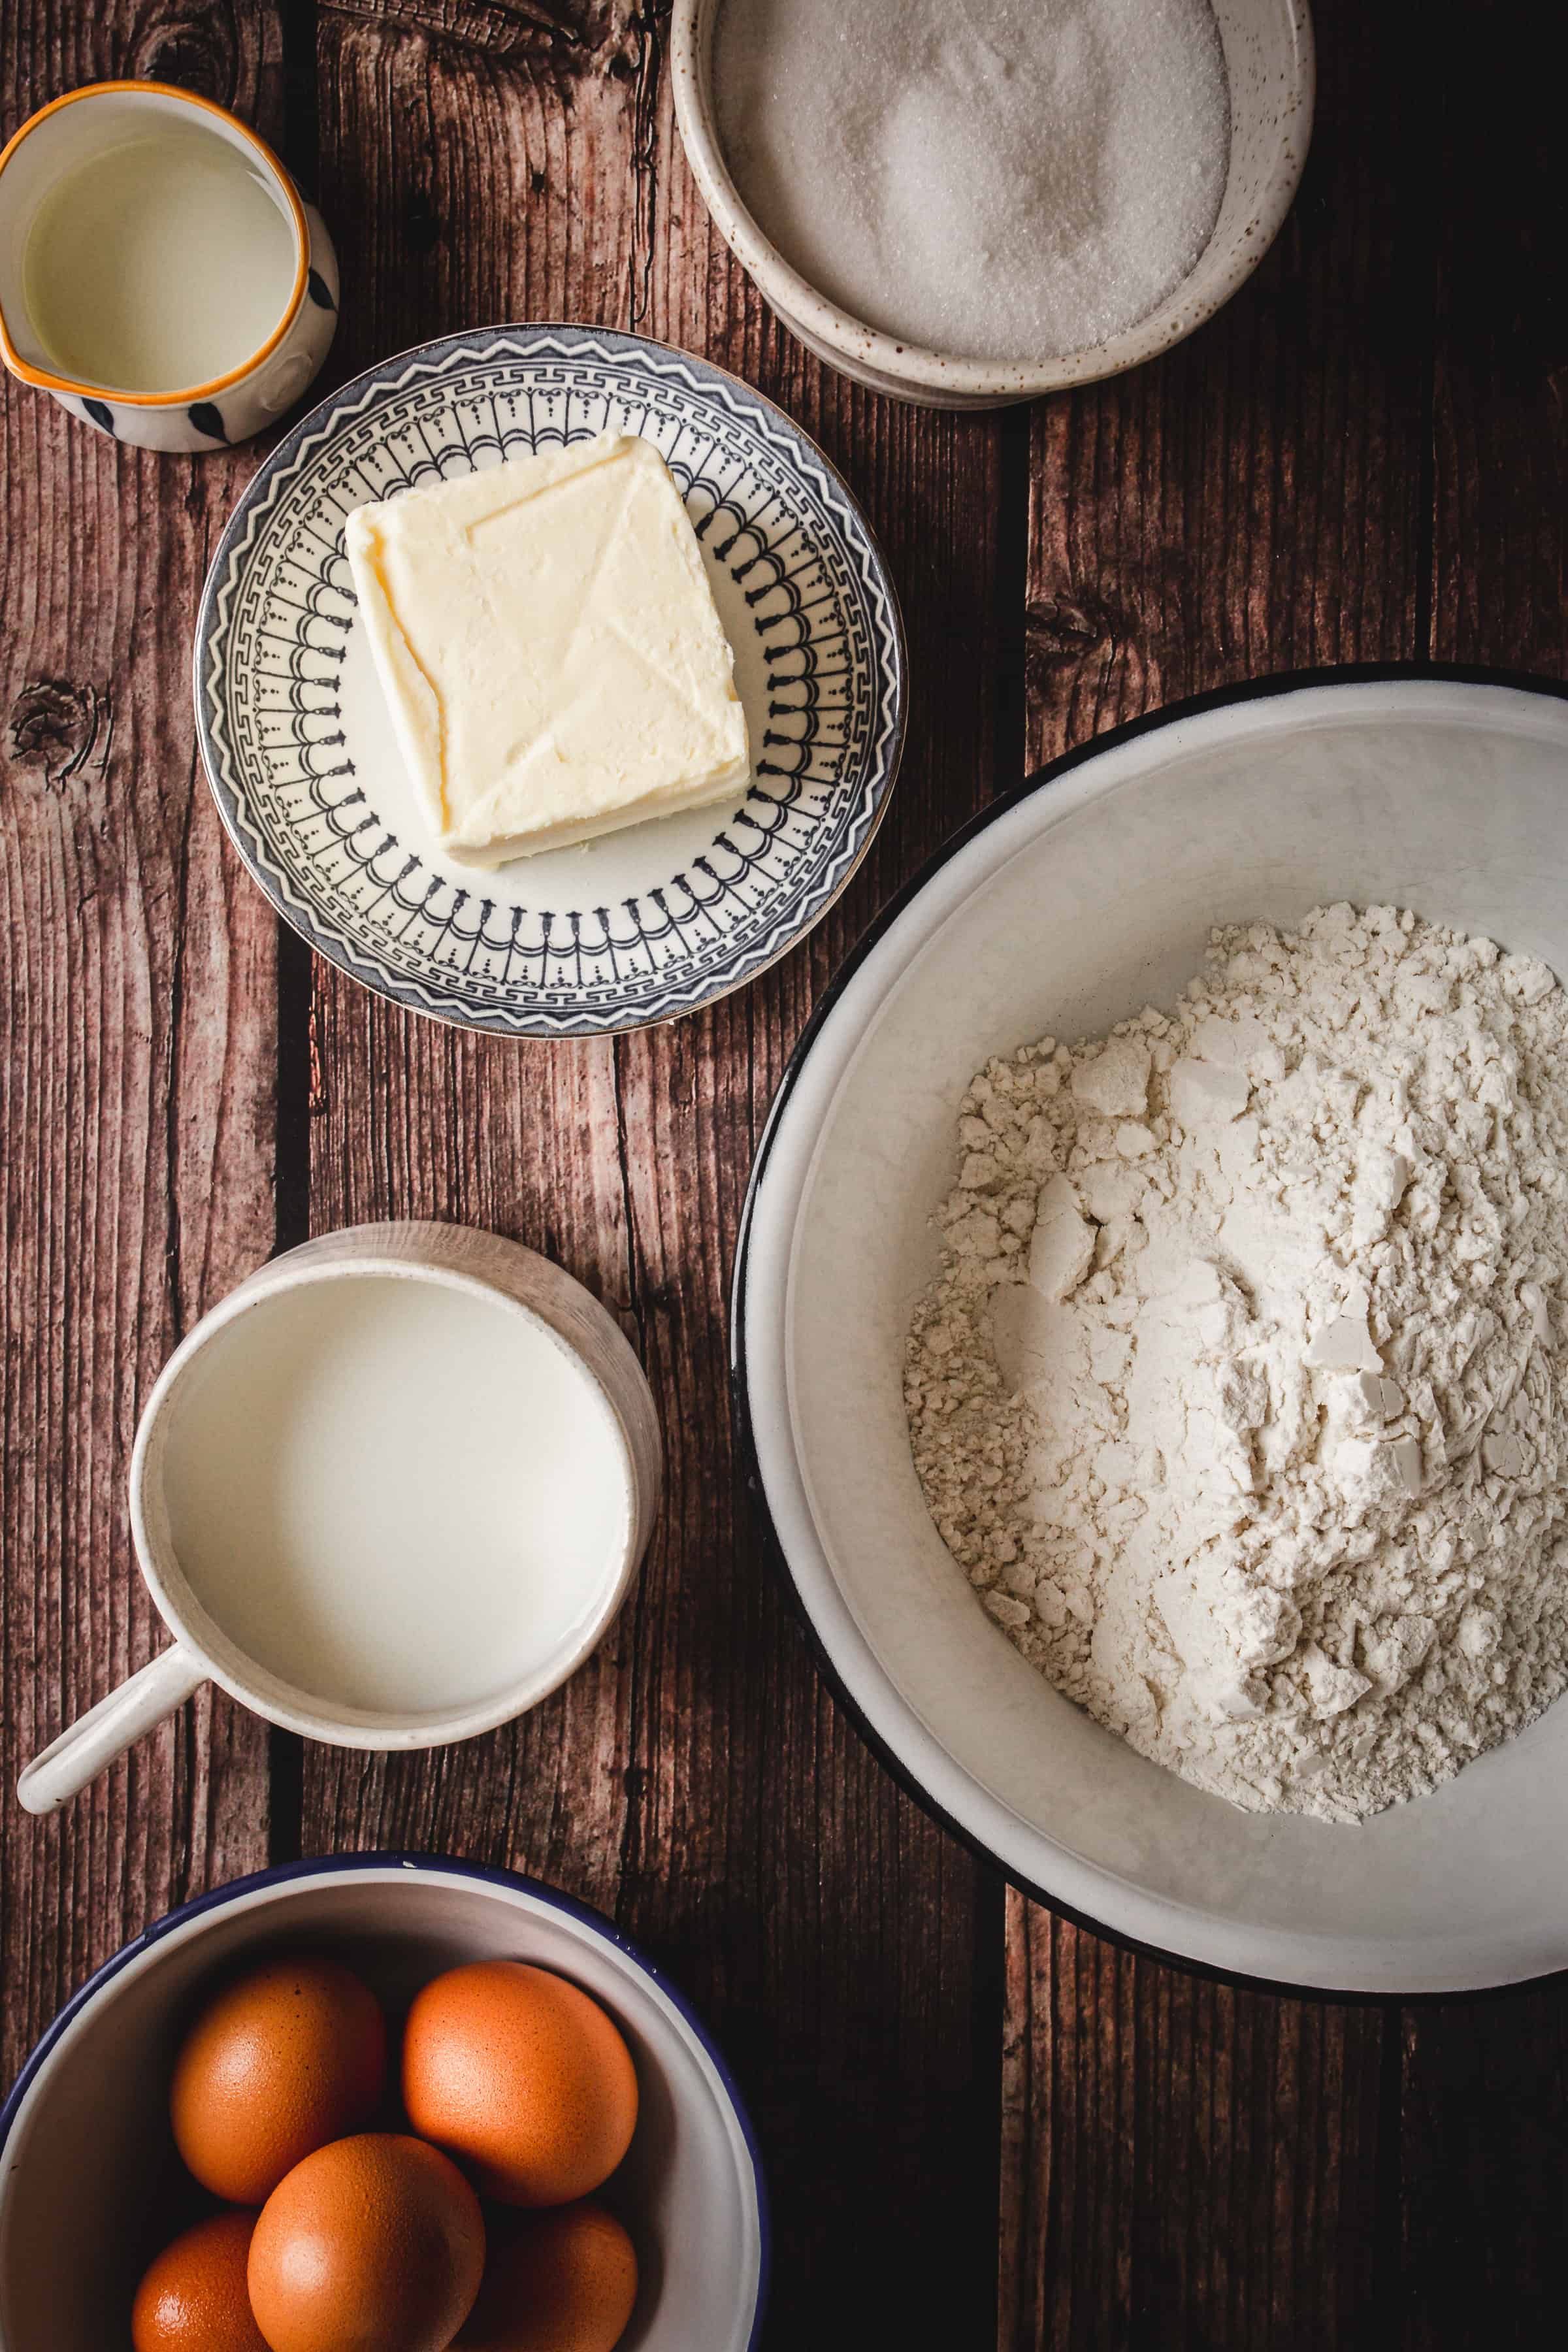
- All-purpose flour - This is the backbone of the recipe. It gives the trubochki enough structure to hold their shape while staying thin and crisp. I use standard all-purpose flour because it spreads easily on the iron and sets quickly, which is essential for rolling. For a gluten-free option, a one-to-one gluten-free baking flour ratio works well.
- Butter - Butter adds richness and depth that define the flavor of traditional trubochkis. Melted butter helps the wafers brown evenly and contributes to their delicate crispness once cooled.
- Granulated sugar - Clean sweetness and crispness come from granulated sugar, which lightly caramelizes as the wafers cook. This reaction gives the wafers their golden color and satisfying snap. The sweetness should support the batter, not dominate it. Alternatives like coconut sugar may be used. But keep in mind, they will deepen the color and slightly alter the flavor.
- Milk - The batter reaches the proper pouring consistency with the addition of milk, allowing it to spread evenly across the iron. Whole milk adds tenderness and prevents the wafers from drying out too quickly during cooking. For a dairy-free option, almond milk or oat milk can be substituted without sacrificing texture.
- Eggs - Eggs bind the batter and give the wafers flexibility while warm, which is crucial for rolling without cracking. They provide structure, color, and a soft interior that turns crisp as it cools. Without eggs, the wafers lose their classic texture.
- Vegetable oil - A neutral vegetable oil helps keep the wafers light and prevents sticking on the iron. It balances the butter by adding moisture without flavor, making the wafers stay crisp rather than greasy. This small addition makes rolling smoother and more forgiving.
See the recipe card for full list and exact quantities.

How to Make Traditional Russian Rolled Wafers
Making grandma's traditional Russian rolled wafers is a hands-on, comforting process that rewards patience and timing. This classic trubochkis recipe comes together with simple ingredients and careful attention, creating crisp, delicate wafers that feel both nostalgic and deeply familiar. Here is how to make them:
Prepare the Batter
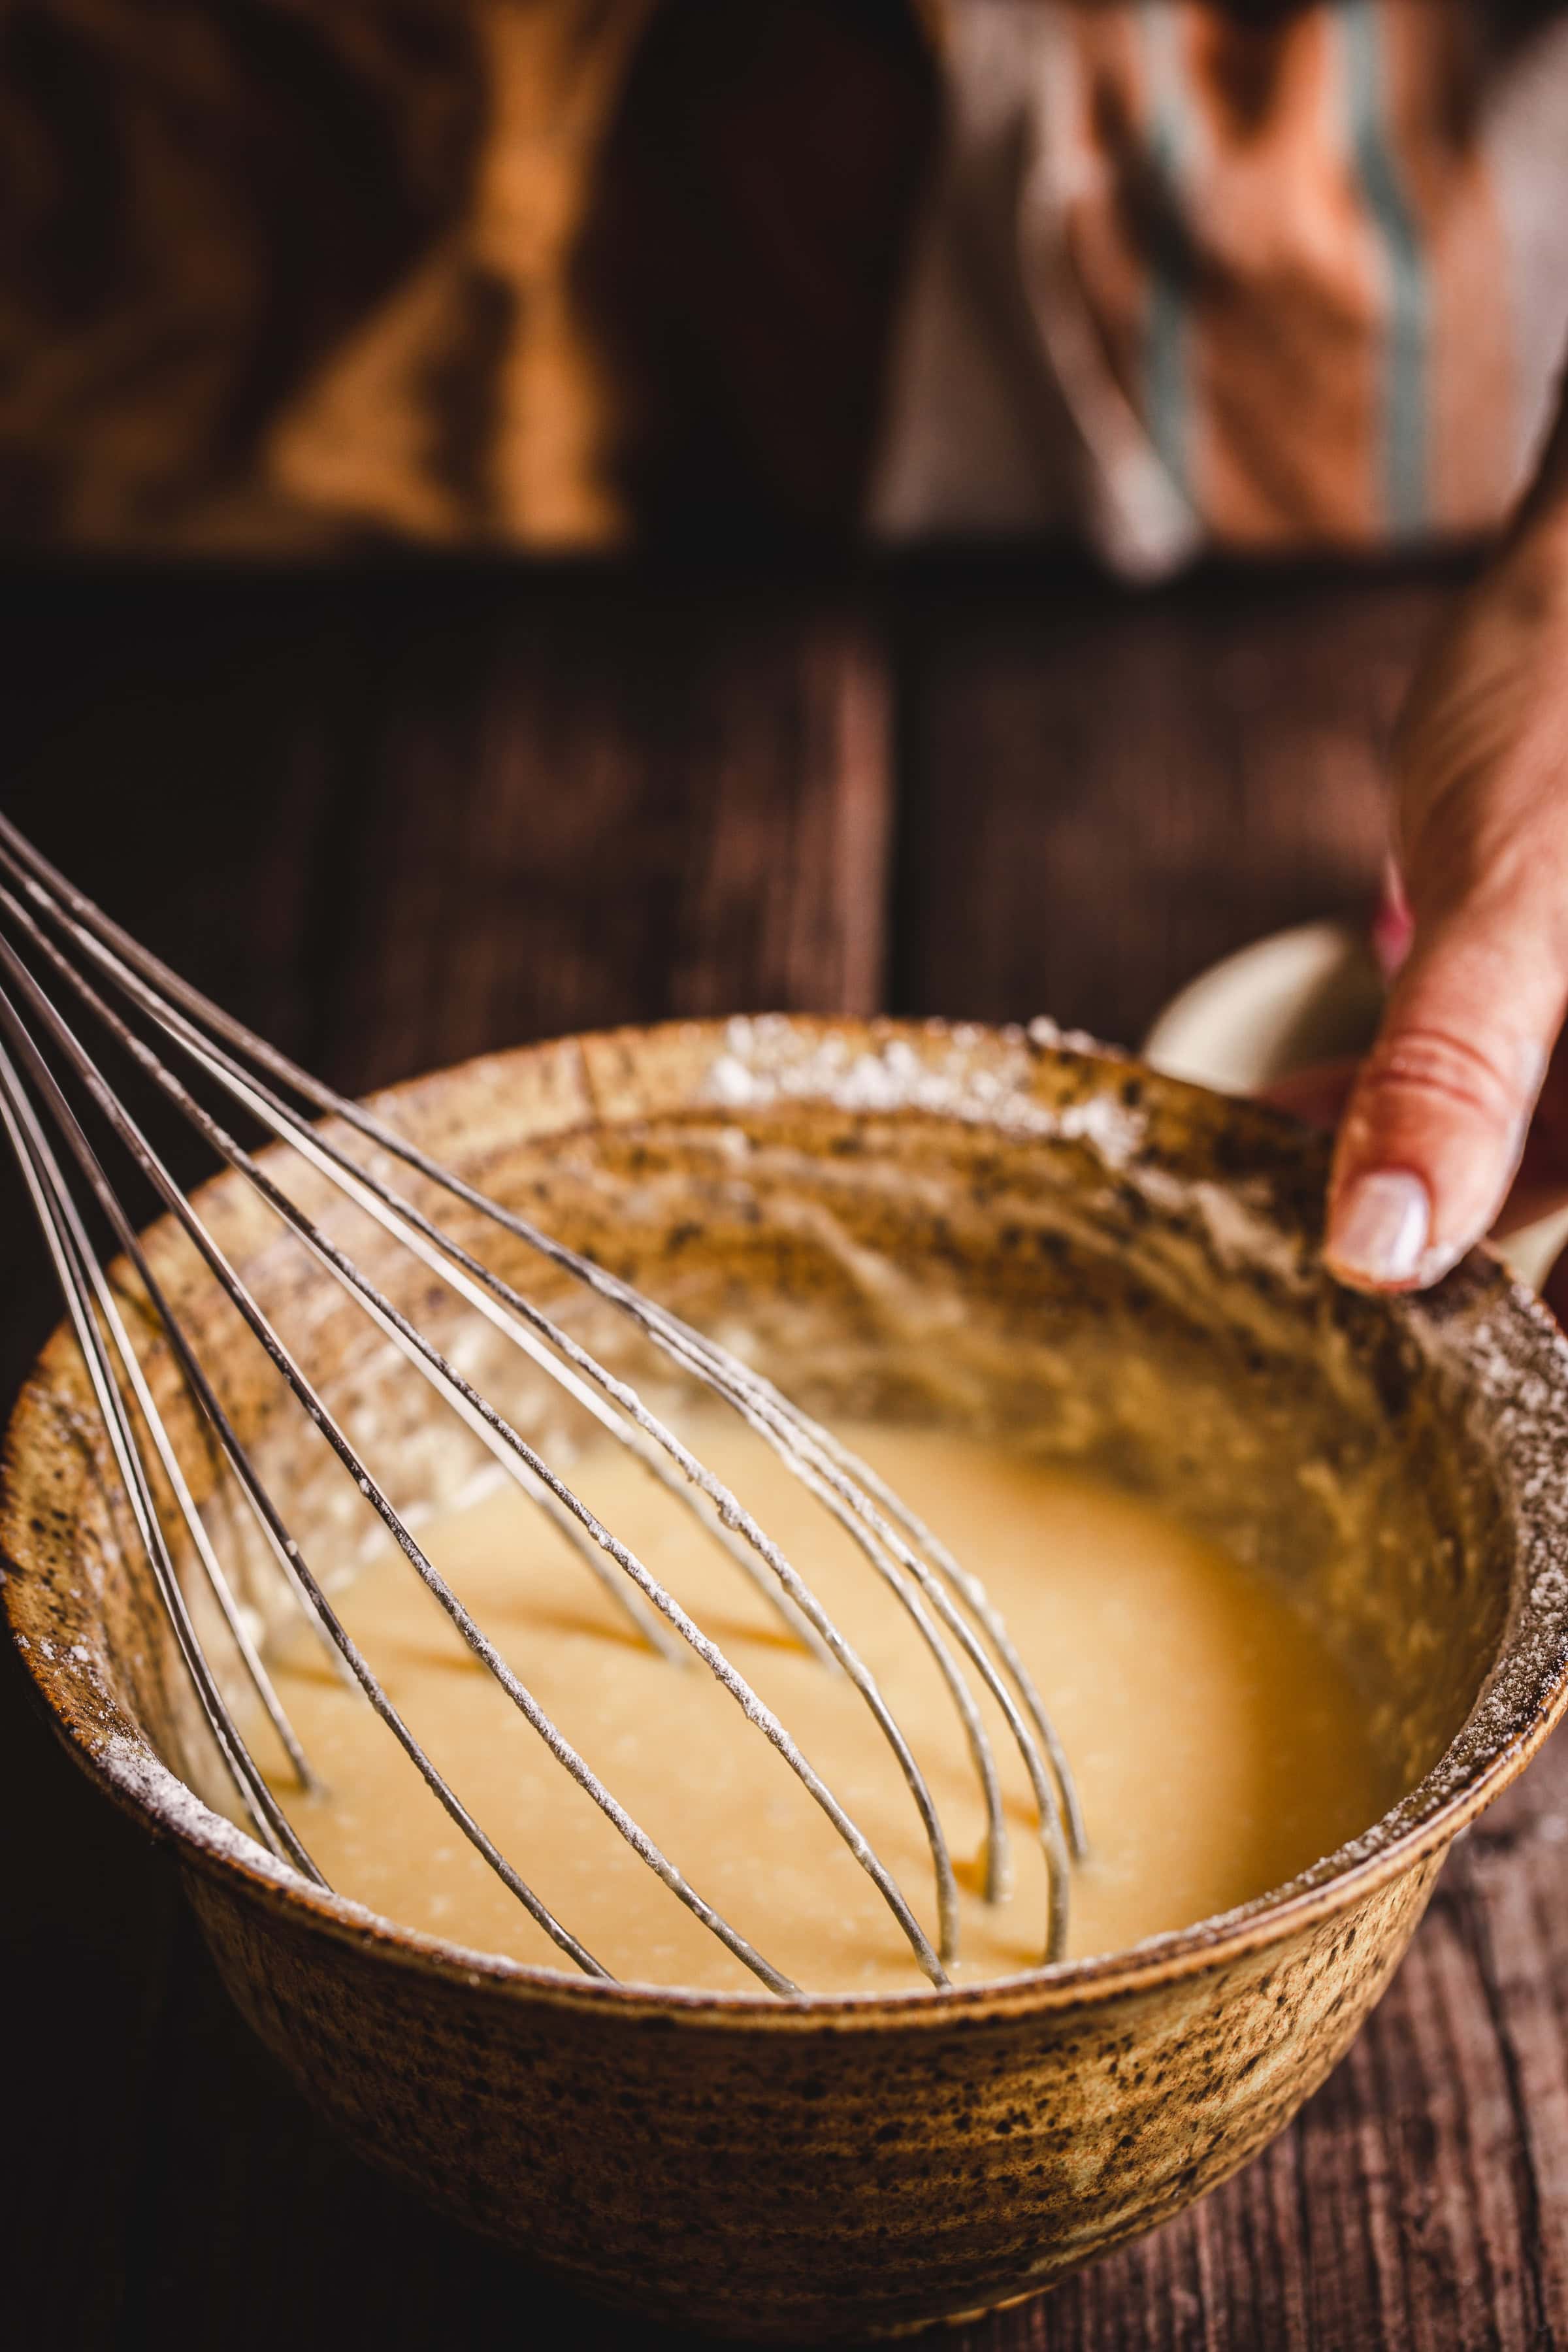
In a large mixing bowl, bring together the flour, melted butter, granulated sugar, milk, and eggs. Mix well until the batter becomes smooth and fully blended. The goal is a homogeneous consistency with no visible streaks of flour or egg. The batter should be fluid enough to spread easily, but not so thin that it runs uncontrollably. Let it rest briefly while you prepare the iron.
Heat the Waffle Iron
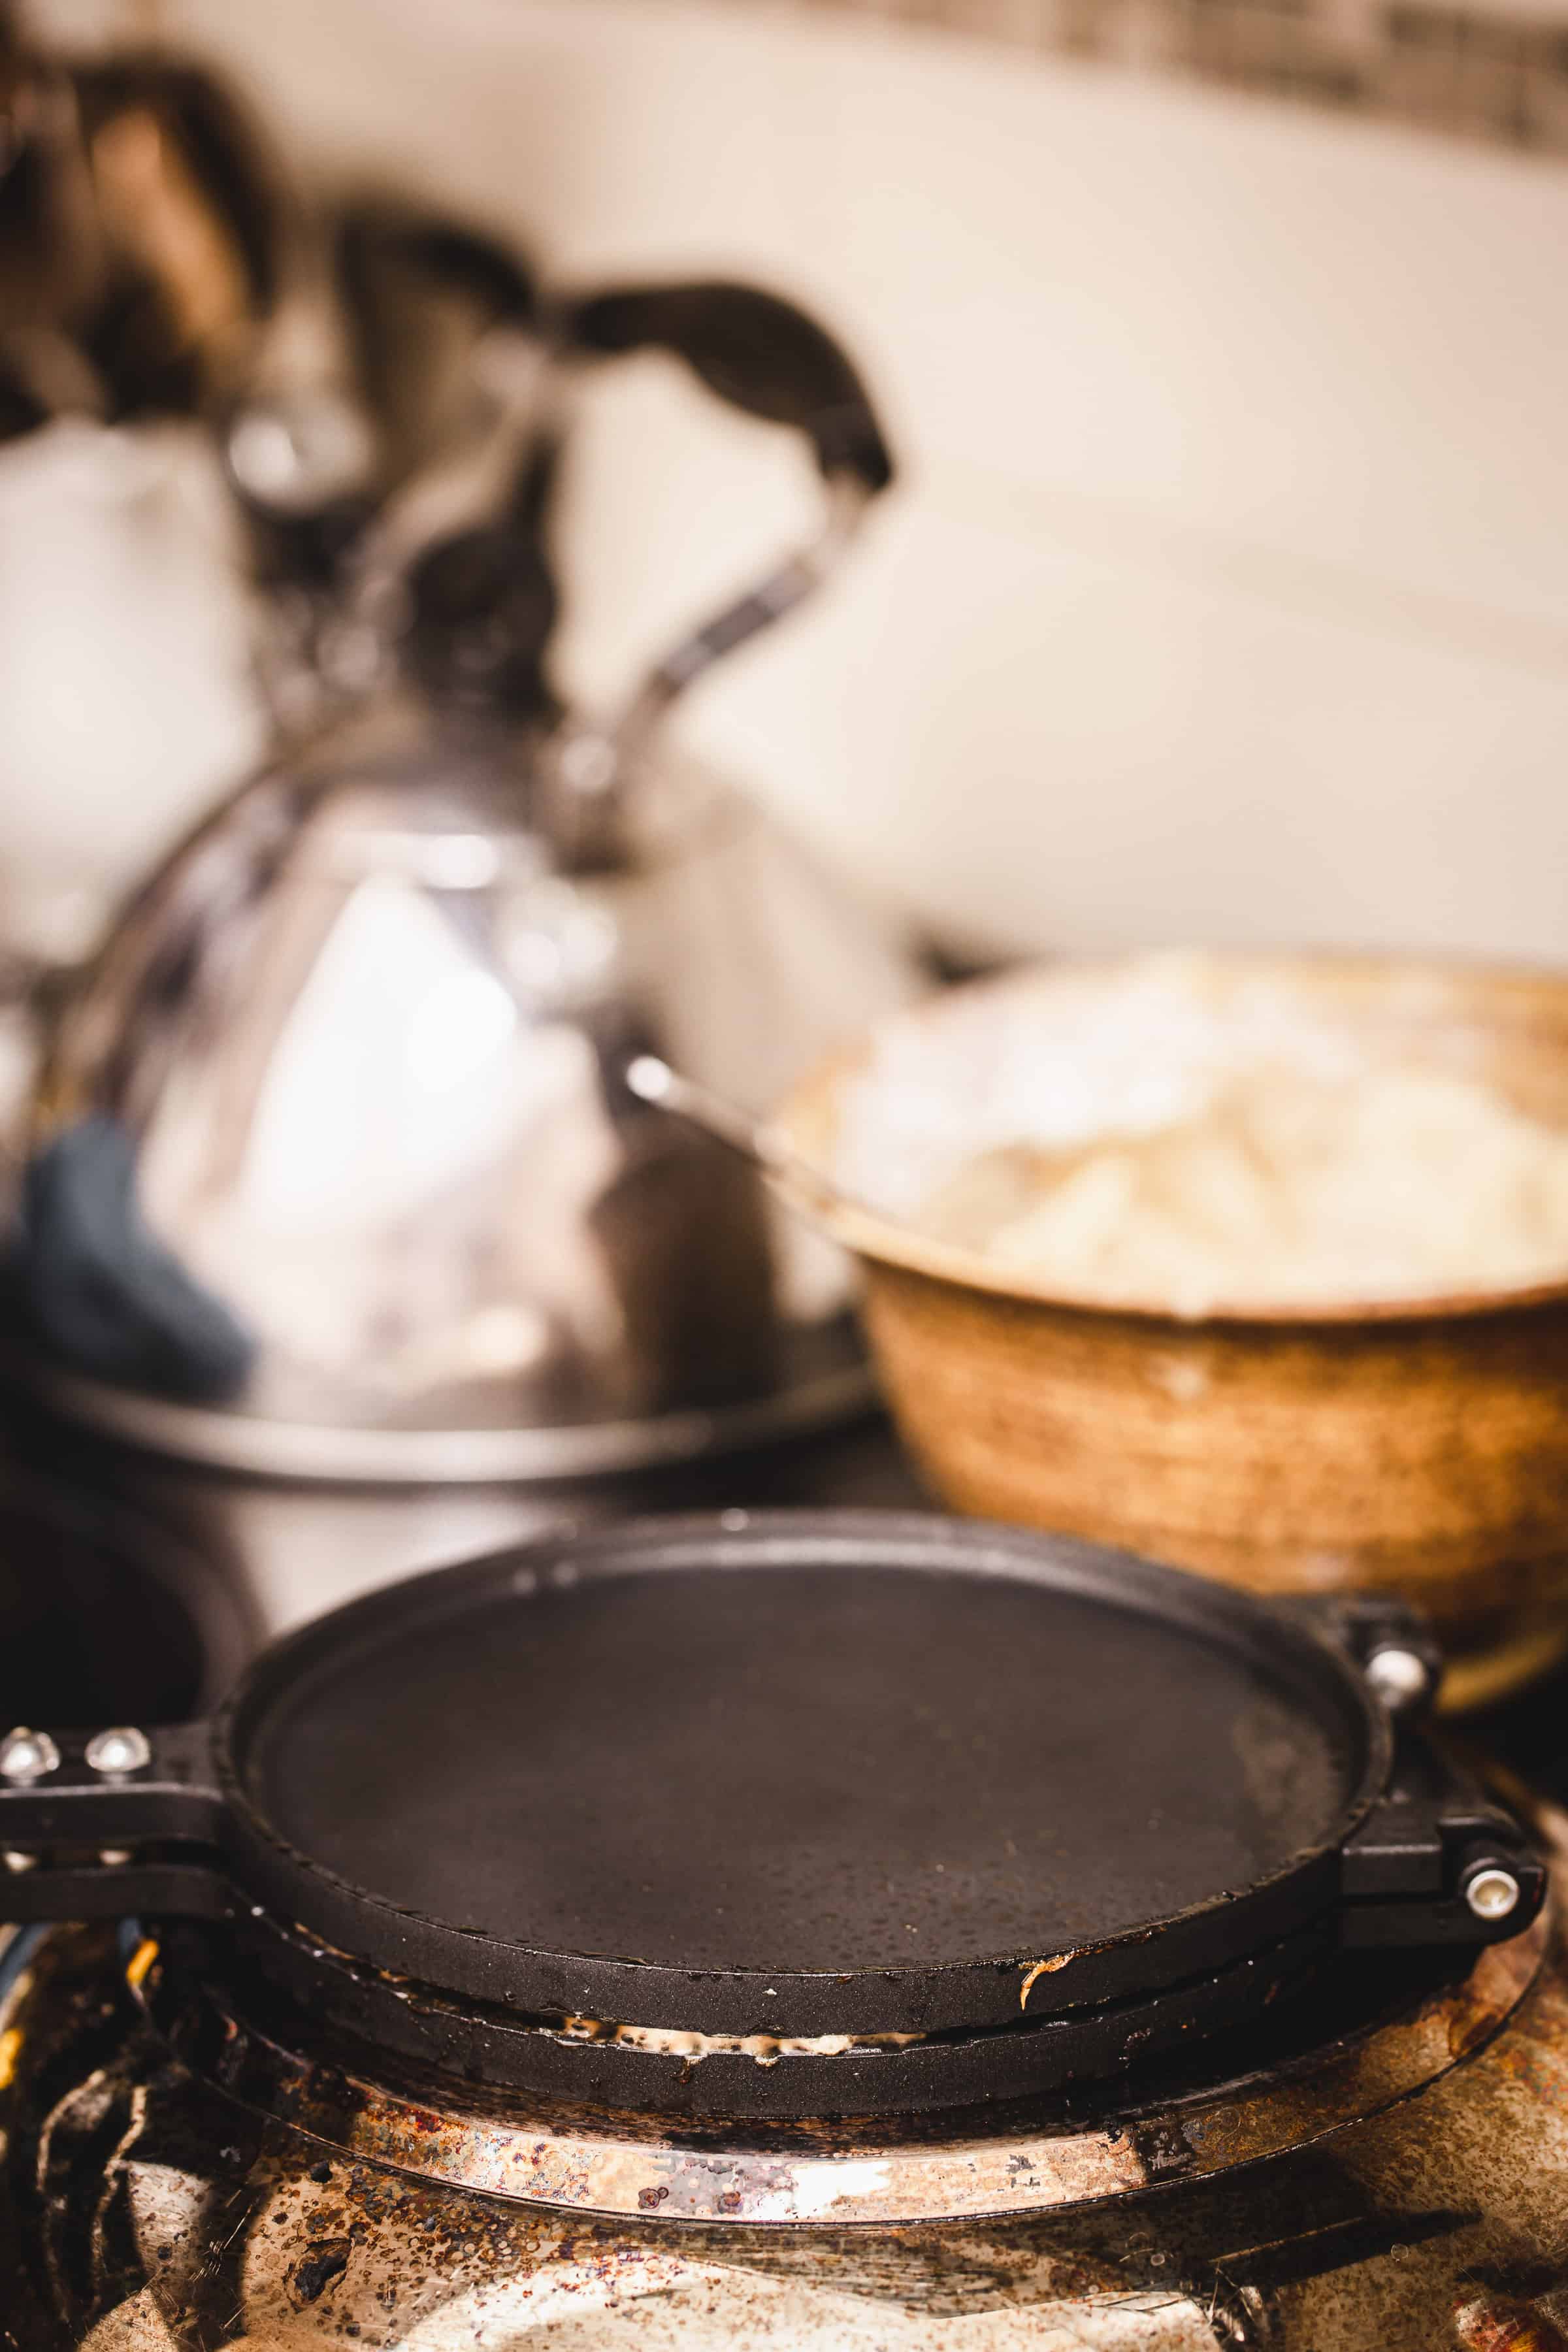
Place your waffle iron over the heat and warm it according to the manufacturer's instructions. If using a traditional stovetop iron, allow it to heat evenly on both sides before cooking. Proper heat is essential. An iron that is too cool will cause sticking, while one that is too hot will brown the wafers too quickly and make rolling difficult.
Grease Before Cooking
Before making each waffle, lightly brush the surface of the iron with a small amount of vegetable oil. This step helps ensure easy release and even browning. Reapply oil as needed throughout the process, especially if the batter begins to cling to the surface.
Cook the Wafers
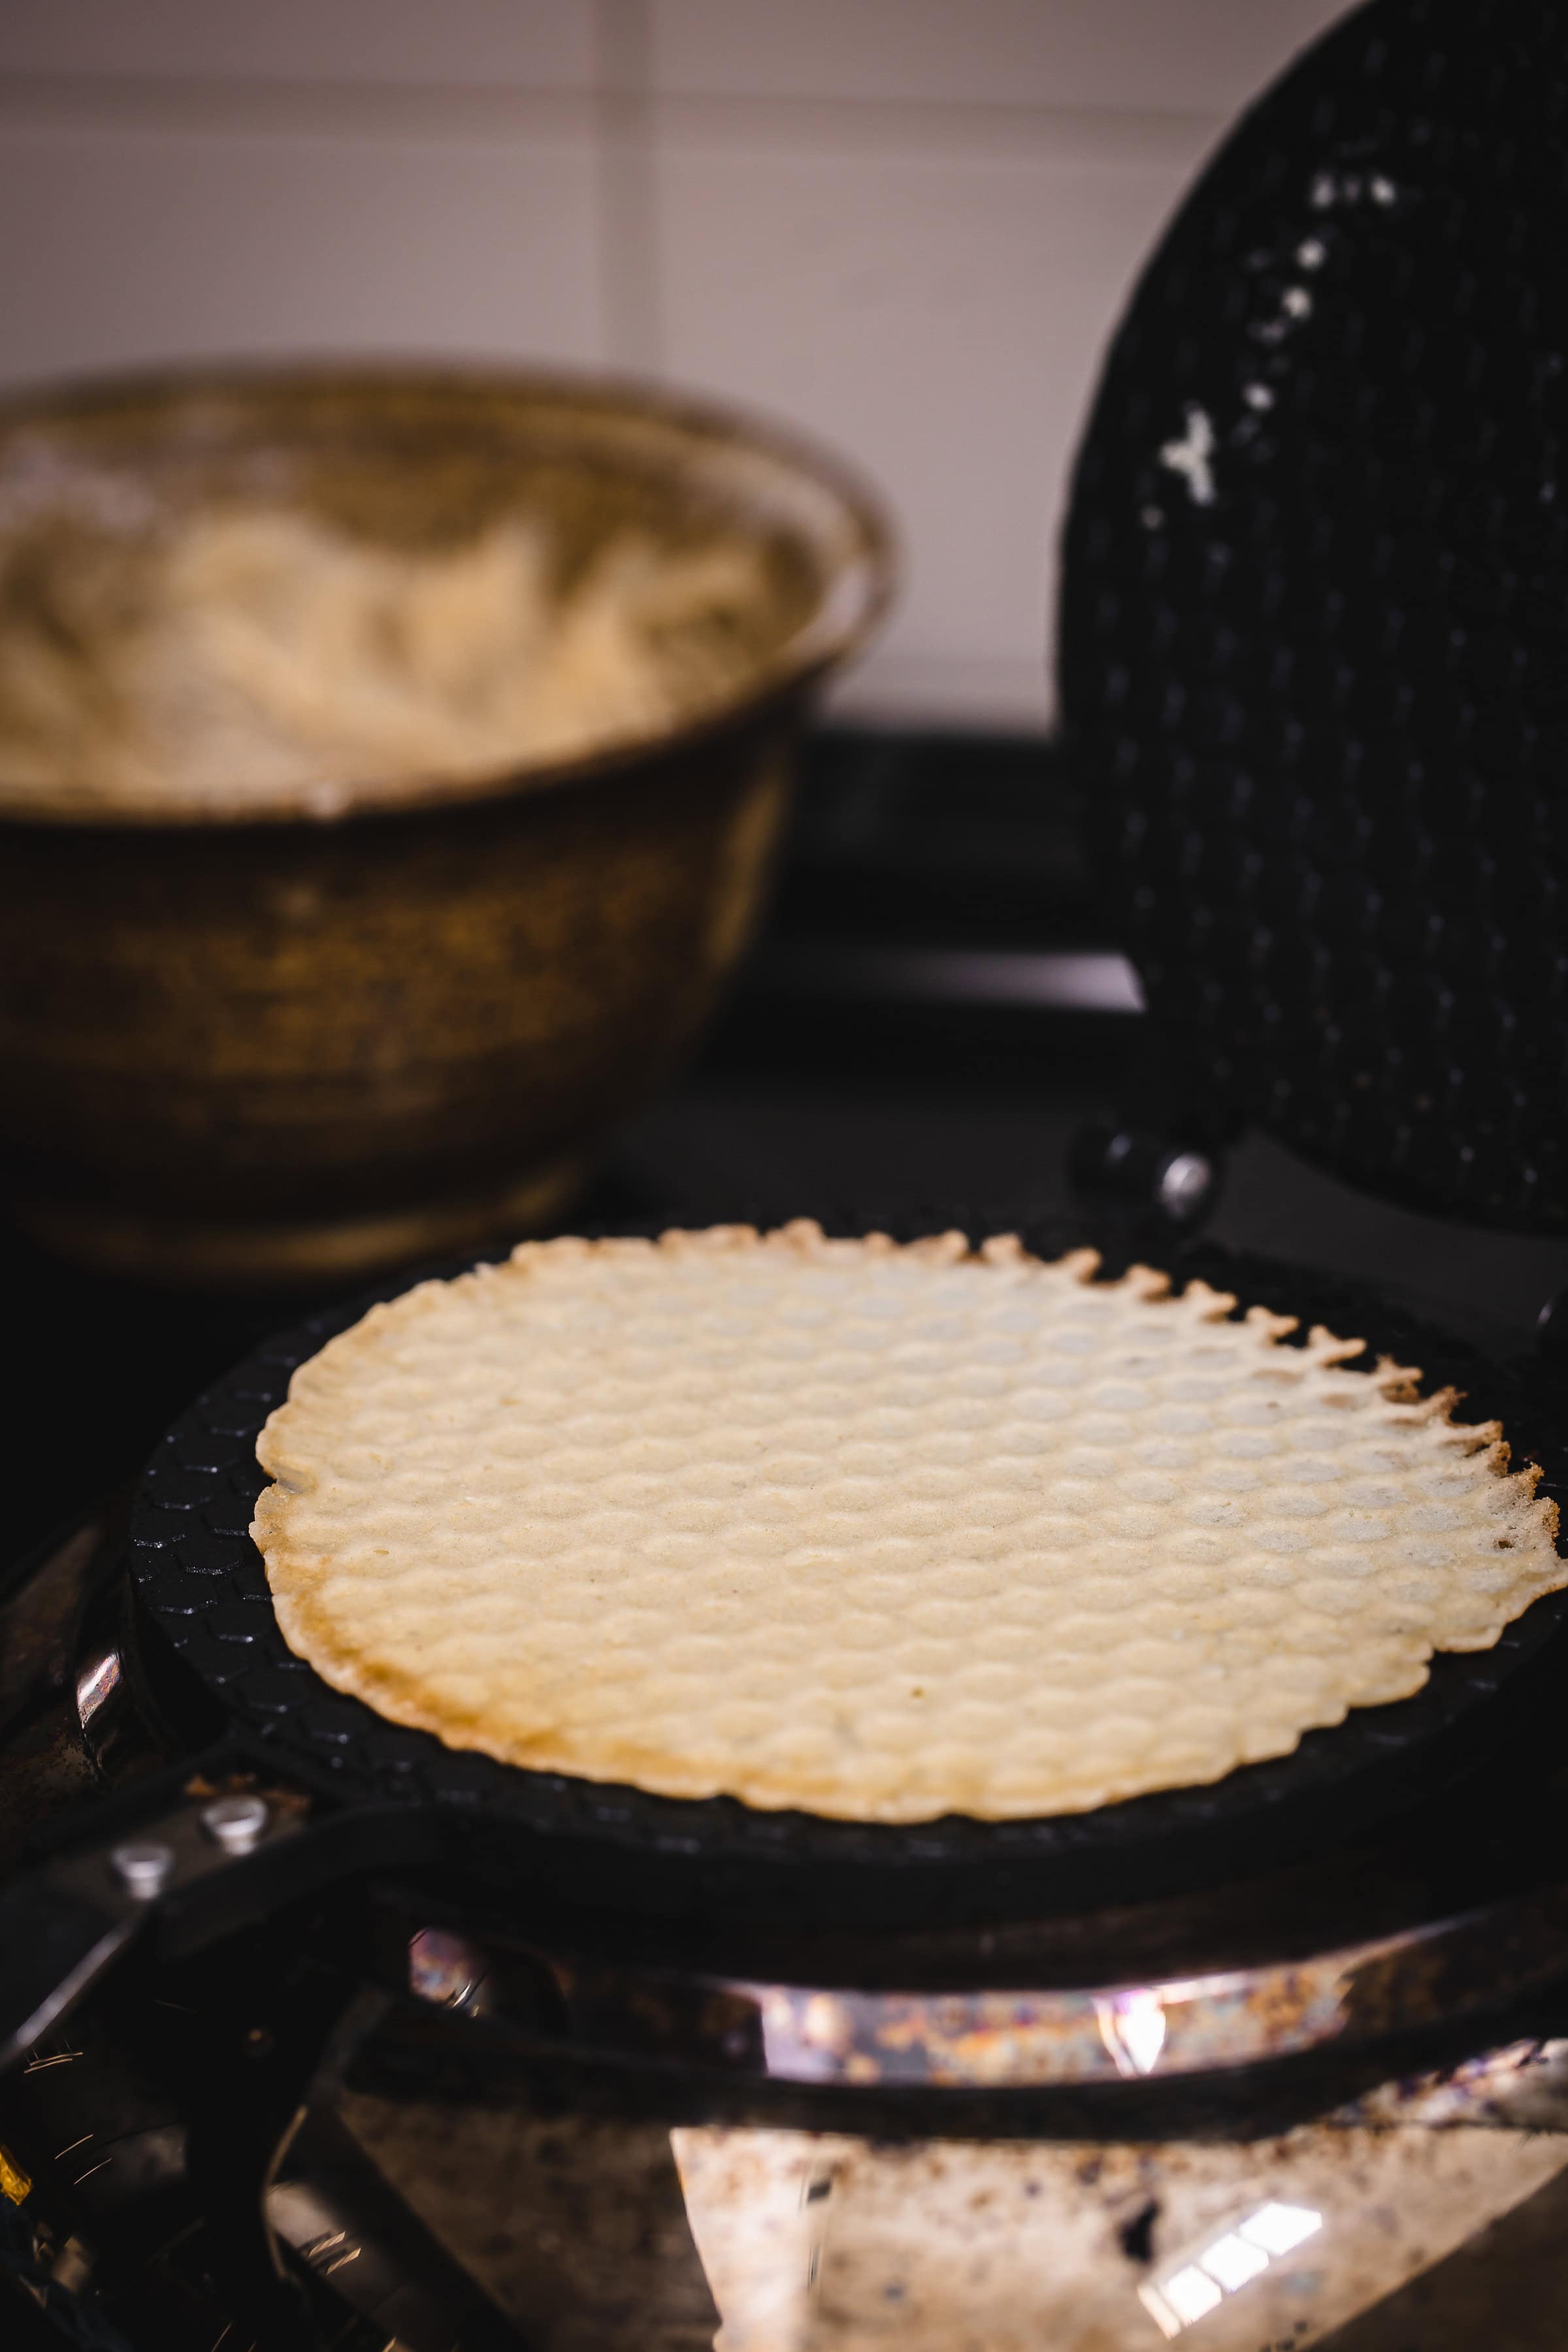
Pour about 1 to 1½ tablespoons of batter into the center of the iron, adjusting the amount based on the size of your waffle iron. Close the iron gently and cook for the recommended time, watching for a light golden color. The wafer should be fully set but still flexible when removed.
Roll While Warm
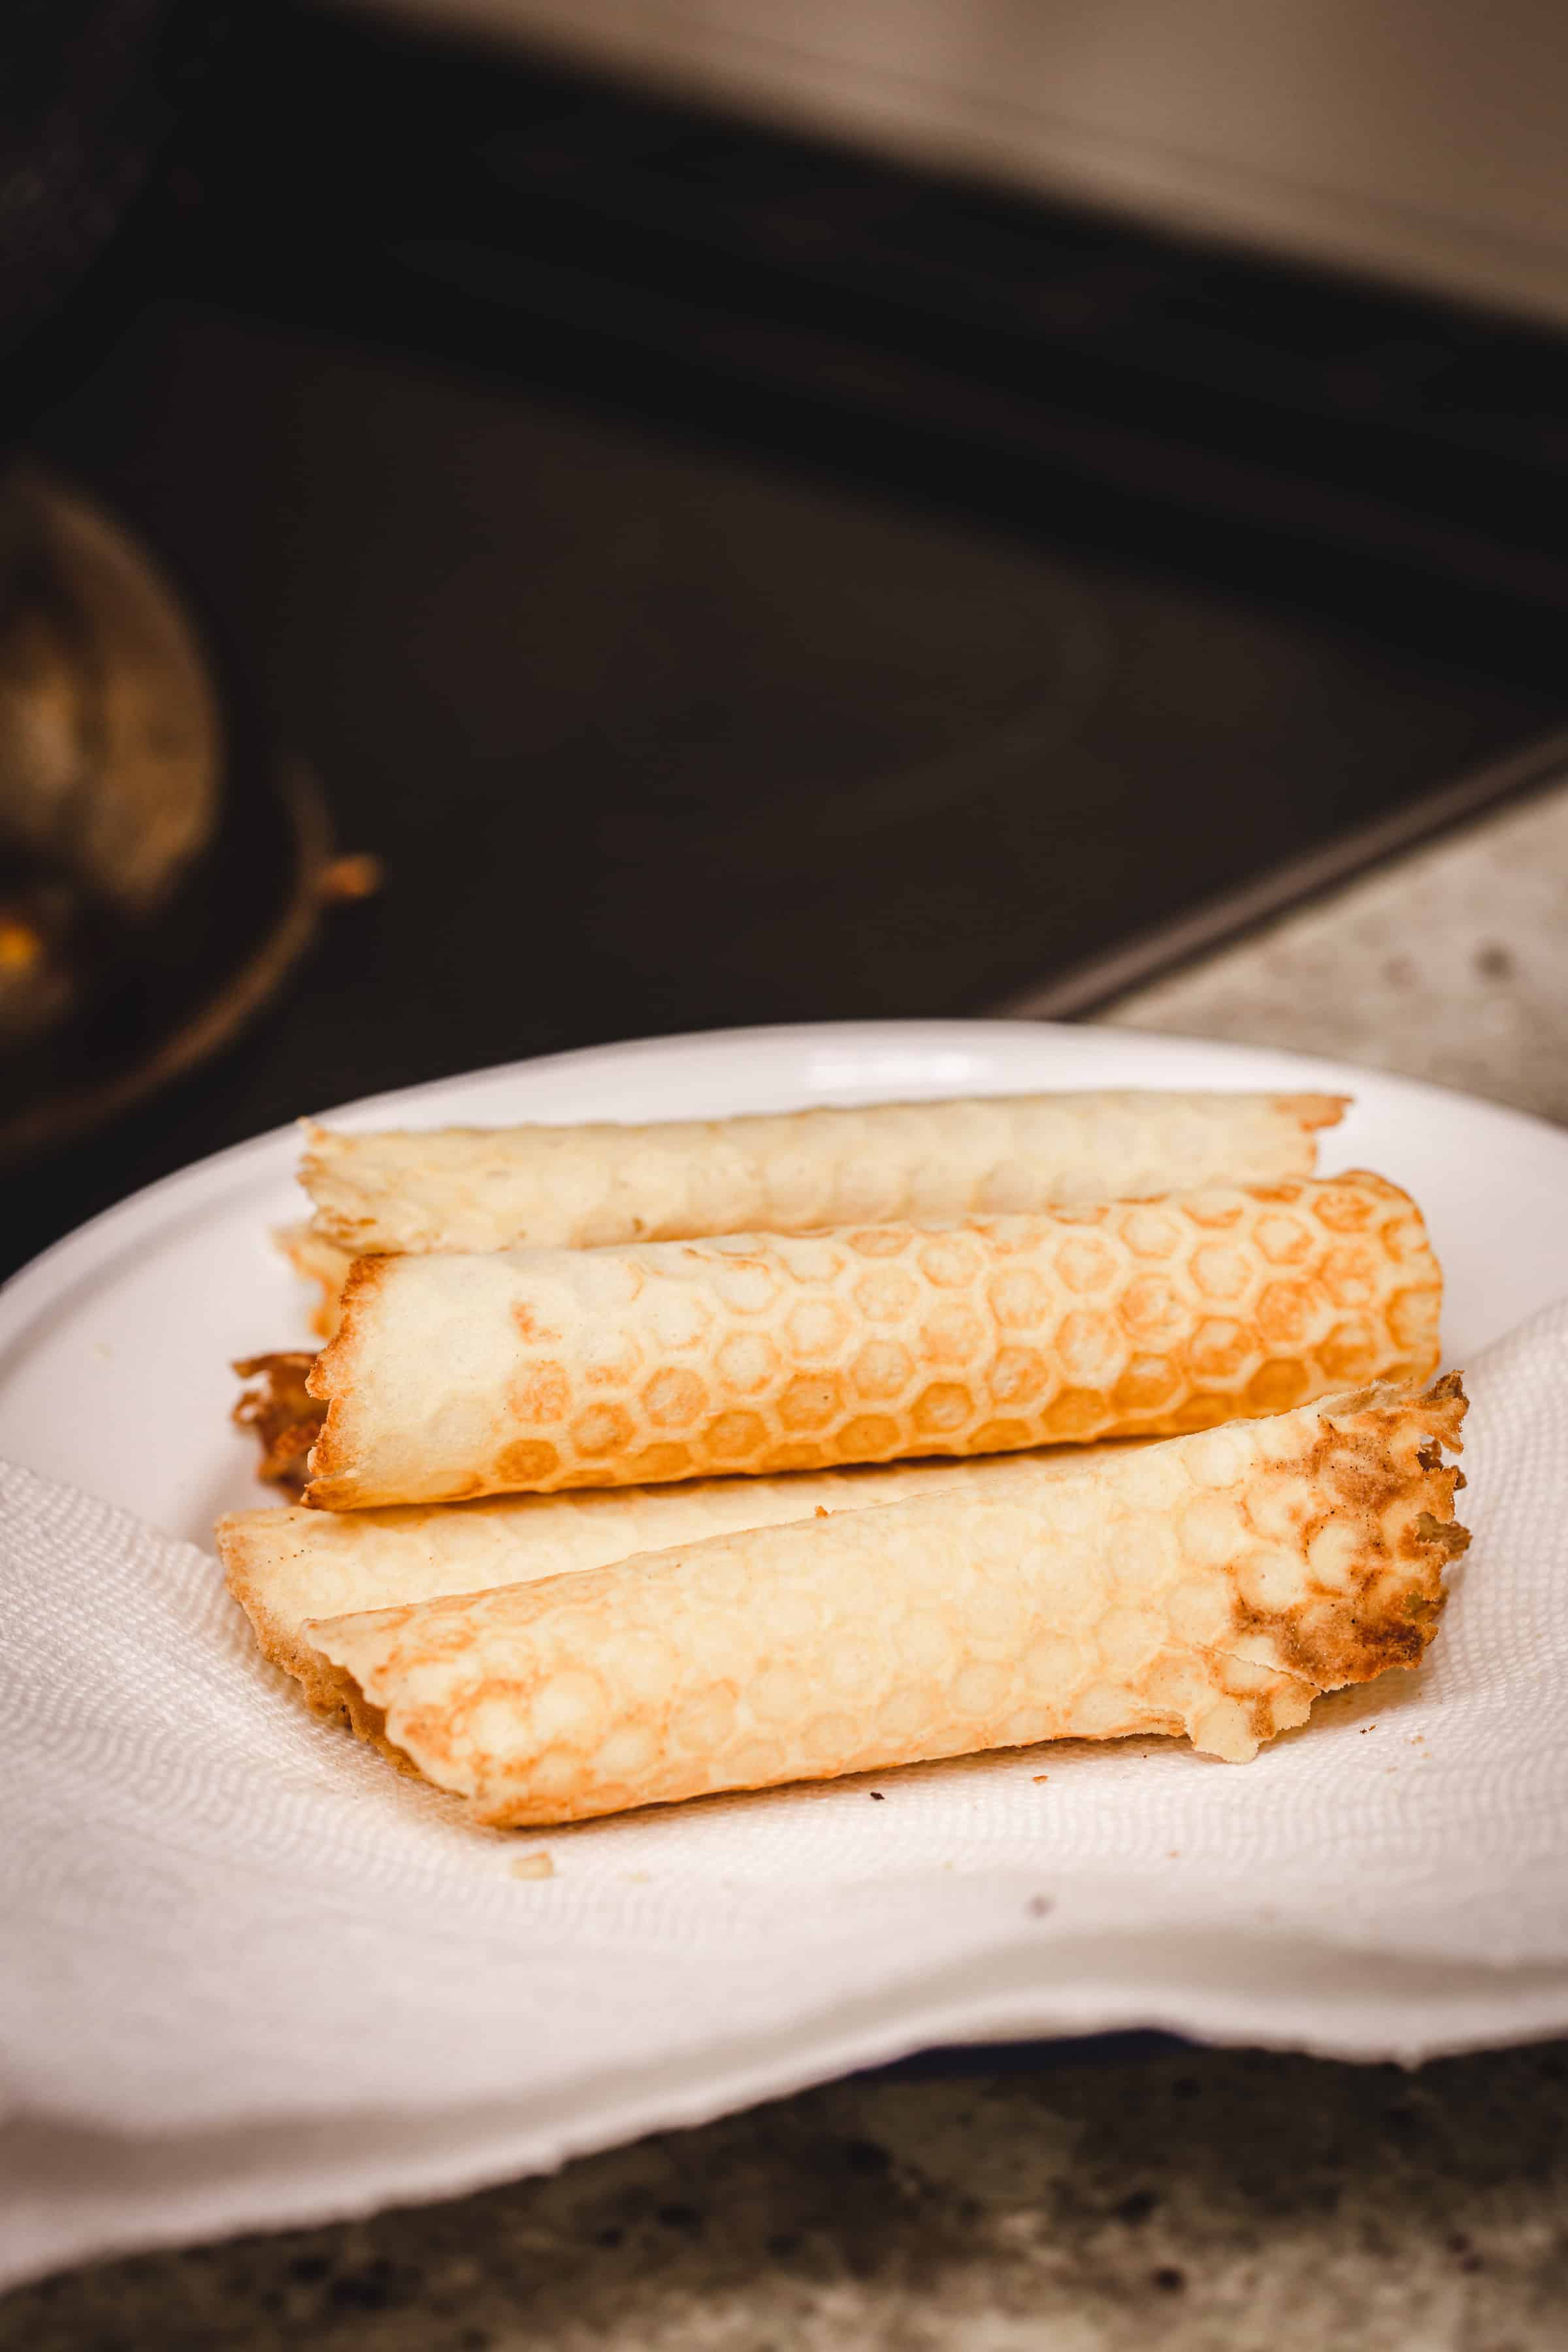
This is the most critical step. As soon as the wafer comes off the iron, immediately roll it into a tube shape while it is still warm and pliable. Work quickly and confidently, as the wafer will stiffen within seconds. Hesitation here often leads to cracking.
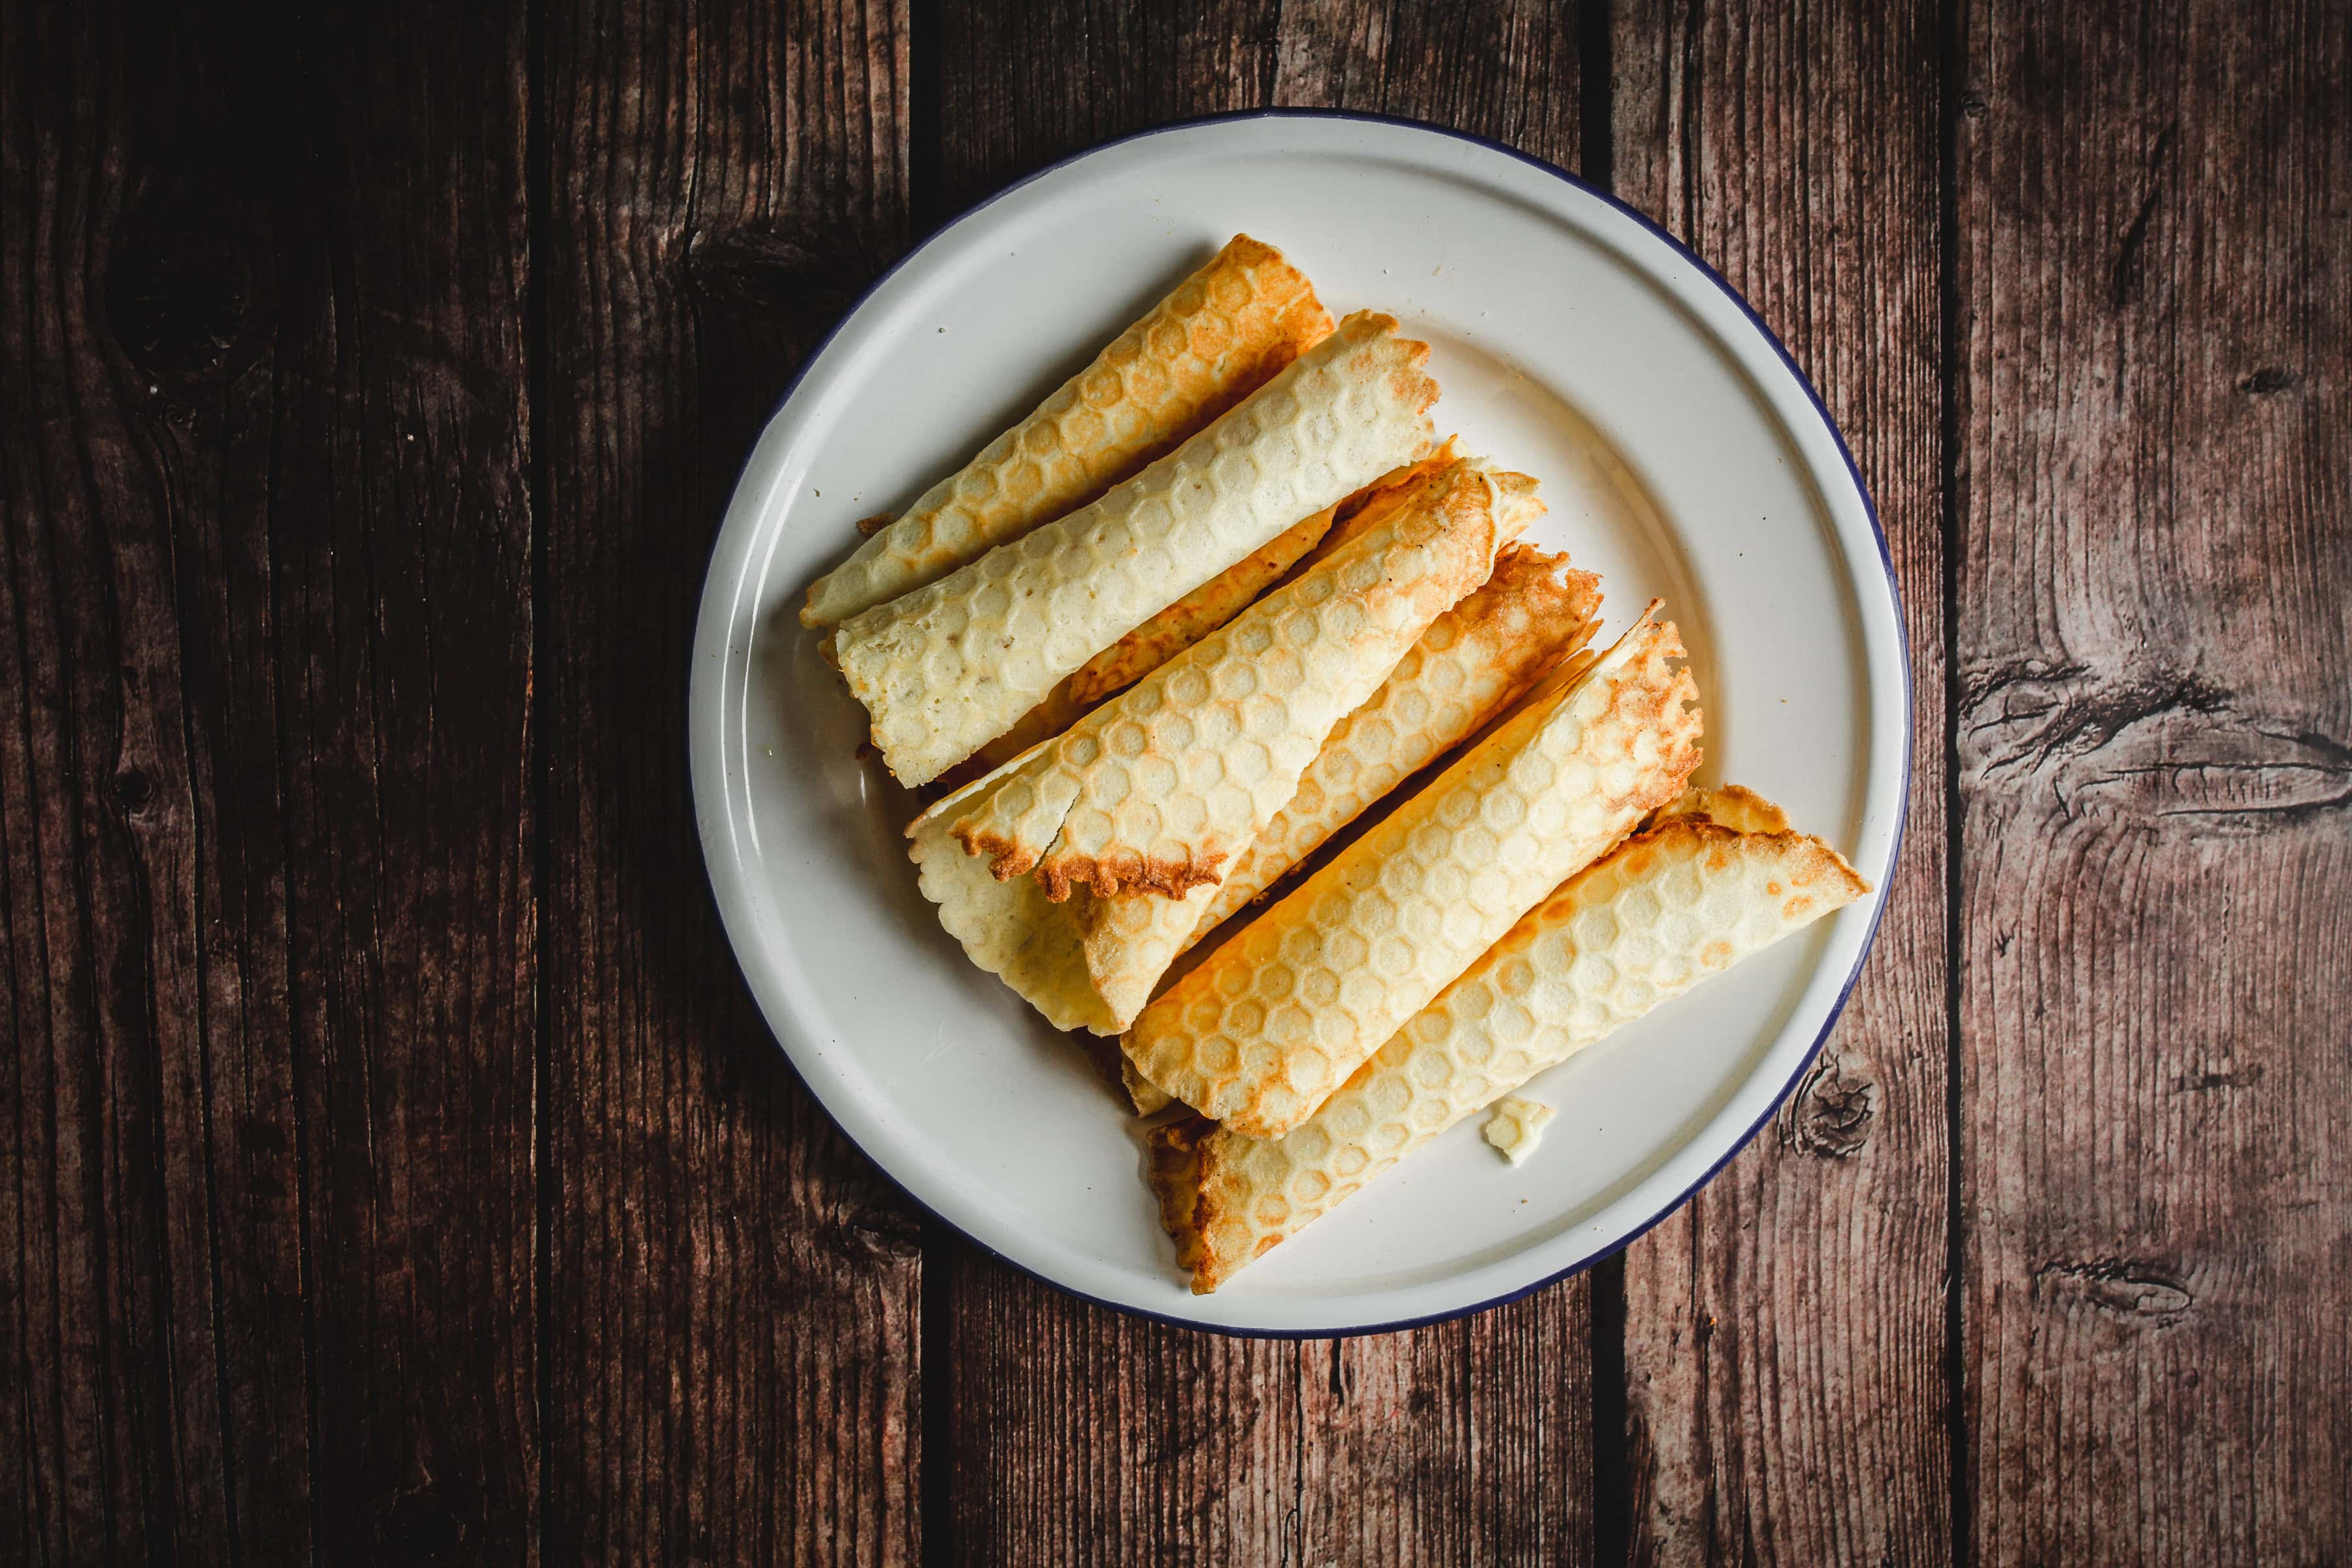
Cool and Crisp
Place the rolled wafer aside to cool completely. As it rests, it will firm up and become crisp, holding its shape beautifully. This cooling period is what transforms the soft wafer into a delicate, crunchy trubochki.
Repeat Until Finished
Continue cooking, rolling, and cooling each wafer until all the batter has been used. Work in a steady rhythm, maintaining heat and timing. With practice, the process becomes fluid, and the result is a full batch of Traditional Russian Rolled Wafers ready to enjoy or fill as desired.
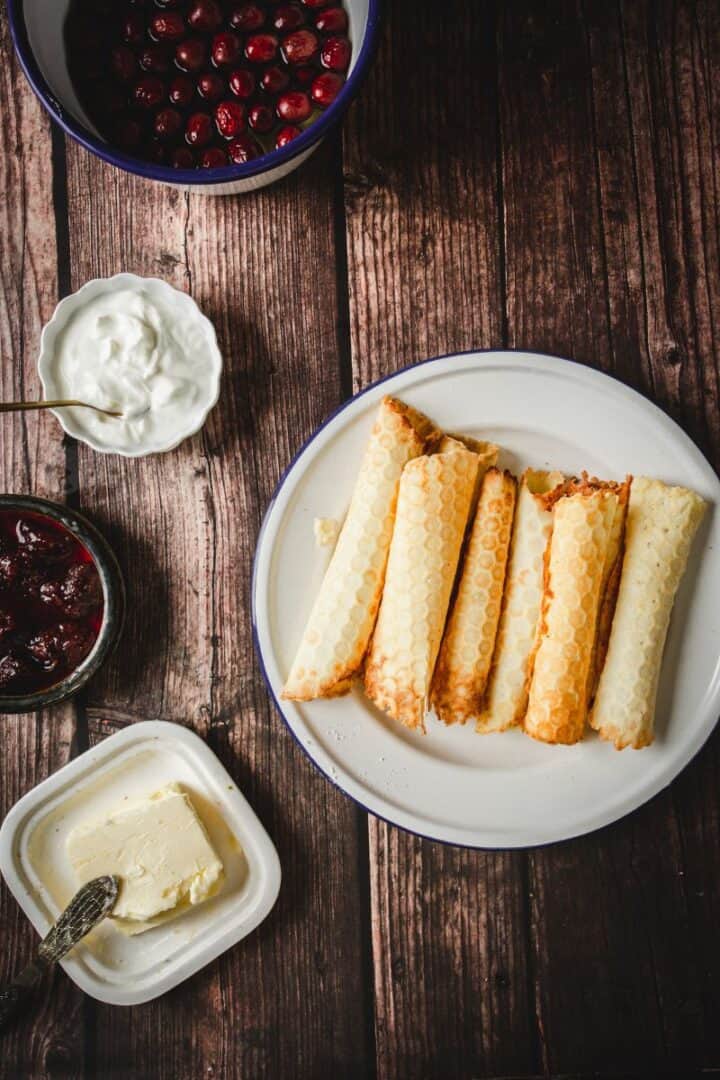
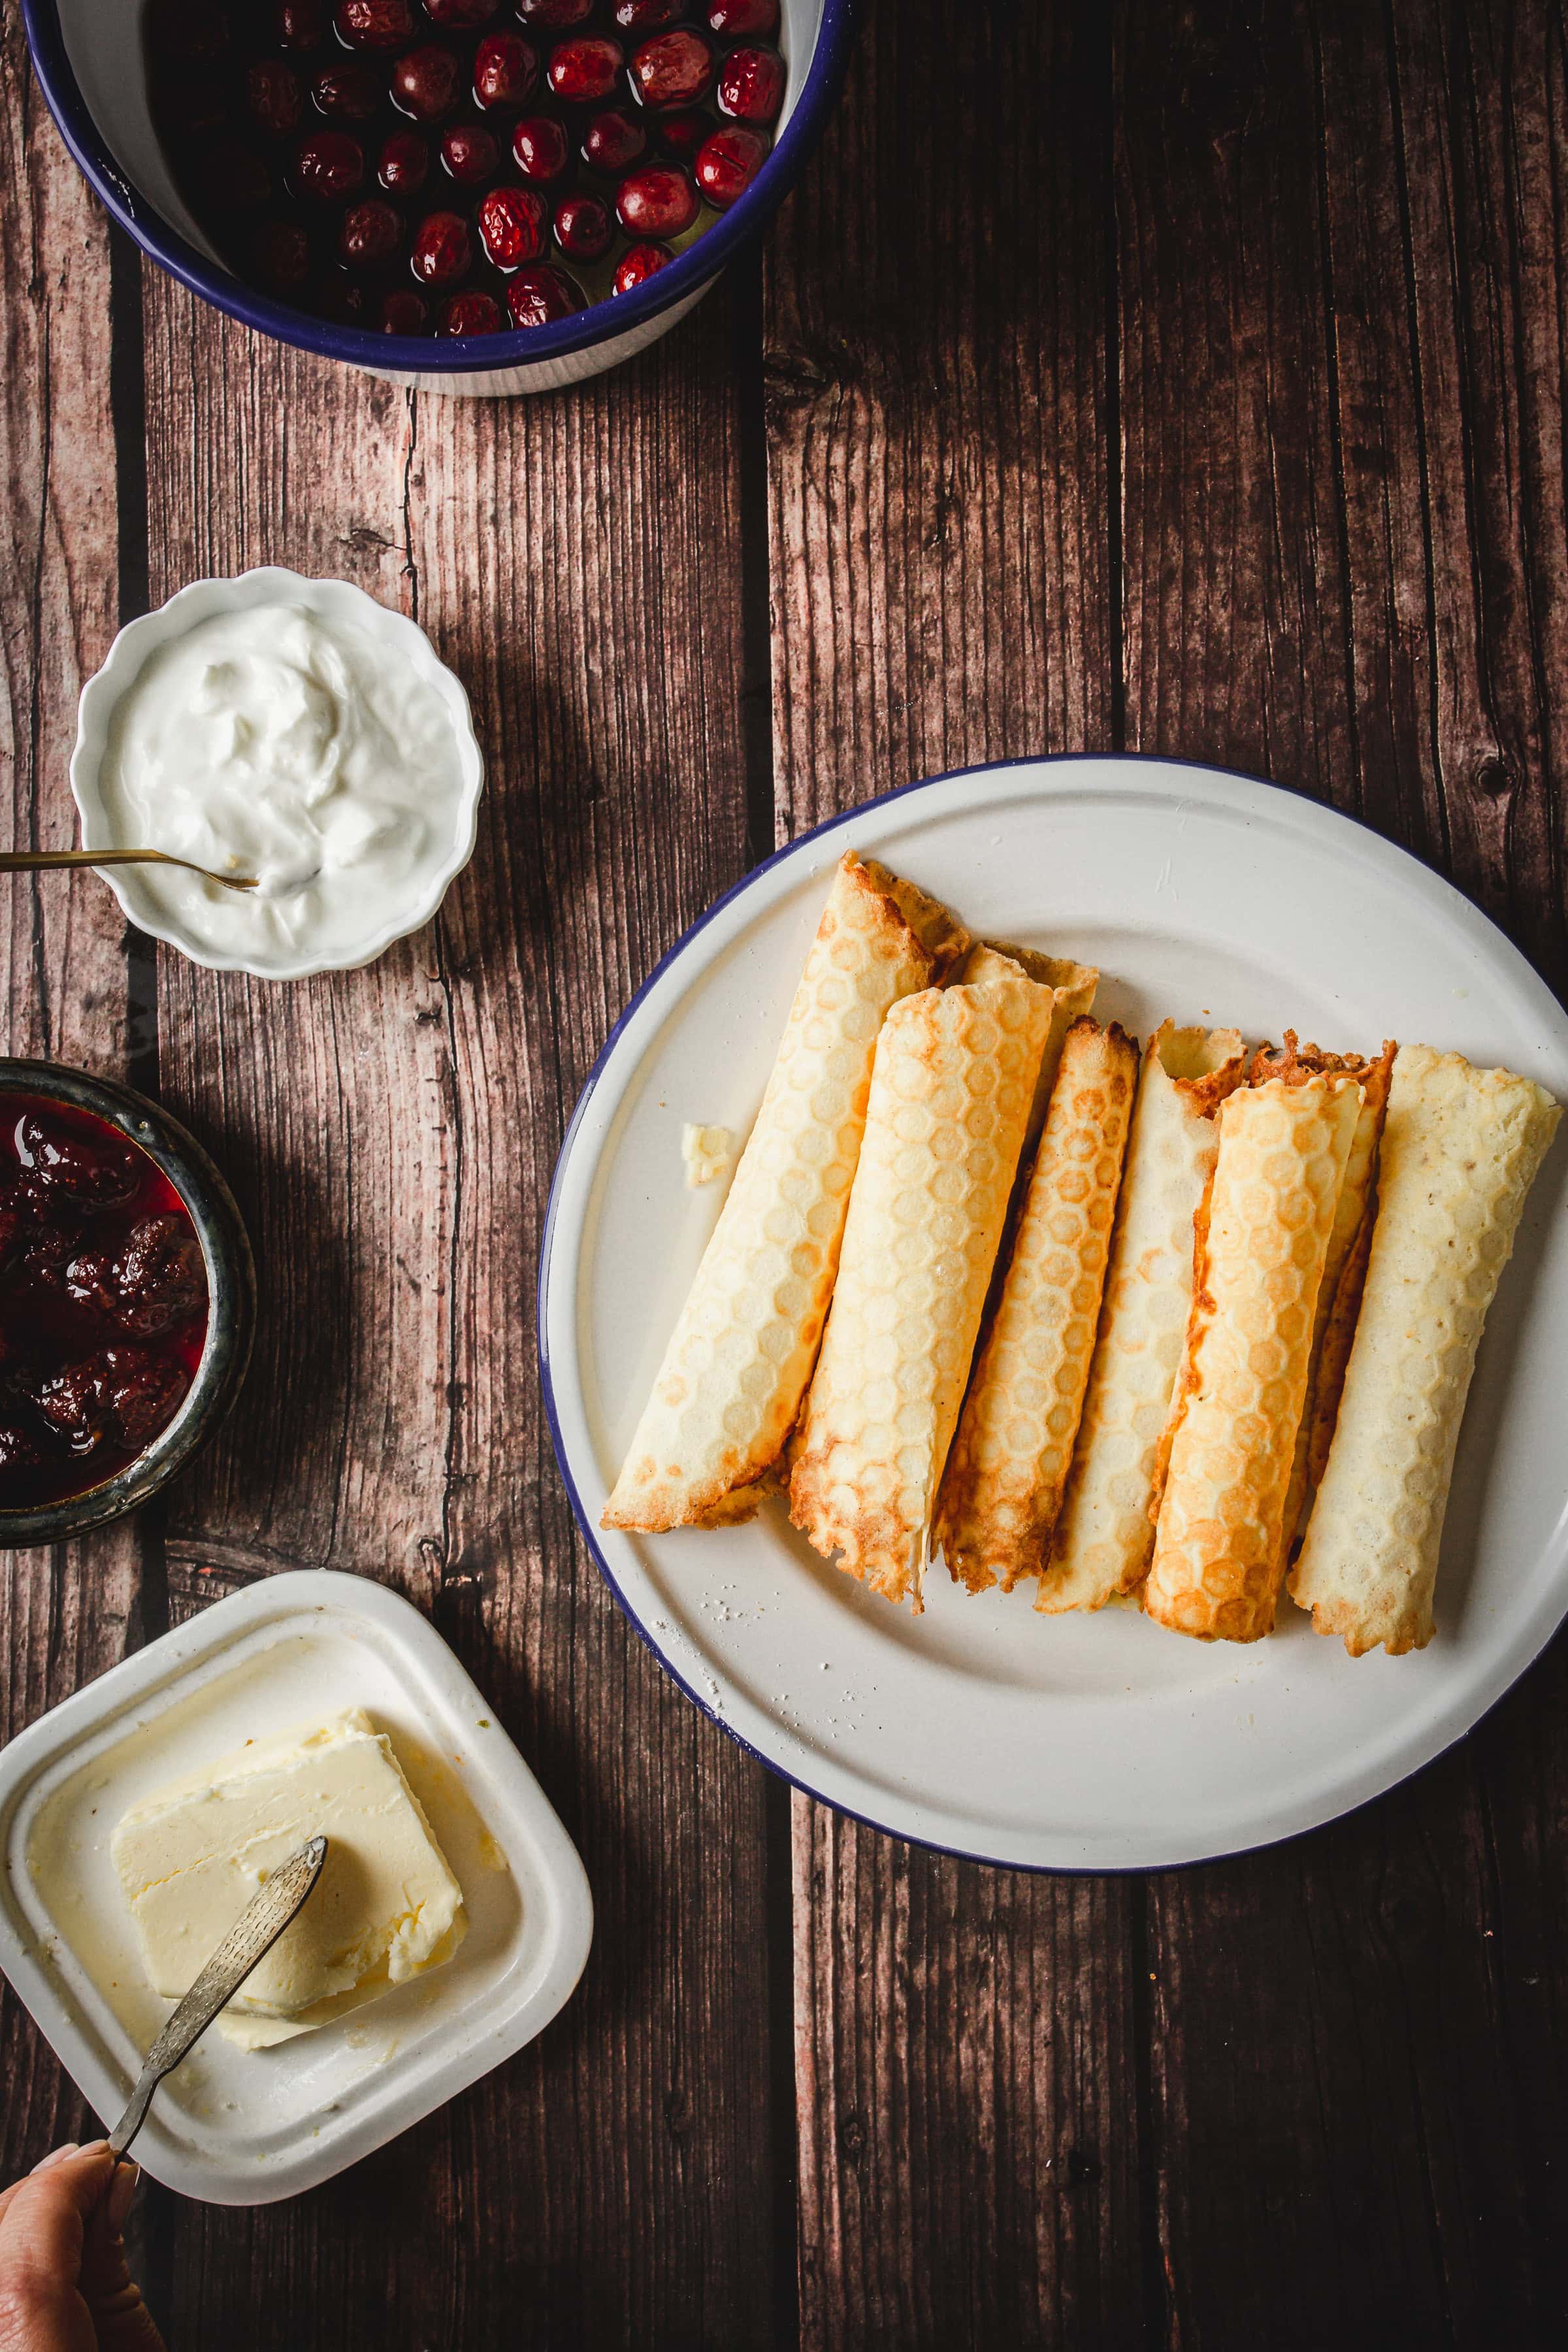
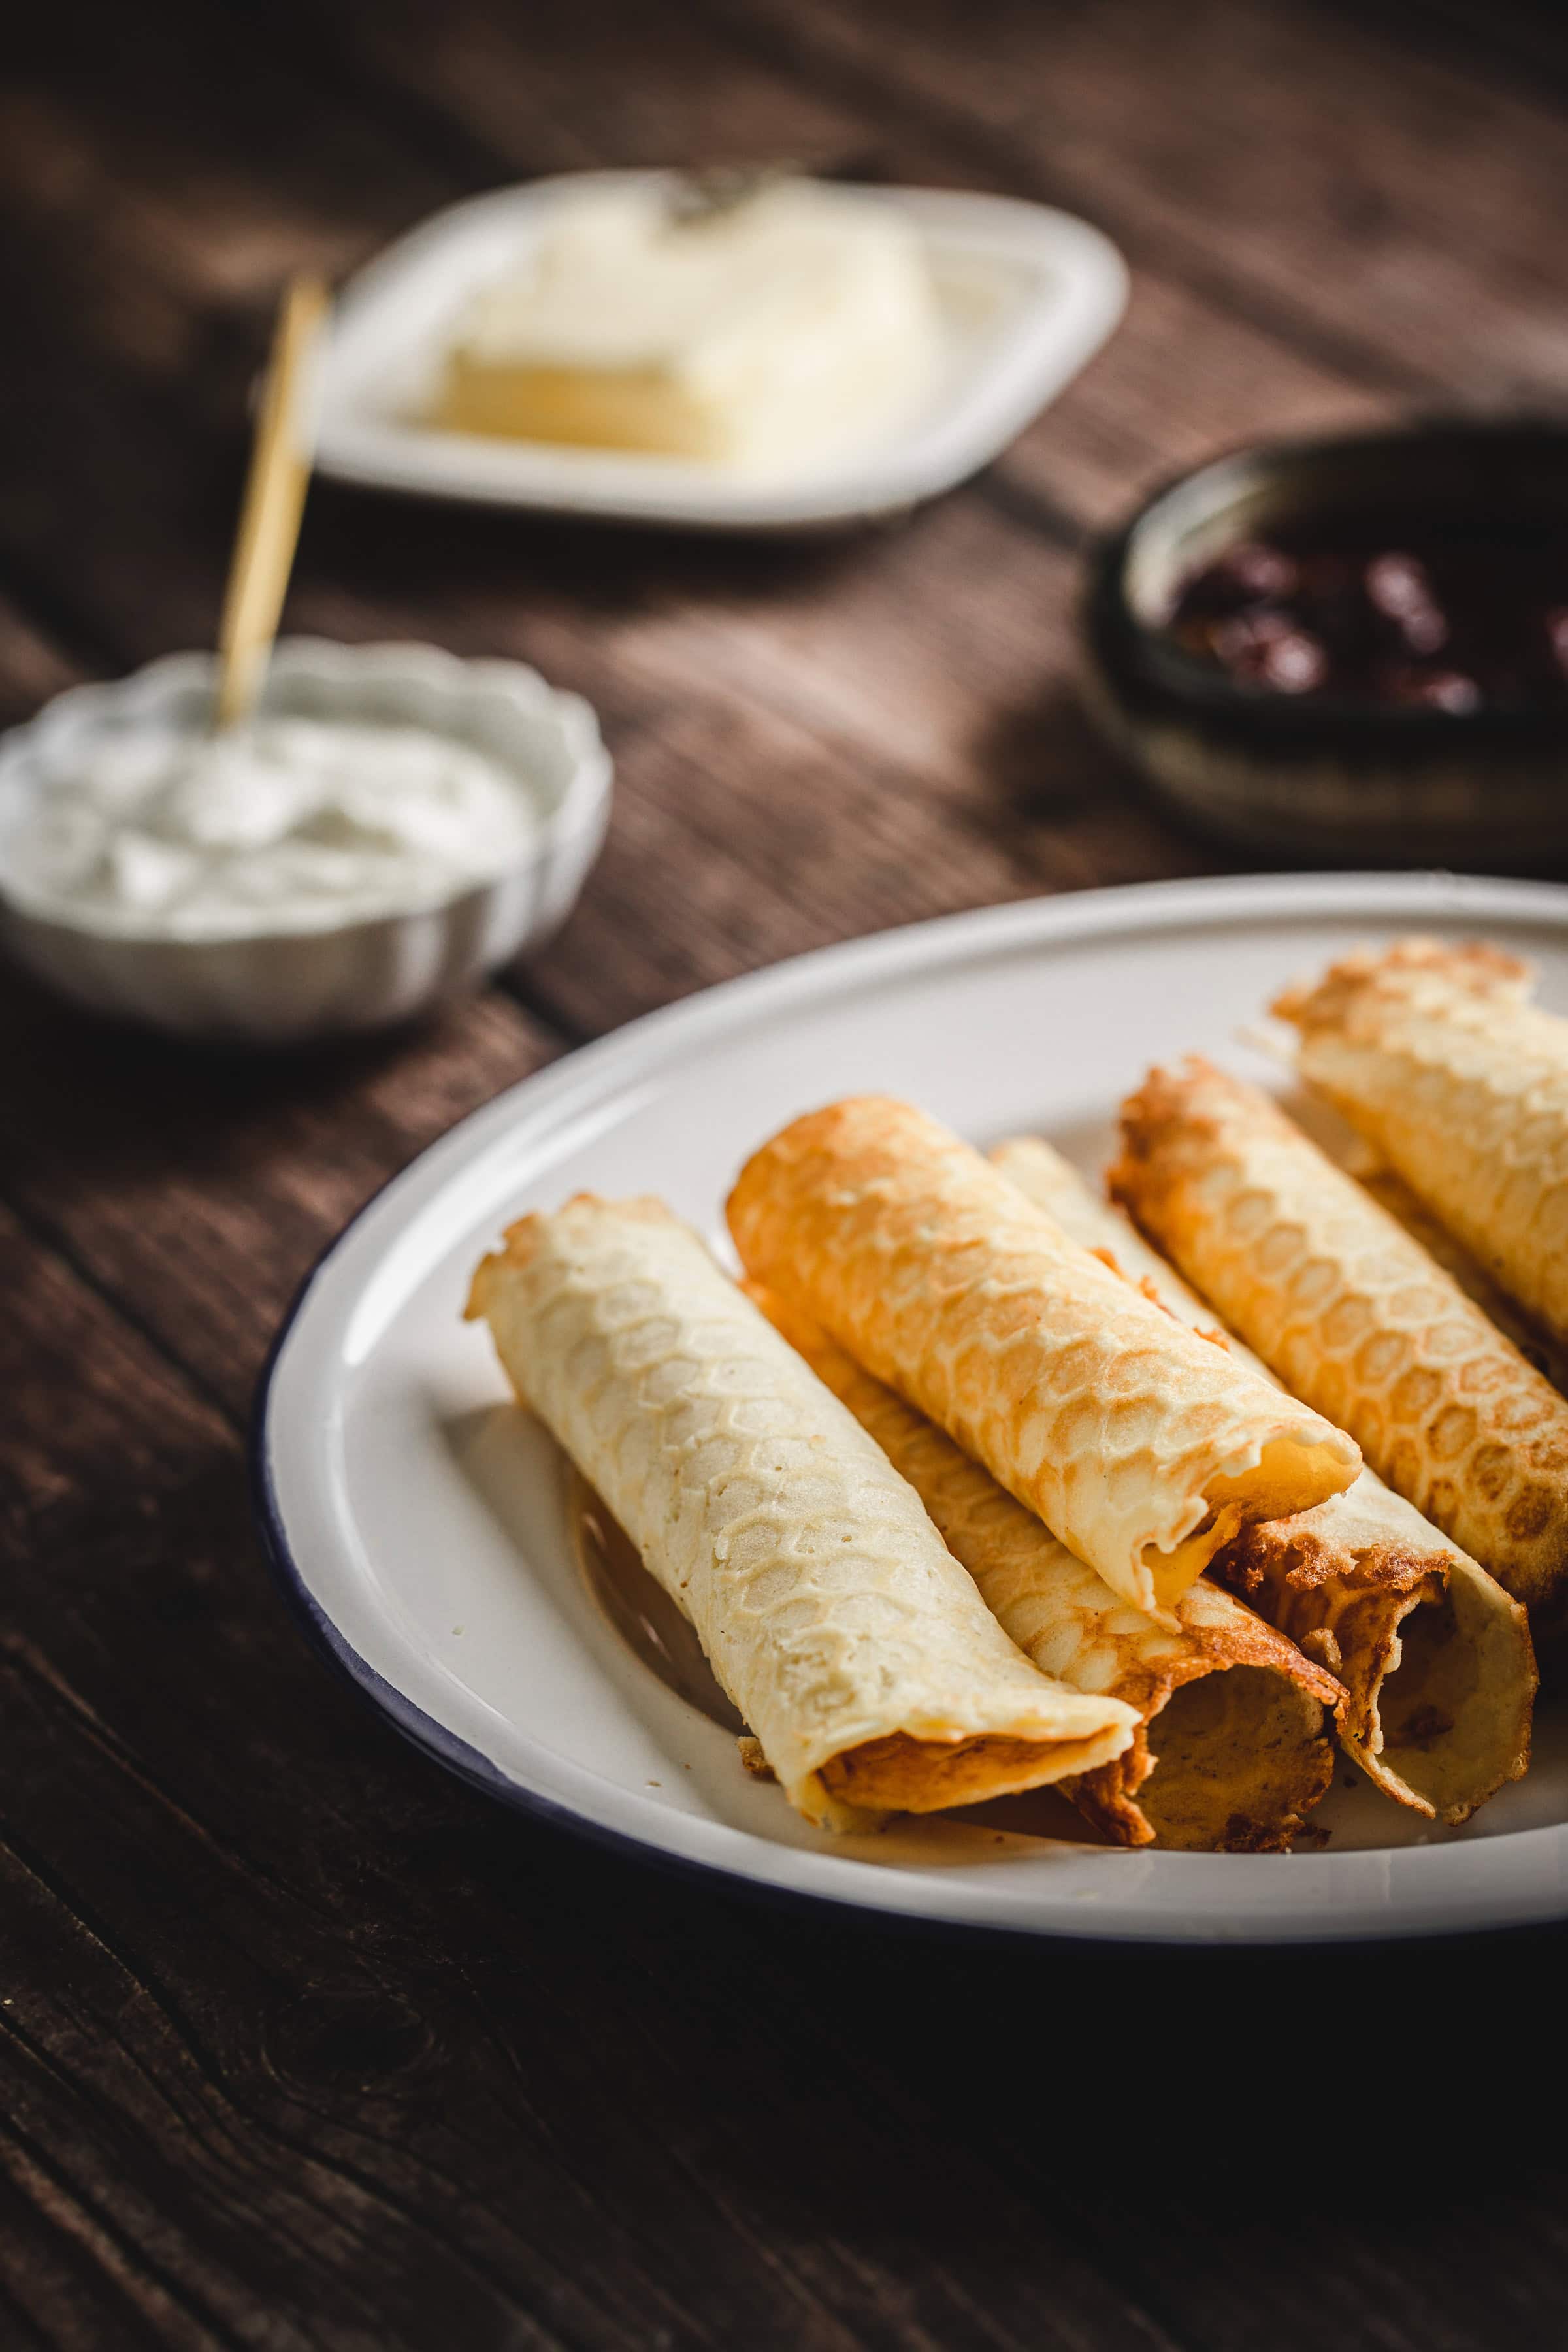
Serve
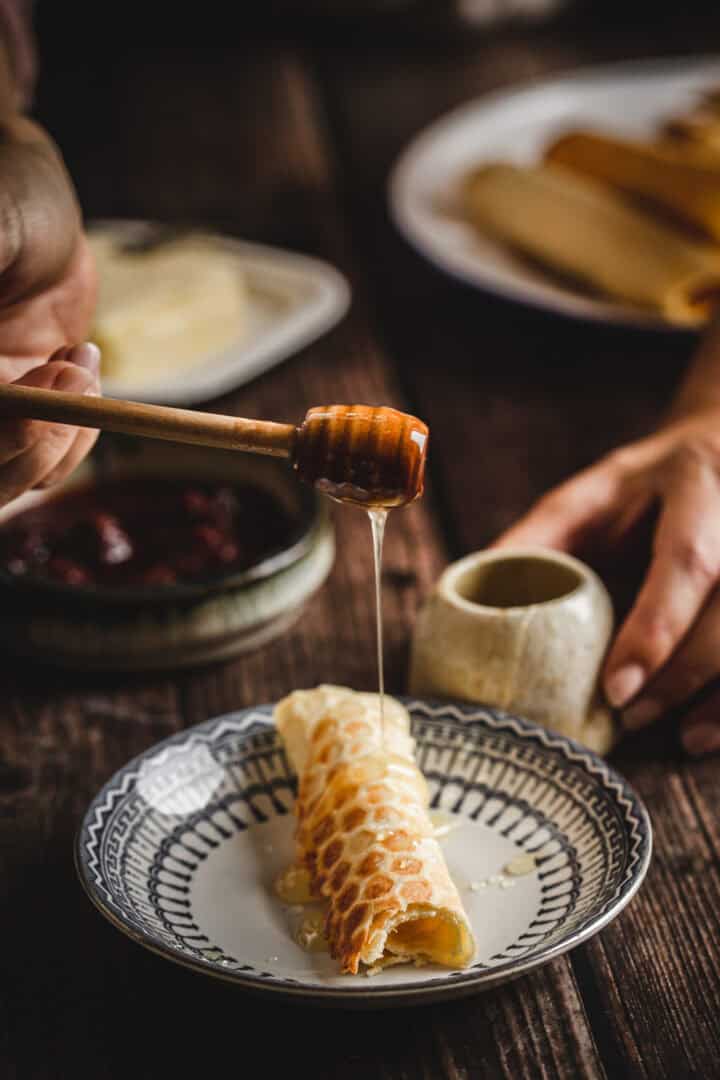
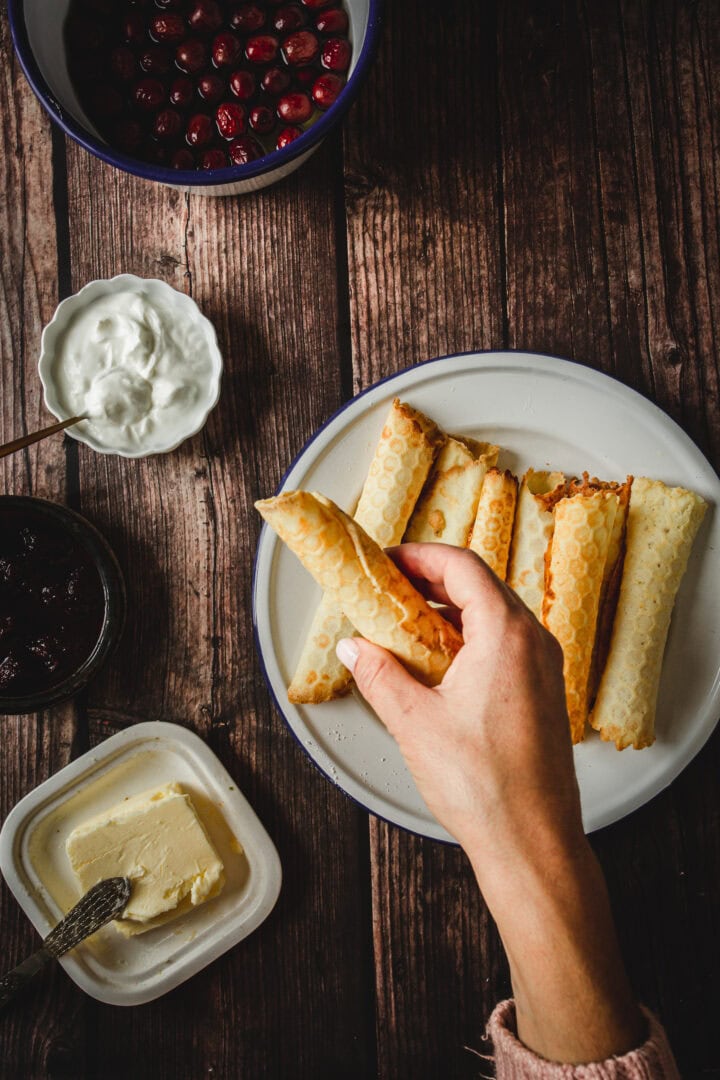
Traditional Russian rolled wafers are delicious on their own, crisp and lightly sweet, but they're also great when filled. Whipped cream, pastry cream, or even chocolate ganache can be piped inside each trubochki for an extra special treat. A dulce de leche filling is also a popular option.
Filling them is simple: wait until the wafer is fully cooled, then carefully insert a small spoon or piping bag into the opening of the trubochki to add your chosen filling. This transforms a humble snack into a dessert that feels indulgent while keeping the classic flavor and texture intact.
Storage
Store the wafers in an airtight container at room temperature, away from moisture and direct sunlight. Avoid stacking them too tightly, as this can cause the wafers to lose their crispness or crack. A simple cookie tin or glass jar with a tight lid works perfectly.
Properly stored, they can stay fresh and crunchy for up to one week, making them a reliable treat to have on hand for tea, snacks, or dessert.
If you want to keep them longer, you can freeze the wafers in a sealed container or freezer-safe bag. Make sure they are completely cooled before freezing to prevent condensation and sogginess.
Top Tips
Top Tips
Punch down and rest before shaping - After the first rise, give the dough a gentle punch and let it rest for five minutes before dividing. This makes it easier to work with and less likely to snap back when you flatten it.
Seal with dry fingers - Any butter or oil on your fingertips will prevent the dough together from sticking properly. Keep a small dish of flour nearby and dust your hands between piroshki so every seam pinches shut cleanly.
Test one before frying the batch - Fry one piroshki first in the hot oil to check your heat. If it browns too fast, the inside will still be raw. If it browns too slowly, it will soak up oil.
Recipe
Tried and loved this recipe? Please leave a 5-star review below! Your reviews mean a lot to me, so if you've got any questions, please let me know in a comment.

Traditional Russian Rolled Wafers
Equipment
- Waffle iron
- Bowl
- Brush
Ingredients
- 300-400 grams 2½-3¼ cups all-purpose flour
- 250 grams 1 cup + 2 tablespoons butter
- 250 grams 1¼ cups granulated sugar
- 100 ml scant ½ cup milk
- 5 large eggs
- 1 teaspoon vegetable oil for greasing
Instructions
- In a large bowl, combine all ingredients (flour, butter, sugar, milk, and eggs) and mix well until you have a smooth, homogeneous batter.
- Heat your waffle iron according to manufacturer's instructions.
- Lightly brush the waffle iron with a small amount of vegetable oil before each waffle.
- Pour 1 to 1½ tablespoons of batter into the waffle iron (amount depends on the size of your waffle iron). Cook according to your waffle iron's recommended time.
- This is the most important step! As soon as you remove each waffle from the iron, immediately roll it into a tube shape while it's still warm and pliable.
- Set the rolled waffle aside to cool. It will crisp up as it cools.
- Continue this process until all batter is used.