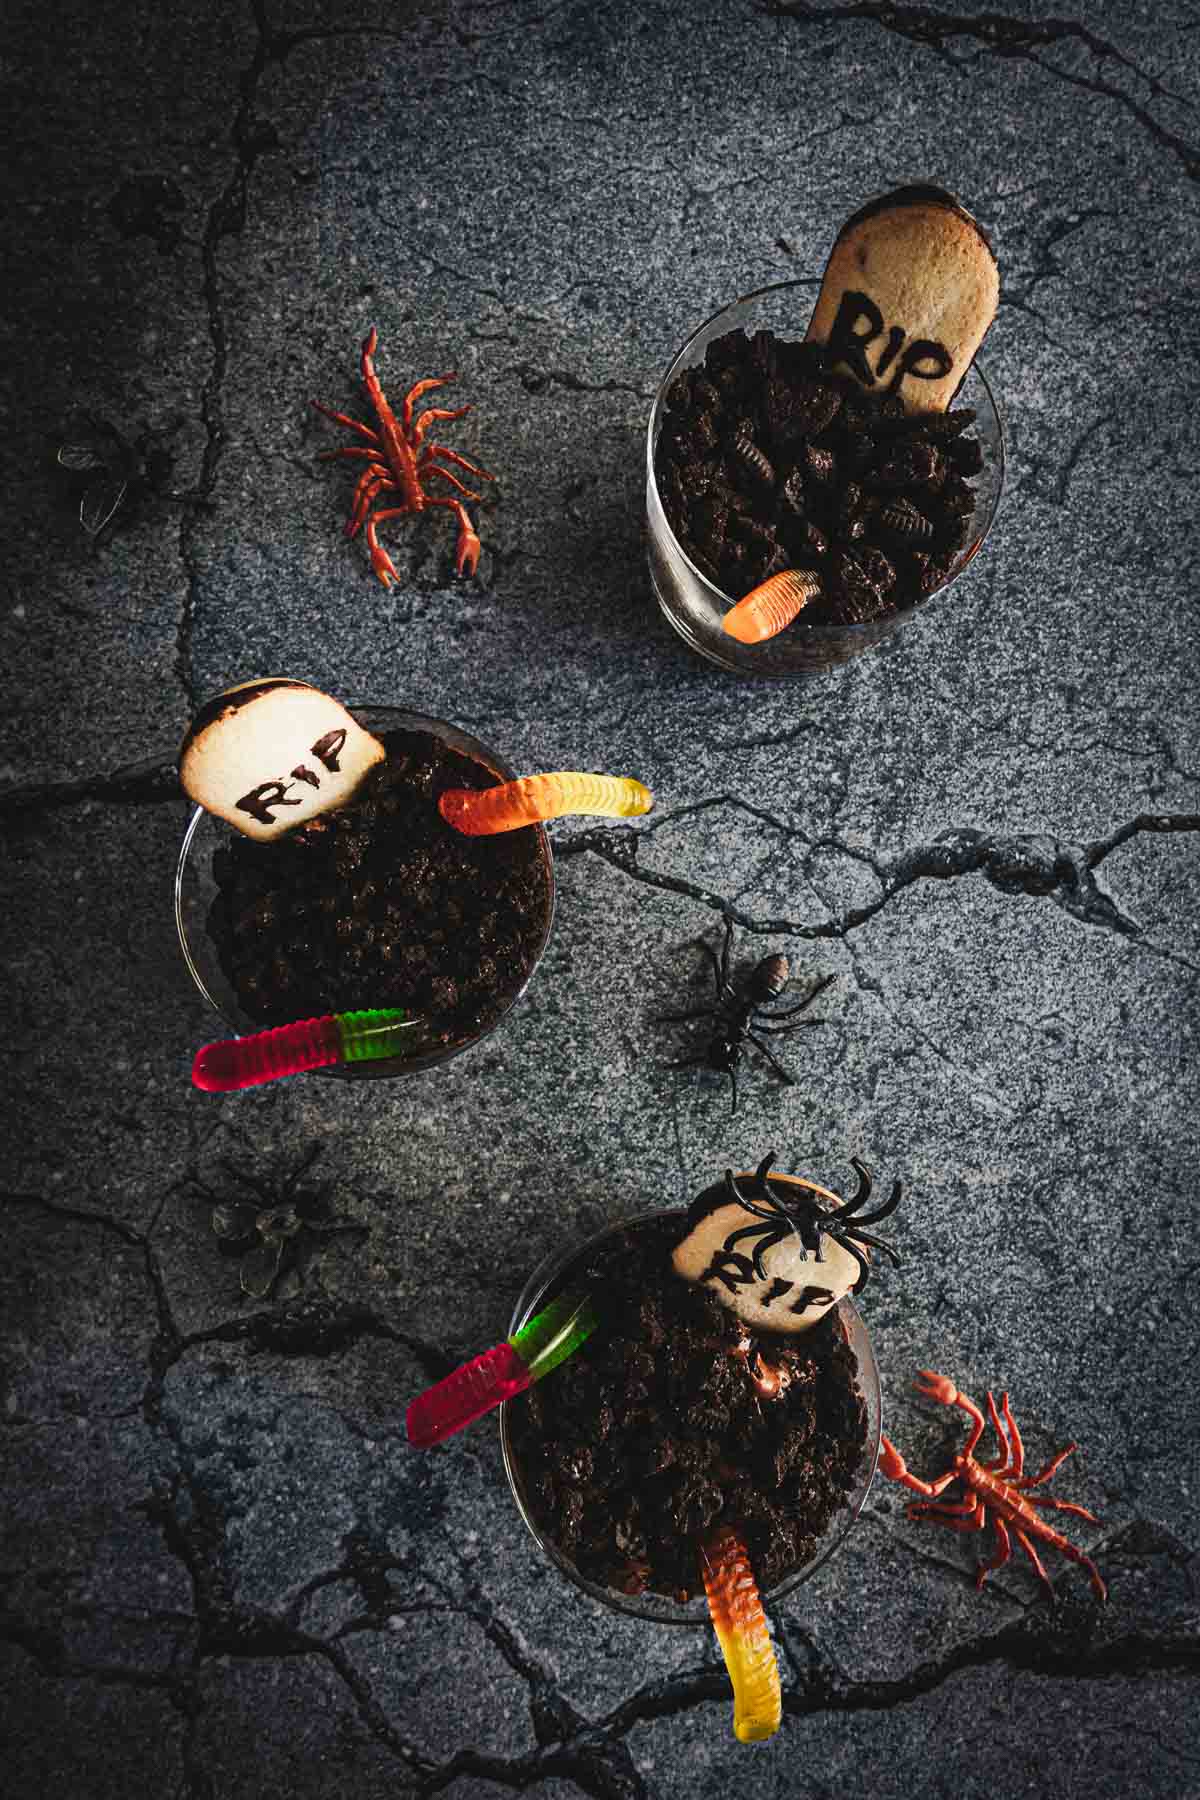
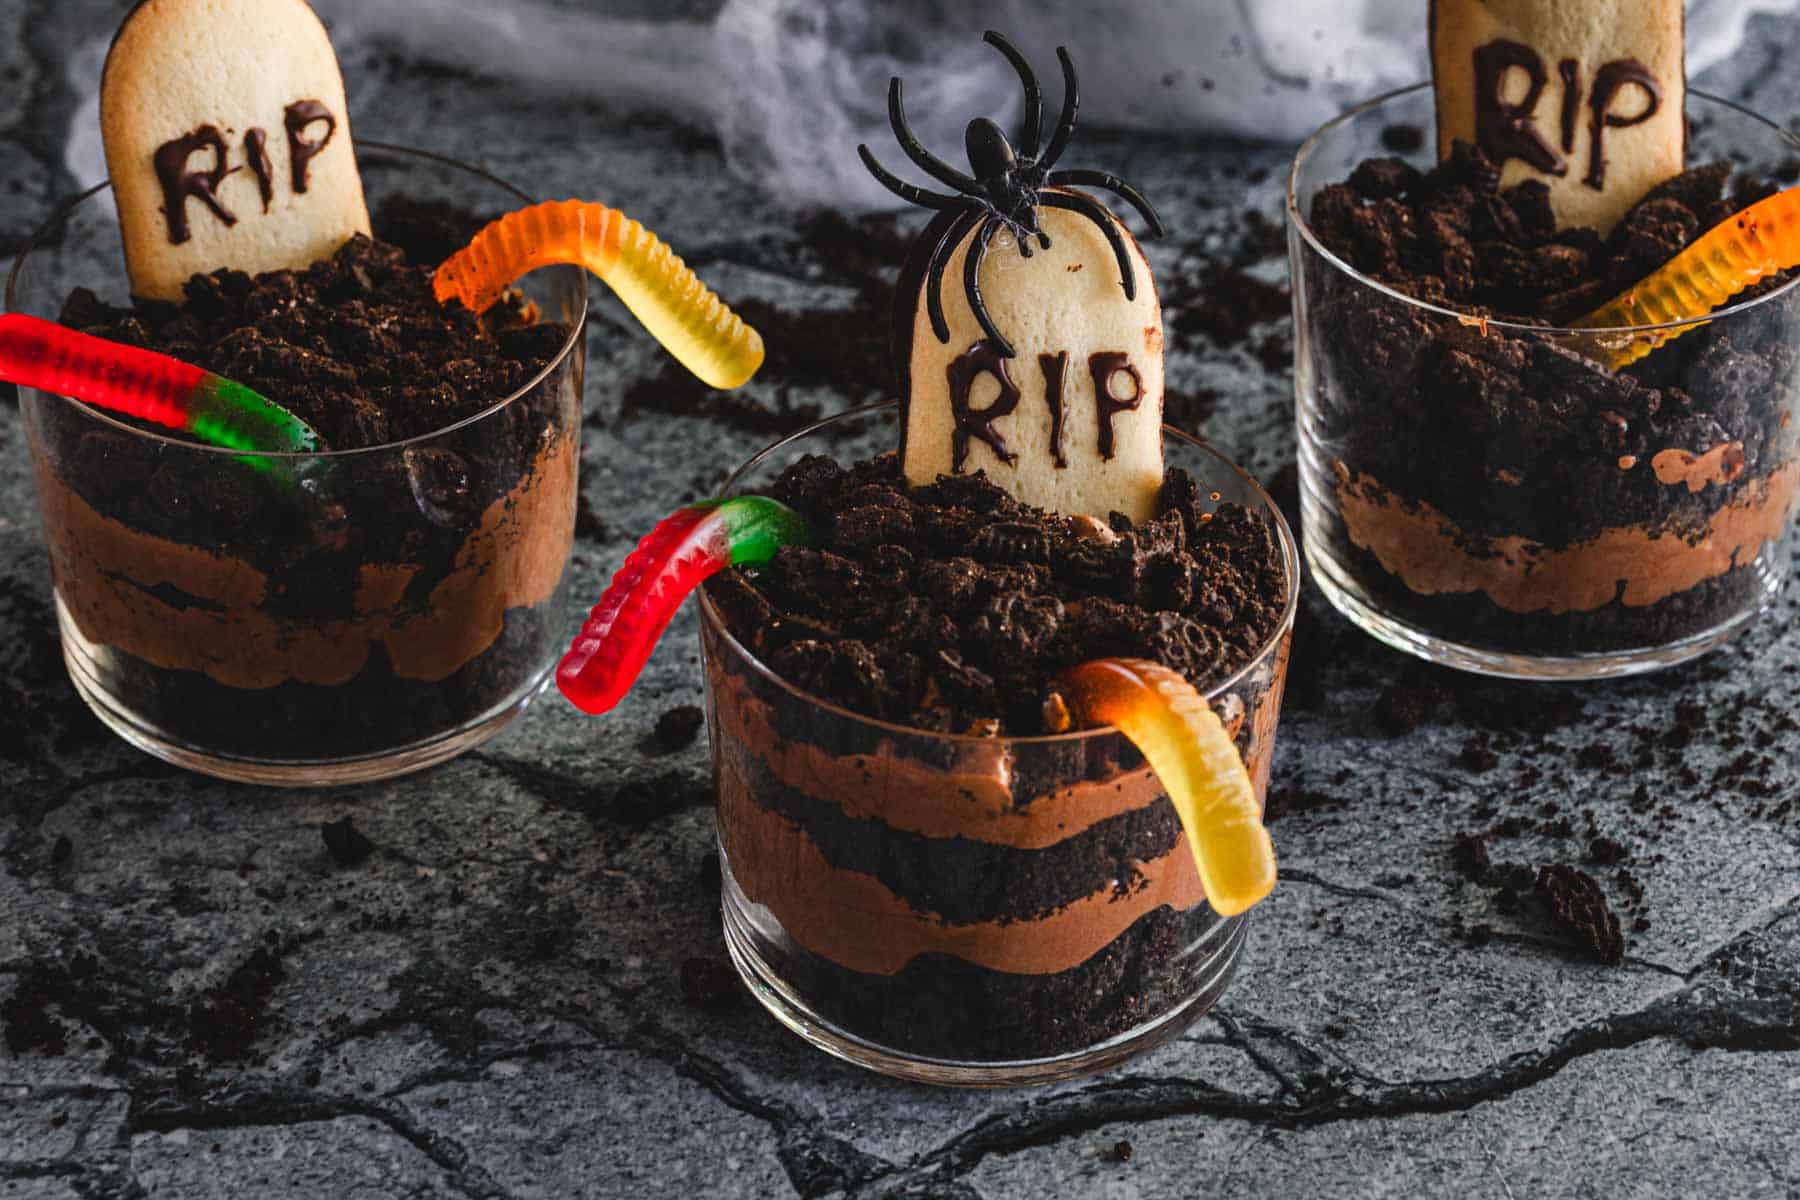
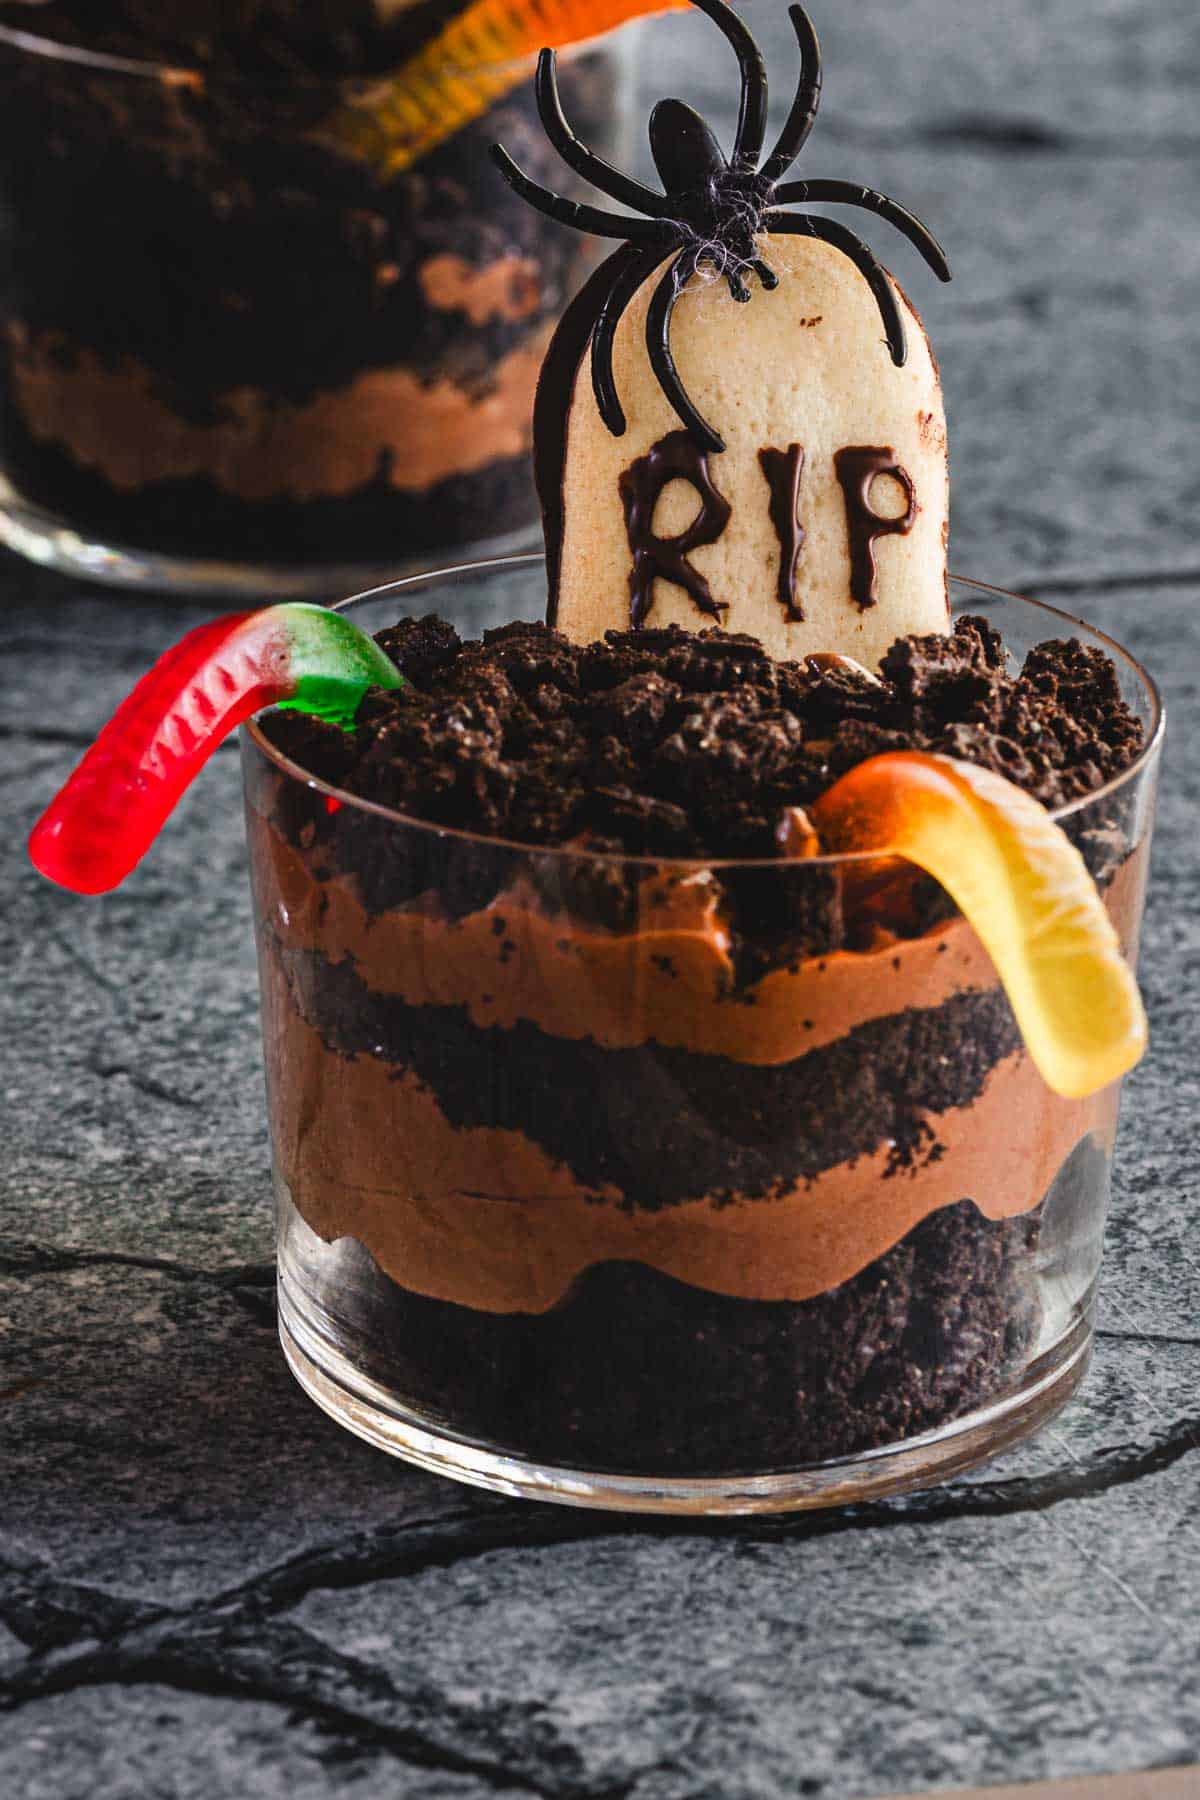
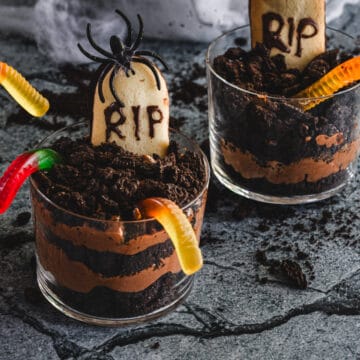
These Halloween chocolate mousse cups are the spooky-cute Halloween dessert of your dreams! With 2-ingredient chocolate mousse & Oreo earth, they make for an easy Halloween treat kids will love.

Halloween is just around the corner, and it's time to start planning some deliciously spooky treats for your upcoming party or gathering. One easy dessert perfect for the occasion is Halloween graveyard chocolate mousse cups. These creative and eerie treats are delicious and add a touch of fun and whimsy to your Halloween-themed event.
But the best part of this dessert for a mother of two toddlers? They take minutes of active work to make, and you can prep them as a fun Halloween activity with your kids!
How to make these easy chocolate mousse cups
Creating these Halloween graveyard chocolate mousse cups couldn't be simpler. Start with a rich and creamy chocolate mousse as your base, made with two simple and wholesome ingredients. No additives, no chocolate pudding mix here!
Once you have your mousse ready, you'll top it off with crushed Oreo cookies to create the appearance of dirt. I use gluten-free Oreos to ensure this dessert is safe for those with gluten intolerances.
Finalize the spooky effect with edible gravestones that you will pipe yourself, gummy worms and other ghoulish garnishes.
I cannot wait to share my spin on this decadent dessert with you. It's the perfect combination of flavor and presentation, making it an unforgettable addition to your Halloween dessert table. So, let's get started on these unique and festive Halloween graveyard chocolate mousse cups!
Why You Are Going to Love This Recipe
I love these chocolate mousse dessert cups for so many reasons.
- First and foremost, they taste sumptuous with their silky-smooth, rich chocolate mousse and crunchy cookie crumbles. The blend of textures makes this dessert a delight to both the palate and the eyes.
- Another reason to fall in love with these mousse cups is their simplicity. It's a no-bake and eggless dessert, so you can prepare it with minimal fuss.
- The recipe is easy to follow, and the ingredients are readily available, making it perfect for impromptu Halloween parties or gatherings.
- One of the best things about these Halloween mousse cups is the opportunity to involve the entire family. Kids will surely have a blast decorating the gravestones and arranging the cookie dirt. Halloween is all about having fun together; this recipe delivers on that.
- The possibilities for customization are endless. You can mix and match cookie combinations or even create different spooktacular designs.
Ingredients
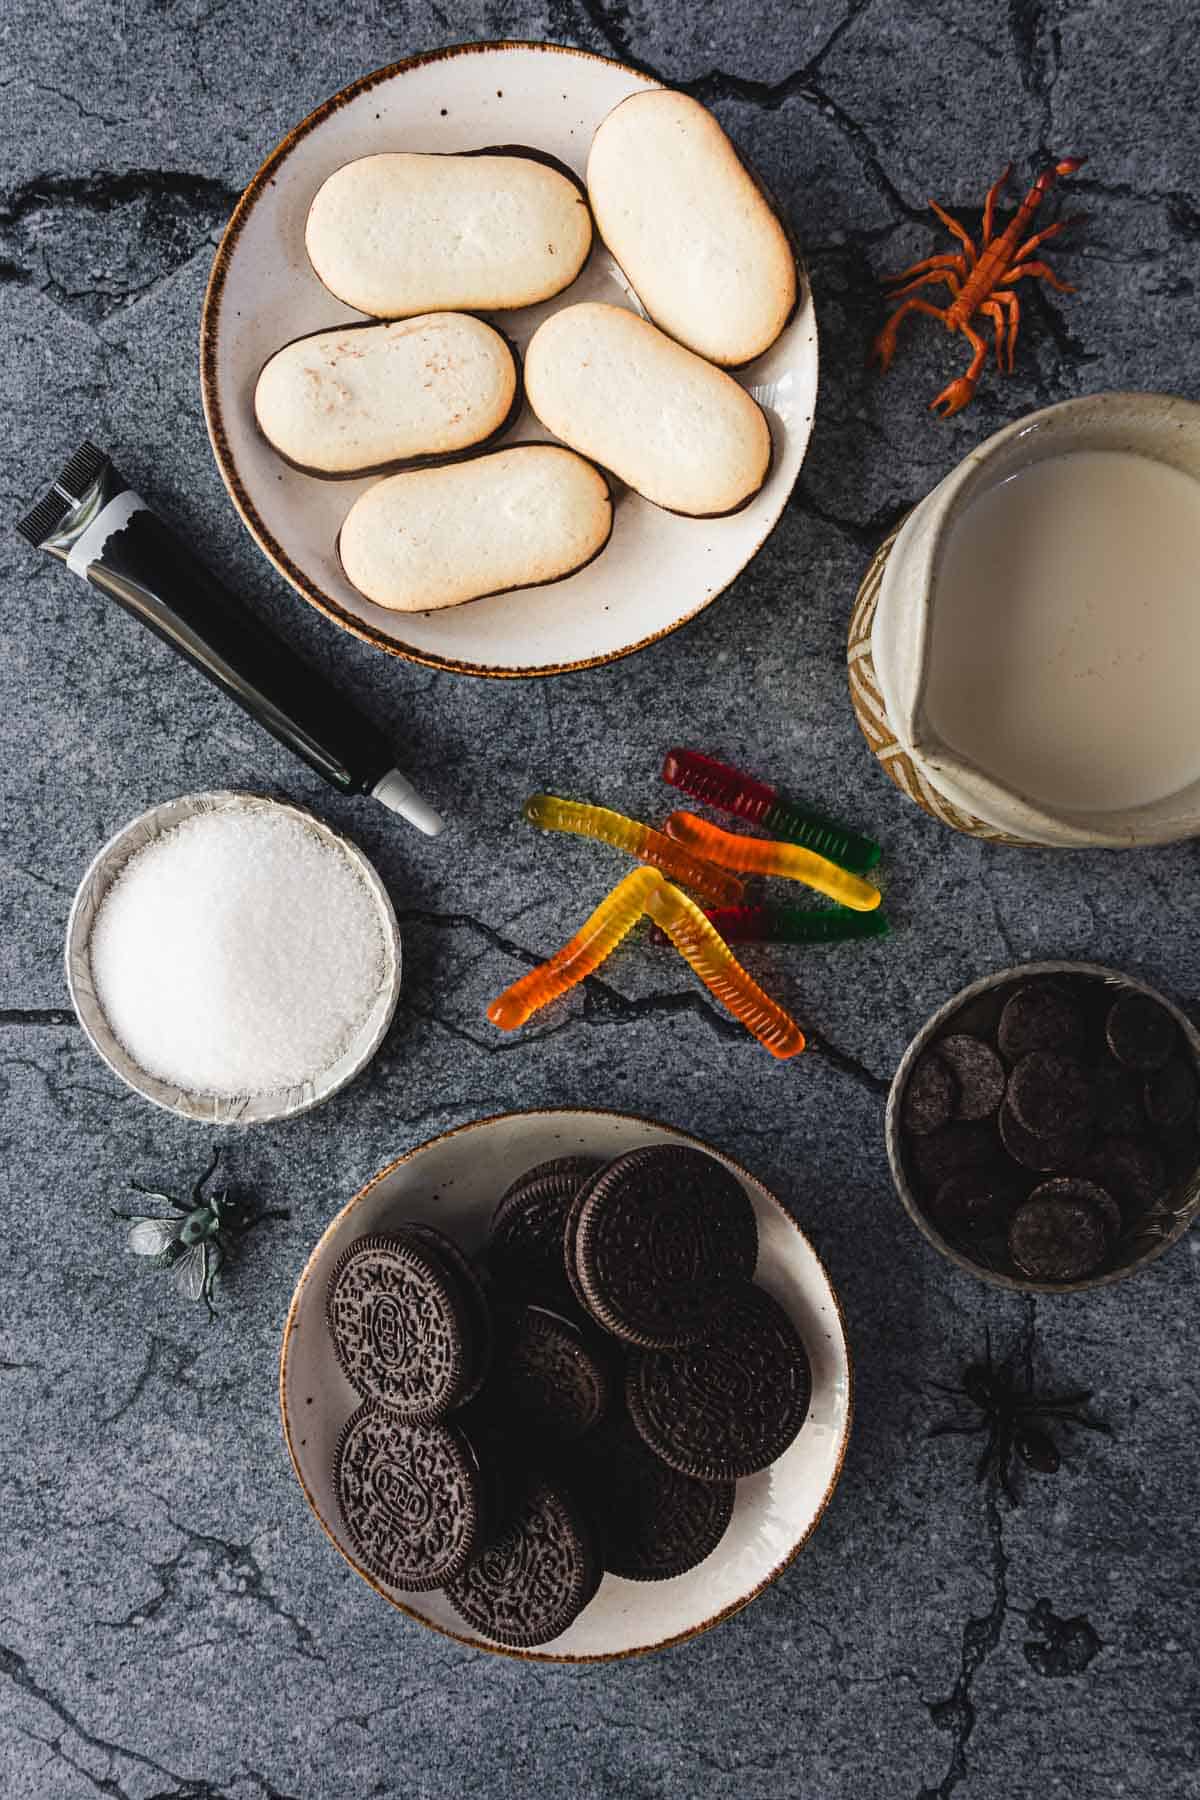
For the Halloween graveyard chocolate mousse cups, we'll need some simple ingredients to create this spooky and delicious dessert. There are three main components for our dessert: the chocolate mousse, the cookie crumbs, and the tombstone cookies.
For the chocolate mousse, you'll need:
- Heavy cream
- Semi-sweet chocolate chips
To prepare the cookie crumbs:
- Chocolate sandwich cookies like Oreos
Lastly, for the tombstone cookies, gather the following items:
- Milano Cookies - you can also use lady finger cookies.
- Black frosting or edible marker
Of course, no graveyard dessert would be complete without some creepy crawlers among the tombstones. So, we'll need:
- Gummy worms - vegan or regular, this is totally optional and up to you!
See recipe card for exact quantities.


Step-By-Step Process
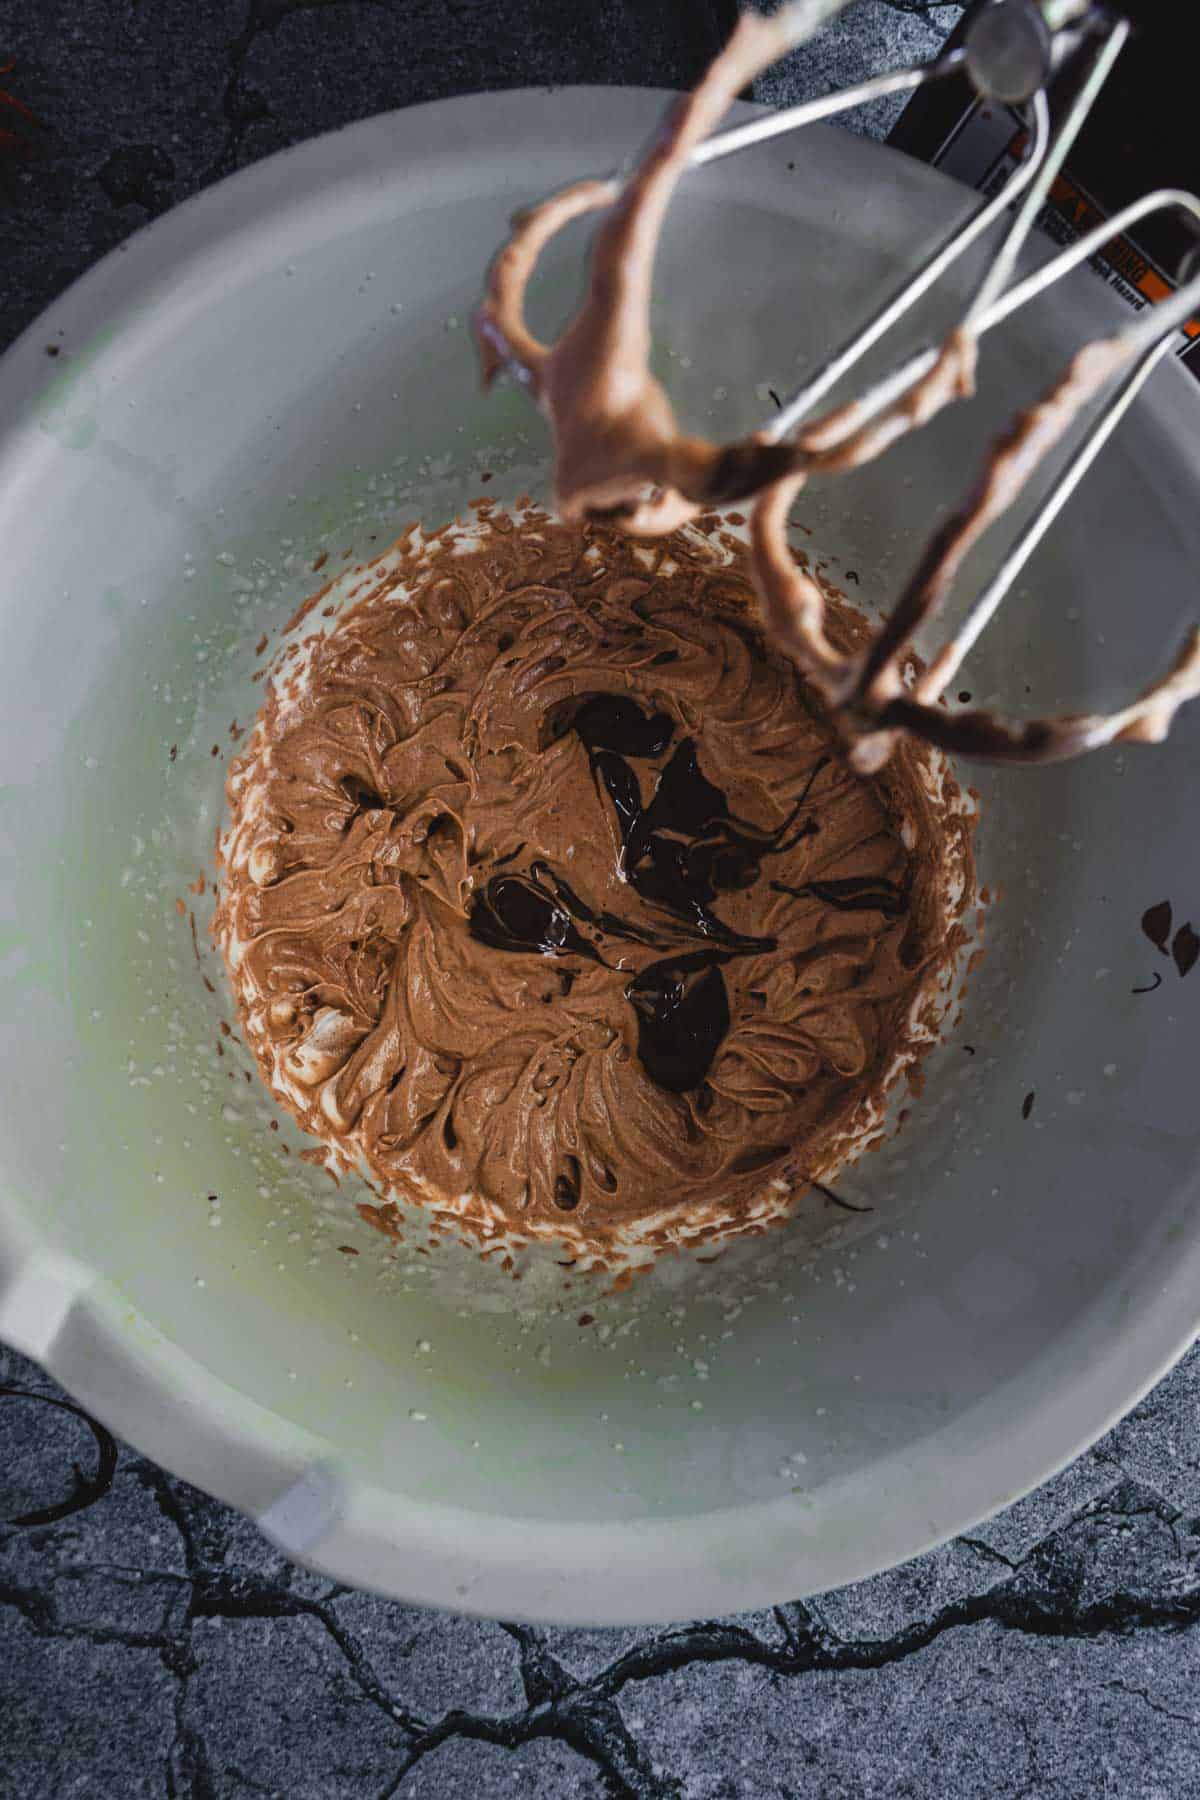
First, whip a medium-sized bowl of cream until soft peaks form. This helps ensure a smooth and creamy chocolate mousse.
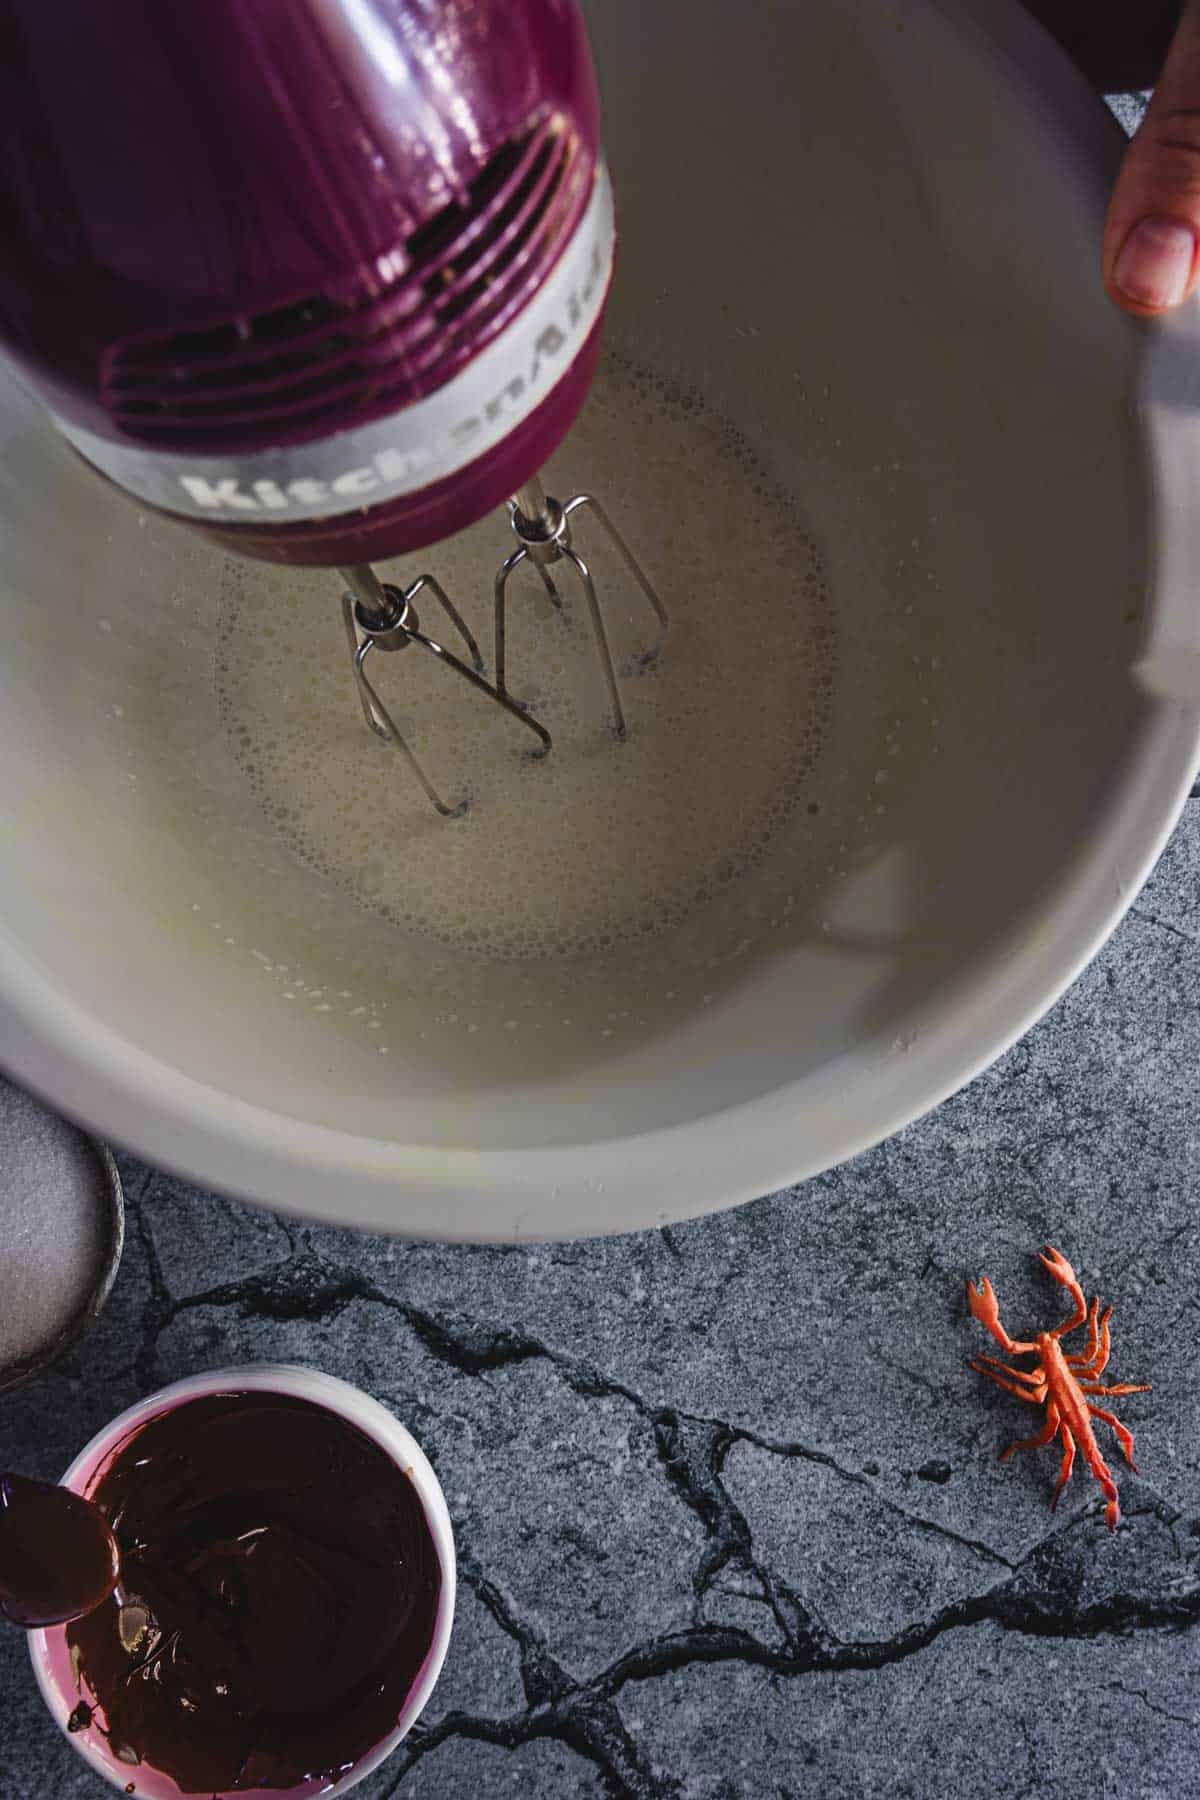
Next, melt chocolate and carefully fold it into the cream, adding one decadent touch to your dessert. Transfer to the fridge for 10 minutes to cool.
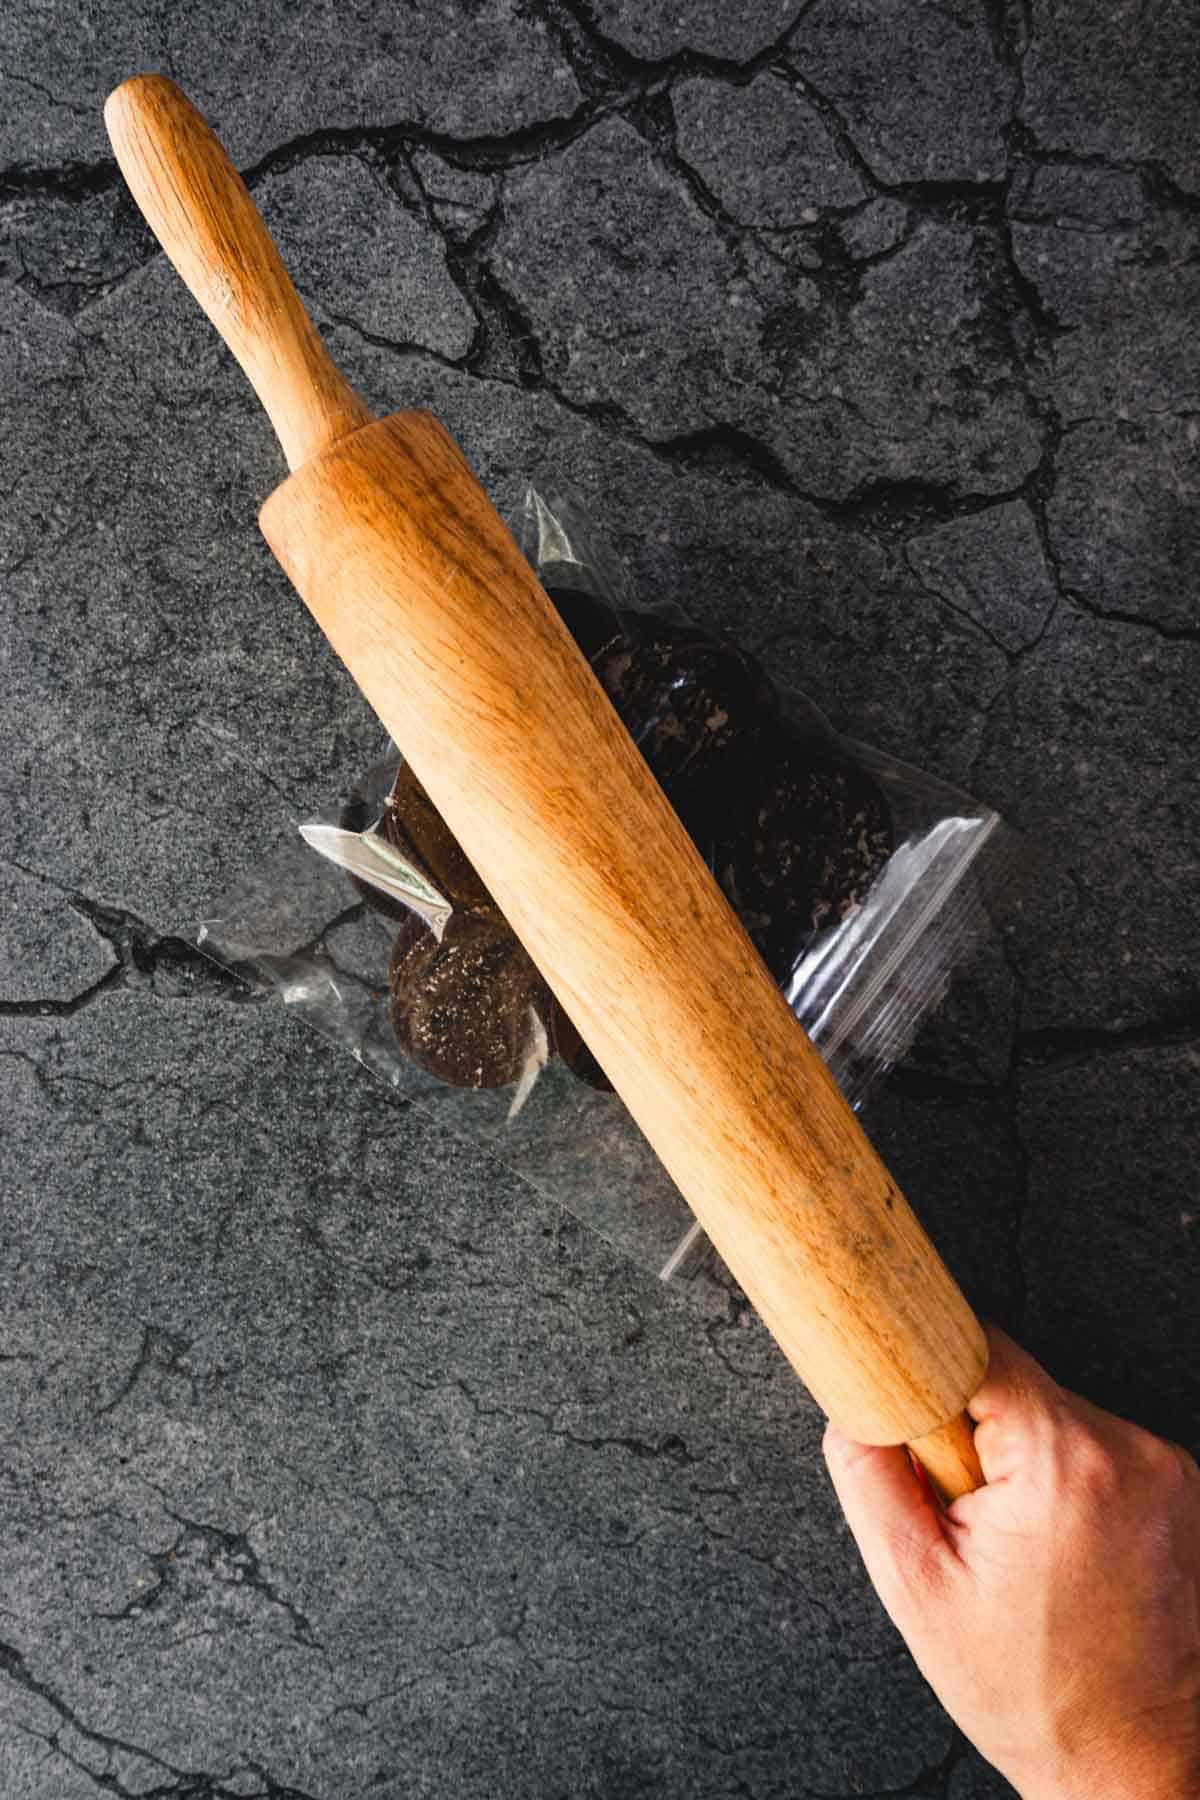
To create the graveyard scene, crush Oreos in a food processor or blender. You can also place them in a Ziplock bag and hit them with a rolling pin to get all your aggression out!
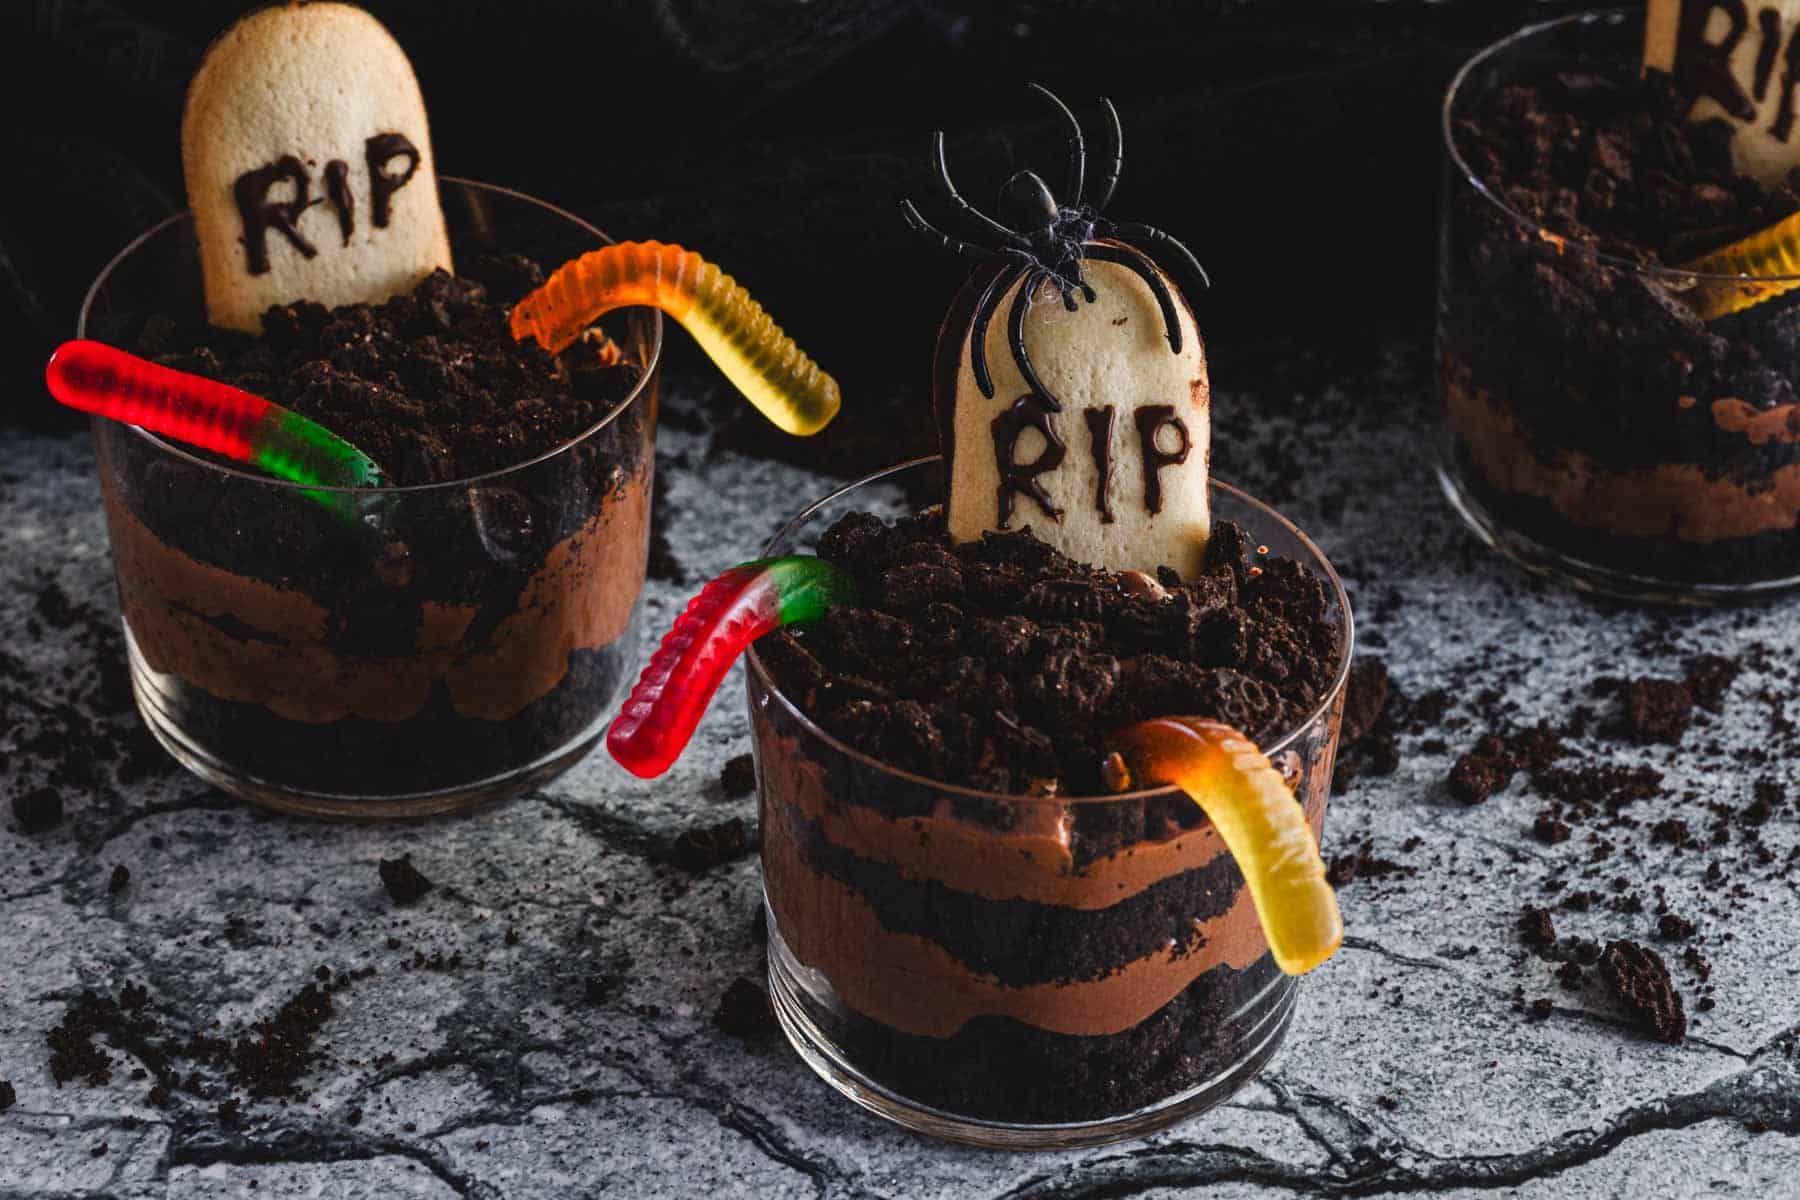
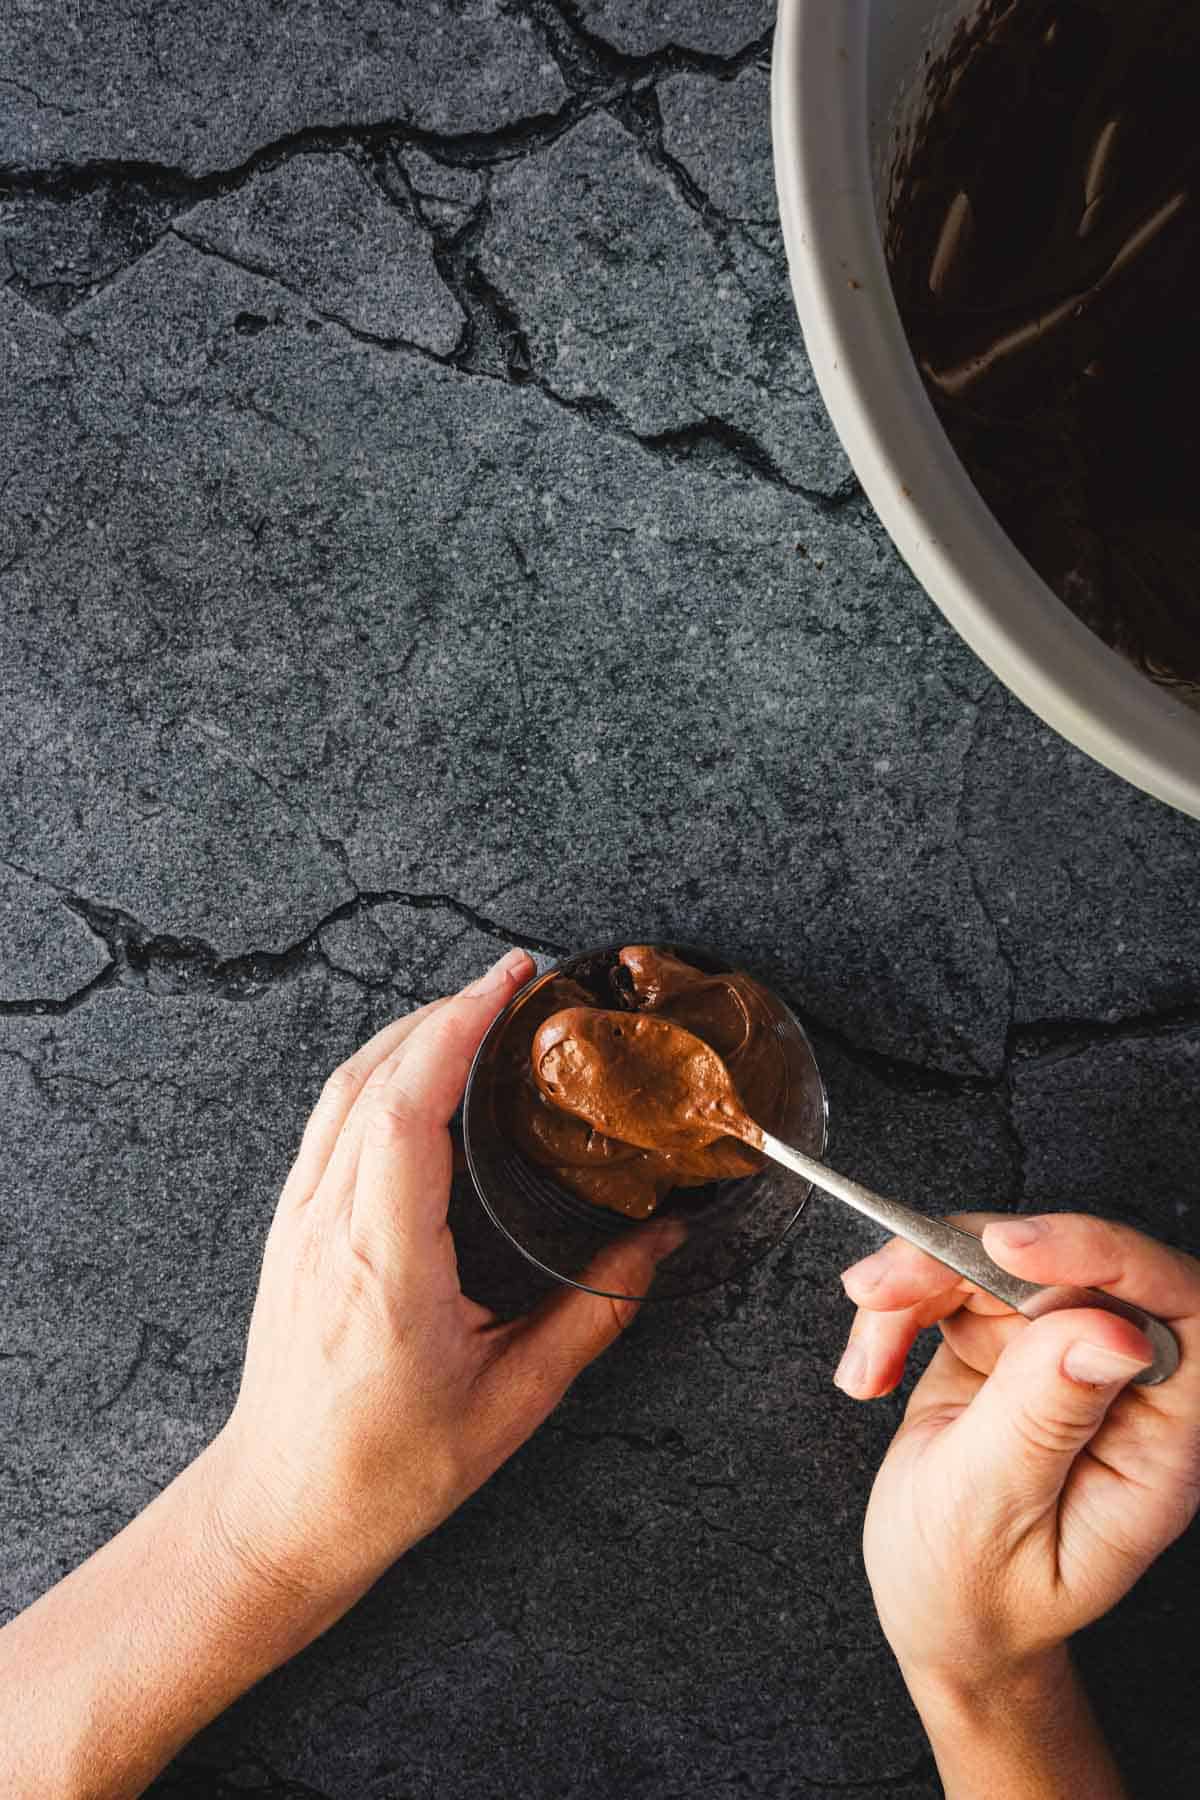
Spoon the crumbs onto the mousse to represent dirt. Top with mousse. Repeat one or two more times.
For the gravestones, use a black edible marker or some melted chocolate to write spooky messages like RIP on the Milano cookies.

After constructing the graveyard display, place the cups in the refrigerator for at least two hours. This helps the chocolate mousse set and allows the flavors to meld.
Once chilled, serve the Chocolate Mousse Graveyard Cups to your pleased and surprised guests.
Storage
Storing your Halloween graveyard chocolate mousse cups is quite simple. In my experience, the key is to ensure that the dessert remains fresh and retains its tasty appearance. Here are a few steps I follow to store these little treats:
Cover each mousse cup with plastic wrap or a lid. Place the covered cups in the refrigerator, not the freezer. Typically, I store them towards the middle or back of my fridge, as these areas are less likely to experience temperature fluctuations.
In terms of duration, I find that the Halloween graveyard chocolate mousse cups can be stored for up to 2-3 days in the refrigerator without losing their charm or taste.
Variations
When it comes to Halloween graveyard chocolate mousse cups, I love experimenting with different flavors and decorations to keep things interesting and appealing to everyone. In this section, I will share a few variations that you can try.
- One easy variation is using different flavors of mousse. You can opt for a vanilla mousse instead of chocolate, or even combine the two for a marbled effect.
- You can also try incorporating seasonal spices, like cinnamon or pumpkin spice, to give the mousse a festive twist.
- For the cookie gravestones, you can replace the classic vanilla cookies with chocolate or gingerbread cookies, or even sugar cookies decorated with edible markers or food coloring.
- As for the toppings, you can switch up the crushed Oreos for different types of cookie crumbs or even crushed pretzels for a salty twist.
- Consider adding some green-tinted coconut flakes to mimic grass, or edible luster dust to create a spooky, foggy atmosphere.
Top Tips
When making Halloween graveyard chocolate mousse cups, I always opt for high-quality chocolate. Dark chocolate with 70% cacao works best for an intense and deep chocolate flavor.
If you have time, prepare the mousse in advance and refrigerate it for at least 2 hours to ensure it sets properly.
To make the cookie "turf," use a food processor or simply put the cookies in a plastic bag and crush them with a rolling pin.
Accompanying Dishes
When I serve Halloween graveyard chocolate mousse cups, I like to offer a variety of complementary dishes to create a fun and spooky atmosphere for my guests. In preparing the table, I ensure each dish brings a unique flavor and visual appeal to the Halloween feast.
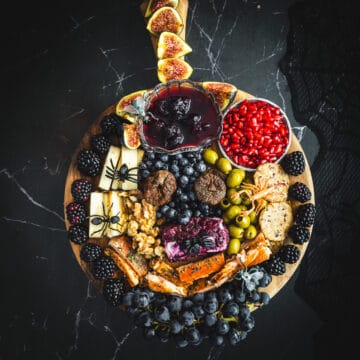
For a spooktacular spread, consider pairing the mousse cups with a Halloween Snack Board. This board offers a delightful assortment of snacks and treats, making it a perfect companion to your graveyard mousse cups.
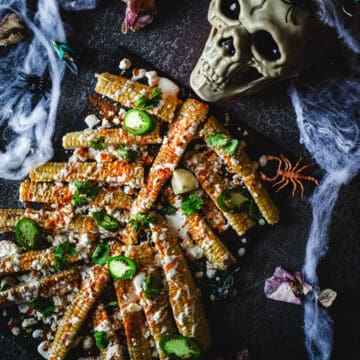
Add some Mexican flair to your party with my Halloween Skeleton Elote Recipe. This creative and visually striking dish will add an extra layer of festivity to your celebration.
For a festive spread, think about serving the mousse cups alongside Halloween Ogre Eyes Deviled Eggs. These uniquely eerie deviled eggs pair wonderfully with your graveyard mousse cups.
If you're looking for a fun adult drink, I am a fan of this Halloween Sangria Recipe. This imaginative and visually captivating sangria will make everyone shiver with its creepy cute vibes!
FAQs
The main ingredients for Halloween graveyard chocolate mousse cups include a chocolate mousse base, Oreo cookies (or similar) for the dirt, and vanilla cookies (or similar) for the tombstones. You can find a detailed ingredient list in this recipe.
To make tombstones for the graveyard dessert, use store-bought or homemade vanilla cookies, and pipe a "RIP" message with a frosting pen. You can also use white chocolate as an alternative.
Yes, you can be creative with your decorations. Some ideas include adding candy bones, gummy worms, or pumpkin candies to the dirt, using food coloring to create "green slime" dripping from the tombstones, or using a food-safe pen to draw skeleton faces on marshmallows.
Preparation time depends on the recipe you choose, but in general, it'll take around 10-15 minutes for the mousse and an additional 8 minutes for the cookies. After assembling, it's best to refrigerate your graveyard mousse cups for at least 30 minutes or until the mousse has set.
The ideal serving size can vary depending on your preference and cup size. A good rule of thumb is to use small dessert bowls or shot glasses, which can serve around four people.
Yes, you can make Halloween graveyard mousse cups ahead of time. I recommend assembling them and storing them in the refrigerator, covered with plastic wrap, up to a day in advance. It's best to add decorations like cookies and candies just before serving to keep them fresh and crisp.
For more Halloween recipes:

Recipe
Tried and loved this recipe? Please leave a 5-star review below! Your reviews mean a lot to me, so if you've got any questions, please let me know in a comment.
Halloween Graveyard Pudding Cups
Ingredients
- 2 cups heavy whipping cream
- 6 oz semi-sweet chocolate wafers or chocolate chips
- 24 Oreo cookies
- 6 Milano double chocolate cookies
- Black frosting or edible marker
- Gummy worms optional
Instructions
- Use black frosting or an edible marker to write "RIP" on 6 Milano cookies to create tombstones. Set them aside.
- In a bowl, whip 2 cups of heavy whipping cream until it forms stiff peaks.
- Place 6 oz of semi-sweet chocolate wafers in a microwave-safe bowl. Microwave at 50% power for 30 seconds at a time, stirring in between until mostly melted.
- Set the chocolate aside to cool for 10 minutes.
- Slowly add in the melted chocolate to the whipped cream. Fold it in until your mousse is ready.
- Sprinkle 3-4 tablespoons of crushed Oreo cookie crumbs at the bottom of 6 clear 9 oz. cups.
- Spoon a layer of whipped mousse cream on top of the crumbs.
- Repeat the previous two steps one more time.
- Top the cups with more crushed Oreo cookie crumbs until they reach the cup's edge.
- Refrigerate the cups for 2 hours before serving.
- Insert one cookie tombstone into the center of each pudding cup.
- If you like, add some gummy worms to the cups for an extra eerie effect.
- Serve graveyard pudding cups with real whipped cream and chocolate!

Rosie says
I tried to make a few test of this for our upcoming Halloween party and indeed, it's a fantastic Halloween dessert idea! The chocolate mousse was rich and creamy, and the spooky graveyard decorations made it extra fun. I'm very excited to make this again for our party!!! thanks heaps!!
Laurie says
These were so cute! I made them as an after school snack for my kids and they could not get over how cute and spooky they were! I am going to make them again for an after trick or treating snack!
Heidi says
I have just done a test-run of this recipe and my mousse cups turned out amazing! I cant wait to make them again on Halloween!
Winnie says
Such a fun and spooky treat! It was also super easy to make, and my kids enjoyed it with me. The chocolate mousse was rich and creamy, and the Oreo' dirt' added a nice crunch. We'll add this to our spread this coming Halloween!
Ginger says
We had so much fun making these this weekend! Each kid took theirs very seriously in trying to make it just like the pictures and ate more gummy worms than they used in the end but a fun edible project that we all enjoyed.