Bosnian Pita Pie is made of handmade dough that is stretched into a paper-thin, translucent pastry, stuffed with various fillings and rolled a unique shape.
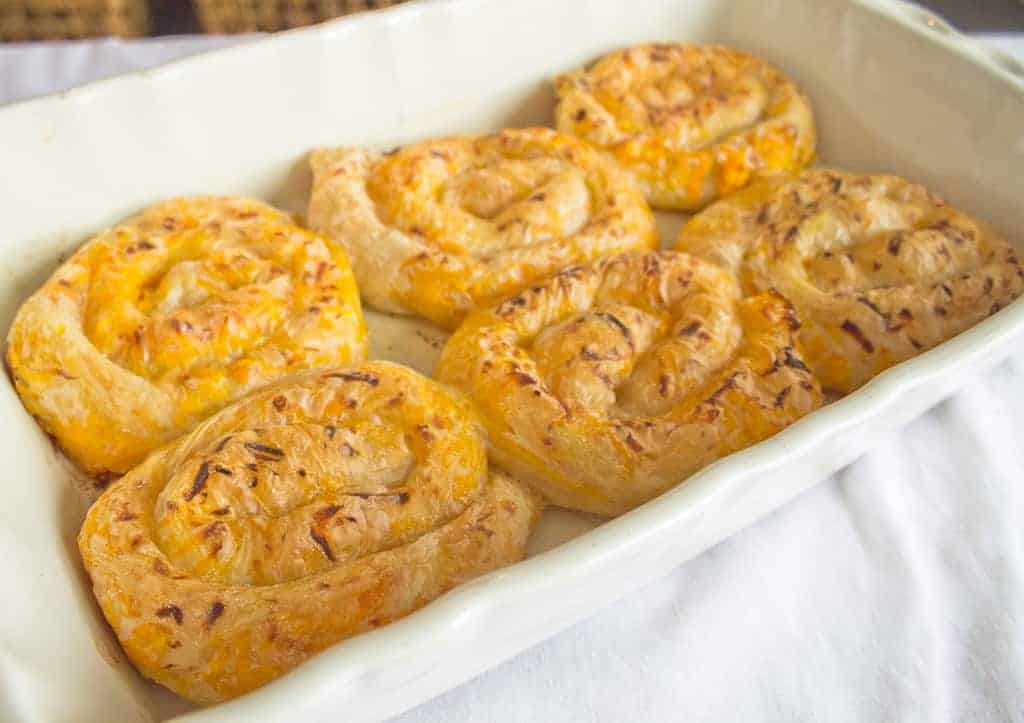
The following entry is not my own story. It is another immigrant's recollection of how food got her and her family through some of the hardest times imaginable to our generation: the civil wars of the former Yugoslavia. I would like to thank Rose for agreeing to share her beautiful skill, recipe and story.
Jump to:
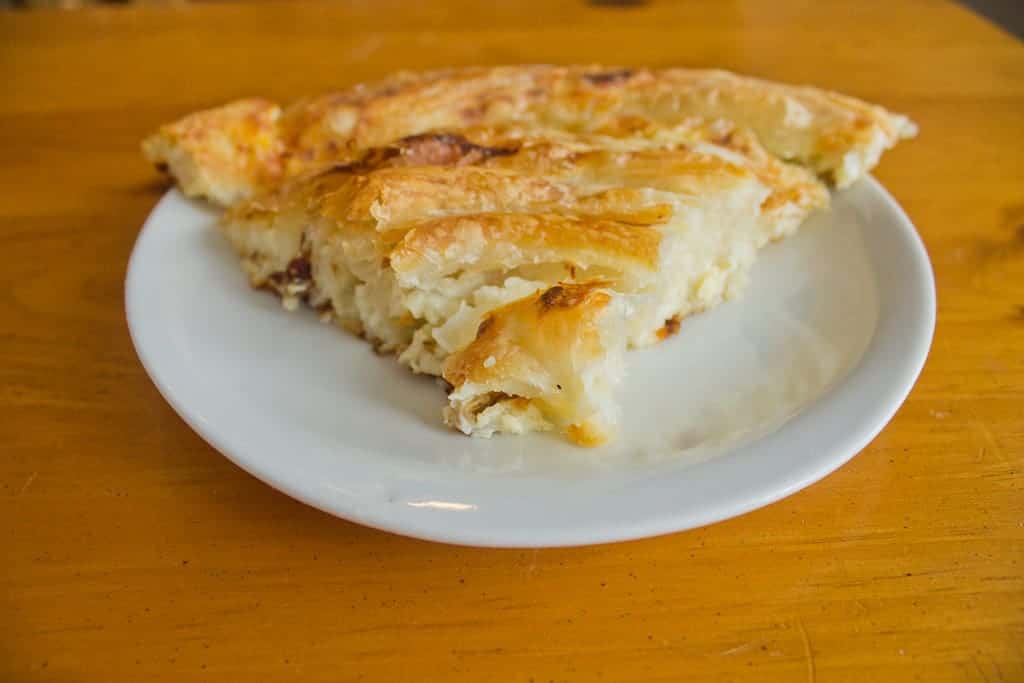
Bosnian Pita: A Historical Dish
Handmade dough is stretched into a paper-thin, translucent pastry, stuffed with various fillings and rolled into traditional Bosnian pita pie.
"I'm the only one in our group of friends who makes this," Rose says to me simply, but her eyes are glinting with pride.
She knows that few people nowadays take the time to make a true Bosnian pita. Few of us have the time or ability to roll out dough, make filling, and assemble one of the most complicated pastries I have ever seen.
And yet, back home, this was "everyday food," even during the turbulent civil wars of Yugoslavia in the 1990s. "Now, it's for special occasions," Rose remarks, and I can't tell if this disappoints her, or makes her even prouder to be one of the last bearers of this skill.
Meet Rose, the Bosnian Pita Maker
Rose grew up in the former Yugoslavia, in the Bosnian town of Tuzla. She is a slight woman with dark curly hair, big eyes that crinkle at the edges, and a captivating smile.
She keeps an immaculate house, full of tasteful personal touches and lots of light. Little Bosnian artifacts are displayed in various corners, bringing a touch of the Middle East to her otherwise modern home.
Rose is a little shy, slow to open up at first, but her warmth radiates through her words, breaking down barriers and making one feel welcome at her home and table.
Practice Makes Perfect
After many years of practice, her Bosnian pita-making technique is flawless. She moves through the kitchen with confidence, gently massaging the dough, tugging at the edges of paper-thin pastry, stretching it to a seemingly impossible size.
Yet Rose didn't start making pita until "The War" started, when she could no longer go to her mom for this traditional pie.
Learning to make Bosnian Pita: The Technique
Learning how to make Bosnian pita herself proved to be the perfect solution for days of war, when transport was cut off, supplies were uncertain, and people often had to make due with very little for very long stretches of time.
"You can put anything in a pie. Whatever came from the garden, or whatever comes from humanitarian aid," Rose says nonchalantly, as though the experience of waiting on Red Cross and UN planes to drop off food and bandages was a regular occurrence for me as well.
For similar stuffed dough dishes, I recommend my cheesy balkan bourekas with eggplant and tomatoes, baked russian vegetarian priozhki (three different fillings), or classic vegan mushroom bourekas.
What Fillings go in a Bosnian Pita?
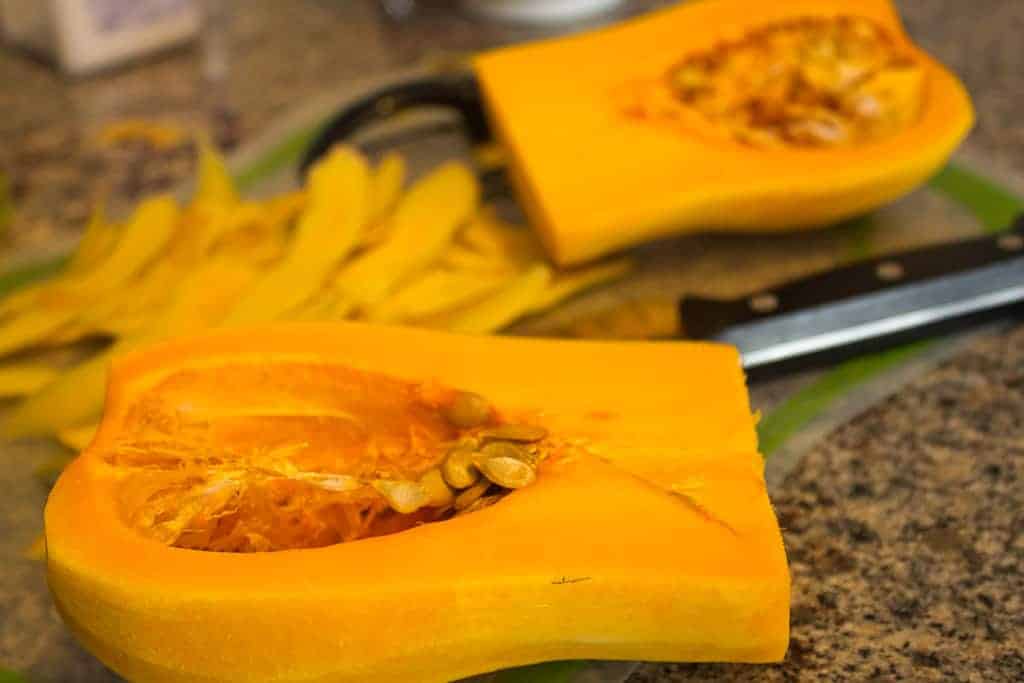
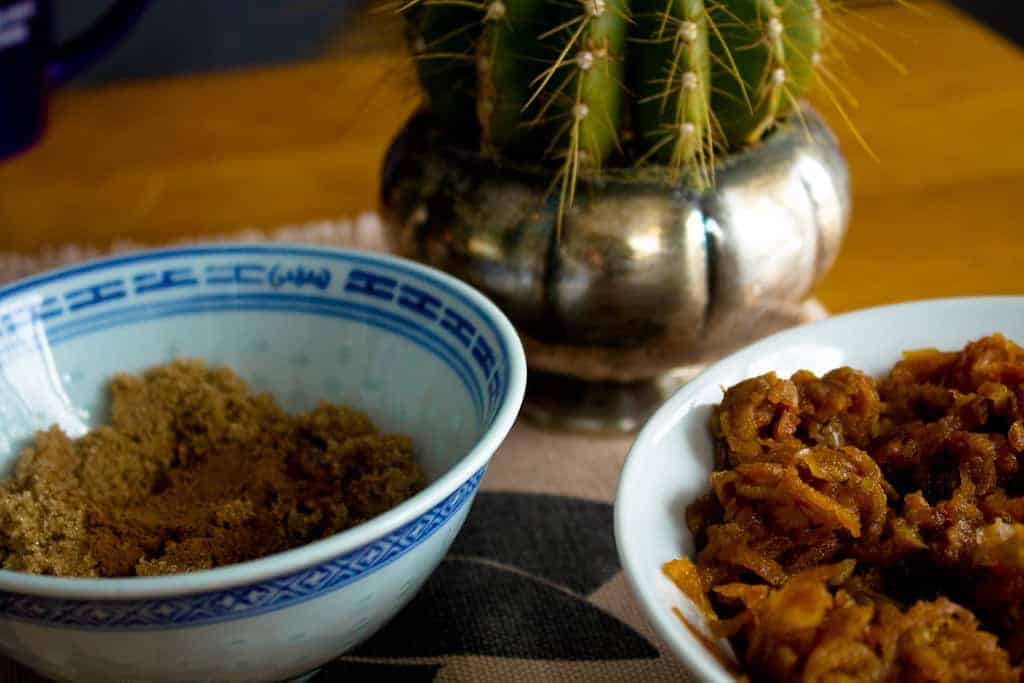
On the day we cook together, Rose assembles three fillings: butternut squash, cottage cheese, and apples with cinnamon and brown sugar. Like my vegetarian empanadas, there are three different fillings - so start with the one you find most exciting!
They are simple, free of superfluous ingredients and shock-me spices. The resulting flavours are clean, vibrant.
But the fillings could really be anything: add some spinach to your cottage cheese, or some raisins or walnuts to your apples. Rose is as resilient today as she was during the war.
"Until today, that's how I cook. Open the fridge, and [I take] whatever is in it, as long as there's no waste."
You could use the following fillings for Bosnian Pita Pie:
- grated butternut squash or pumpkin (see recipe below)
- apples with cinnamon and sugar (see recipe below)
- cheese
- potatoes (as in my vareniki)
- spinach and ricotta / spinach and feta
- mushrooms (use the recipe from my mushroom bourekas)
- cabbage (as in my Russian pirozhki)
This adaptability is a hard-earned skill, an openness to changing circumstances that is familiar to others who have experienced strife, food shortages, poverty, or uncertainty. Yet not everyone who makes Bosnian pita is that open to improvisation. Not everyone adapted to the war, Rose says.
"My mom couldn't adjust to the limitations. She stopped making it (pita)," she lowers her eyes, her voice getting taut.
How to improvise when making Bosnian pie
When Rose rolls out her dough to make Bosnian pita, she brings this history with her into the kitchen. She brings in the days when the fridge was bare and the garden overflowing with nothing but spinach.
And above all, she brings in that sense of resilience, the make-do-out-of-nothing attitude that I recognize from my own grandmothers.
I believe it is precisely this that makes this immigrant's table so welcoming.
Ingredients
Bosnian pita is less about a particular flavor, and more about a technique of making dough. It will taste of whatever filling you choose, so you're really only limited by your imagination!
Remember what Rose said about adaptability? Pretty much anything will taste delicious inside a Bosnian pita! Want onions? Go for it. Ground beef and garlic for a bosnian meat pie? Its all up to you!
Bosnian Pita Dough:
- All-purpose flour, unbleached – Provides the structure for the dough, creating a soft yet elastic texture perfect for stretching.
- Salt and pepper – Enhances the flavor of the dough and helps with gluten development for a pliable consistency.
- Warm water – A mix of boiling and cold water ensures the right temperature for a smooth, easy-to-knead dough.
Butternut squash filling:
- Butternut squash, peeled and shredded – Brings a naturally sweet, earthy taste and a soft texture when baked.
- Sugar – Balances the mild bitterness of the squash and enhances its caramelized flavor.
- Salt – Draws out moisture from the squash and rounds out the sweetness.
Bosnian Cheese Pie:
- Cottage cheese, drained – Adds creaminess and a mild tang to the cheese pie, creating a rich and satisfying filling.
- Eggs – Bind the filling together and contribute to a tender, custard-like texture.
- Olive oil – Adds a hint of richness and prevents the filling from drying out.
- Feta cheese (optional) – Brings a salty, tangy depth of flavor for a more pronounced taste.
- Salt – Highlights the natural creaminess of the cheeses and balances the overall flavor.
Apple filling:
- Sour apples, shredded – Provide a tart contrast to the sweet elements, keeping the filling fresh and flavorful.
- Walnuts, crushed – Offer a nutty crunch that complements the softness of the baked apples.
- Brown sugar – Enhances the apples’ natural sweetness with a hint of molasses-like depth.
- Ground cinnamon – Infuses the filling with warmth and spice, making it fragrant and comforting.
Equipment
- Mixing bowls (get this set)
- Solids measuring cups (I like these and these)
- Measuring spoons
- Rolling pin
- Kitchen towels
- Baking sheets, 9" enamel round pie dish, baking tray, or baking pan for baking the pitas
- Oven
How to make homemade Bosnian Pita Pie
Make the filling of your choice
To make the filling of your choice, simply mix all the ingredients in a medium bowl. Taste and adjust seasonings as desired.
Make the dough
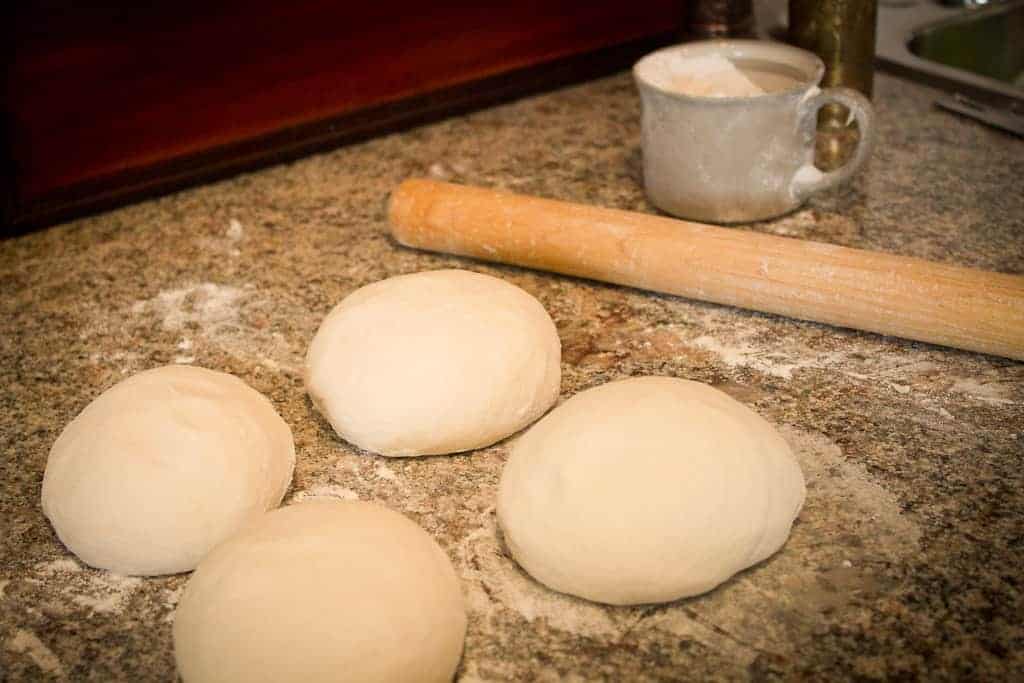
Place 4 cups of flour in a large bowl with a couple of tablespoons of oil or melted butter. Add water gradually to it, until dough is soft but not sticky.
Flour work surface generously. Place dough on counter and knead down gently for about 10-15 minutes, until the dough is springy to the touch. Knead in soft motions, almost stroking the dough and transferring it from hand to hand. Do not be too violent.
Divide dough into 4 pieces. Flour surface lightly, and roll each piece into a ball, transferring from hand to hand gently. Then, adding a bit of flour as needed. roll out dough thinly with a rolling pin, like thin pizza dough.
Let the dough rest
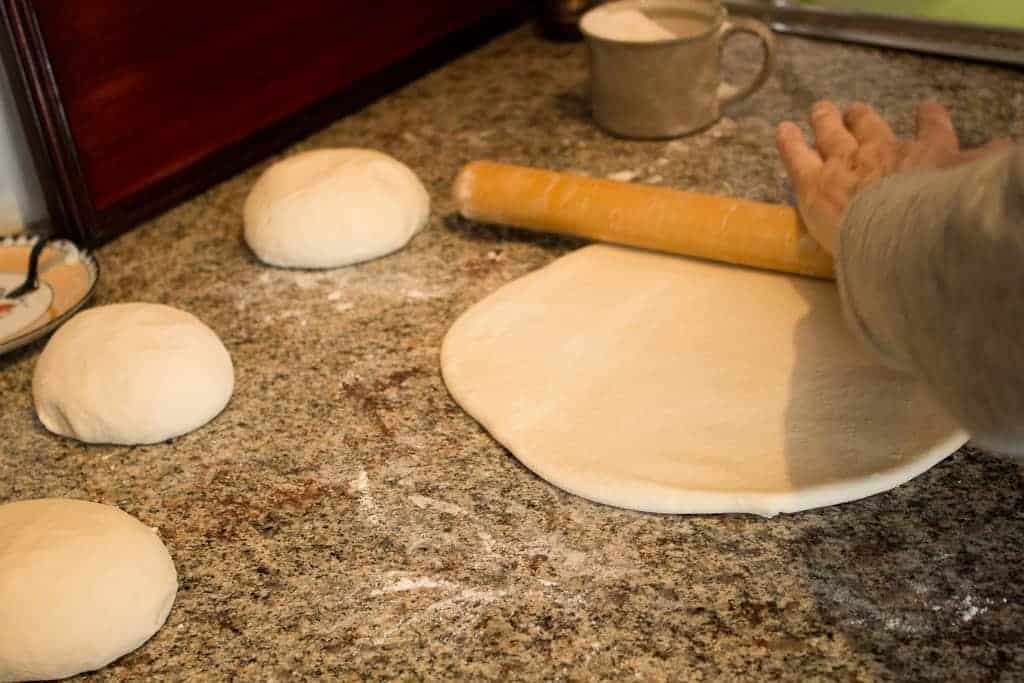
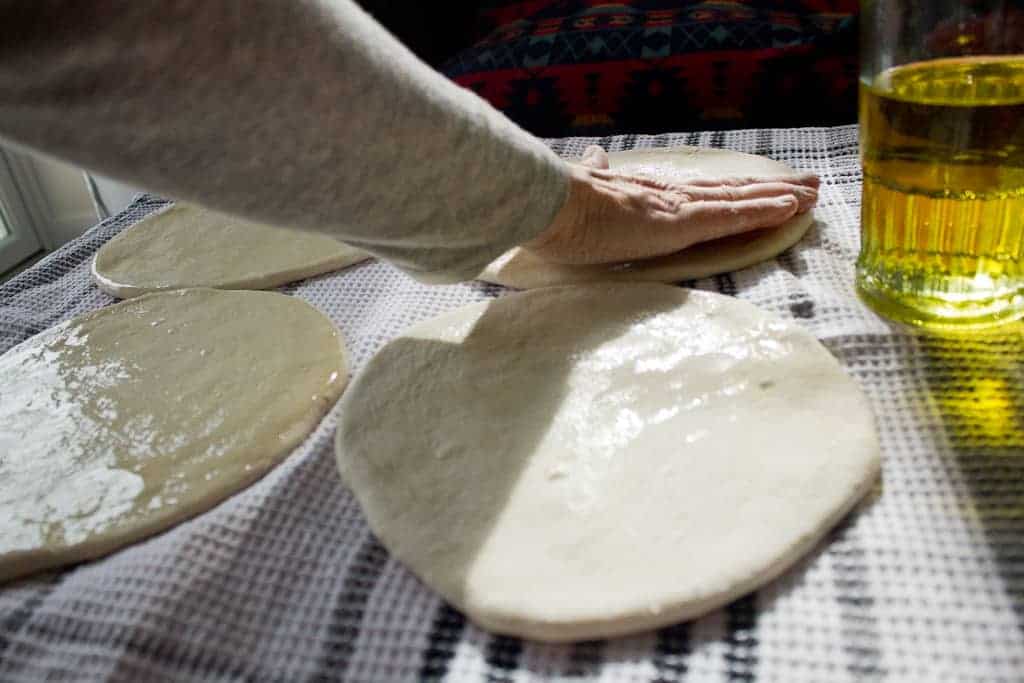
Cover another area with clean kitchen towels, and arrange rolled out dough circles close to each other, edges touching. Drizzle a tiny bit of olive oil on each disc, and spread it out evenly across the surface with your hands.
Cover the discs with plastic wrap, and let rest in a warm place for about 30 minutes. Afterwards, dough should be very elastic, like good pizza dough.
Stretching the dough
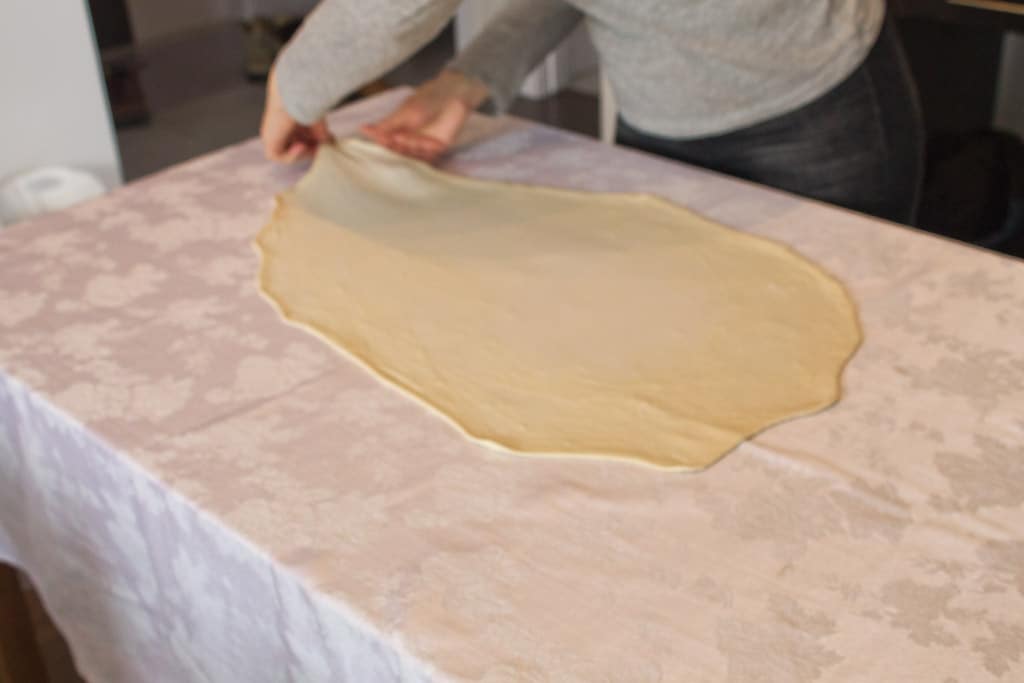
Cover a large dining room table with a clean tablecloth. Transfer one dough disc to the table, laying it in the middle.
Start spreading the dough very gently, pinching the ends with your fingers (never touch or pull from the centre, only from the edges). Pull the ends towards you gently, going around the table clockwise (or counter-clockwise, just try to go in one direction all the time), spreading the dough into a very thin layer as much as you can.
Continue expanding the dough by pulling on the edges gently until the paper-thin dough covers the whole table like a tablecloth, draping over the edges.
Spread the filling
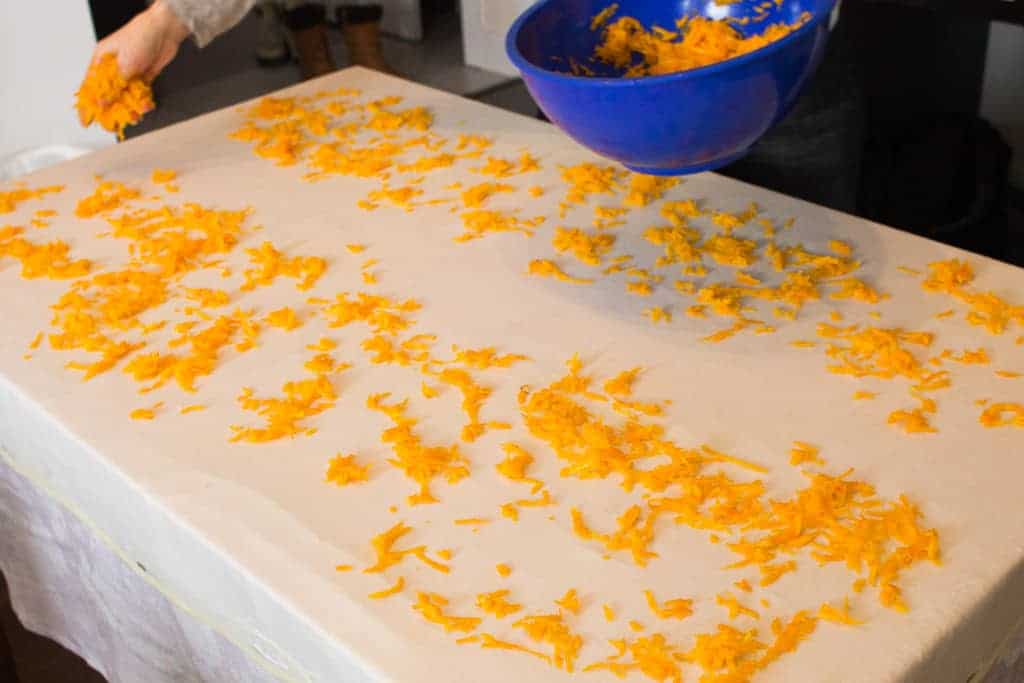
Preheat oven to 400F.
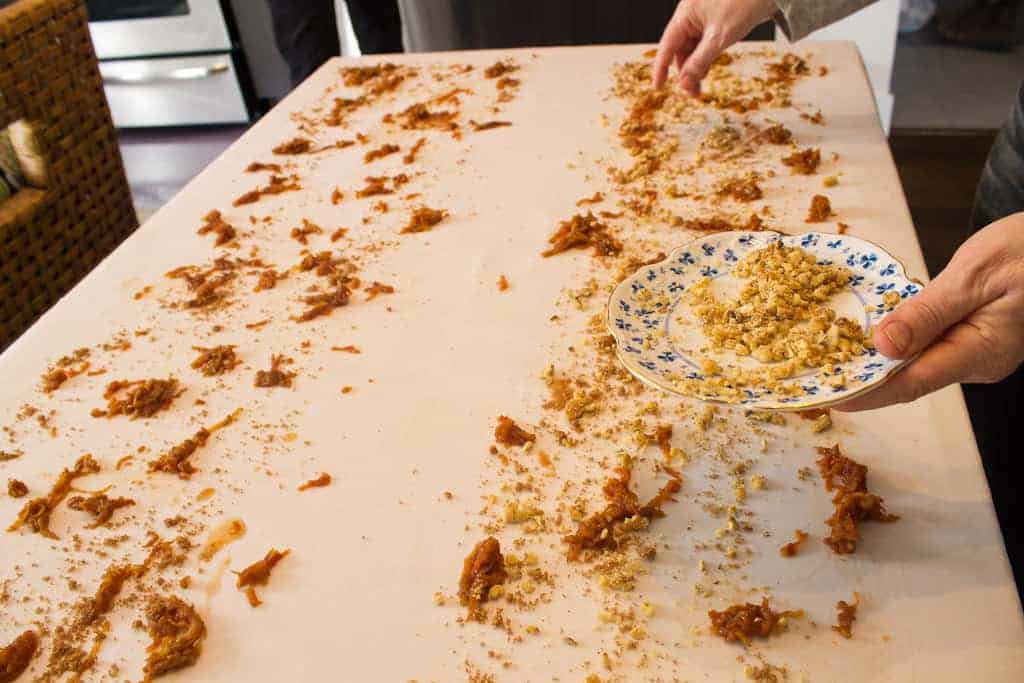
Start spreading filling onto the dough with a teaspoon or tablespoon, dropping dollops all over its surface. Leave one line, the width of about 3 inches, empty all along the middle (please see photos if this is unclear).
Drizzle with a bit of olive oil. Fold the corners of the dough that are draping over the table, making the dough contained on top of the table.
Rolling the pita
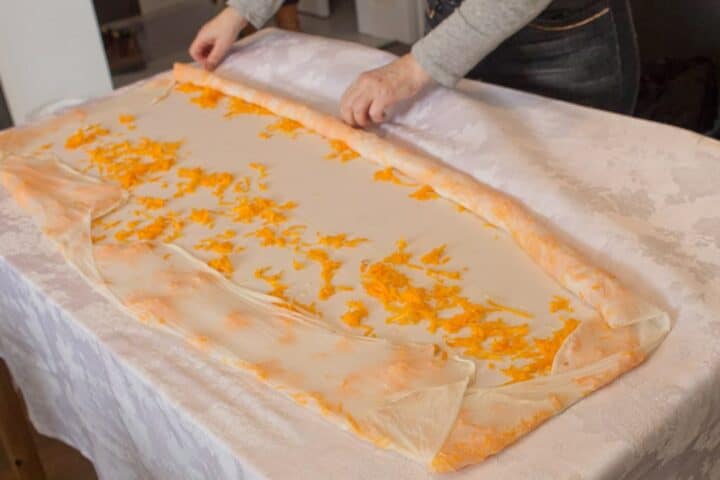
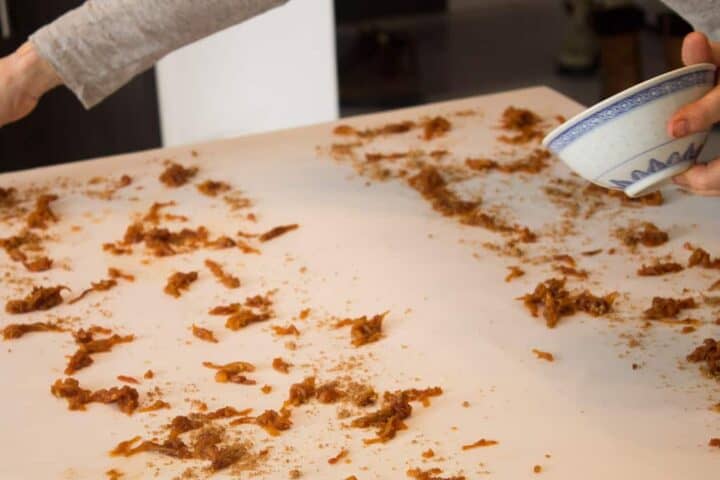
Now, gently raise one edge of the tablecloth, allowing the dough to roll towards the empty part in the middle. Stop when the dough gets to that empty part. Repeat on the other side.
You should now have two long snakes of dough and filling, with a thin layer of dough separating them. Cut that line in half with a sharp knife, separating your two snakes from each other.
Roll the pita to fit baking dish
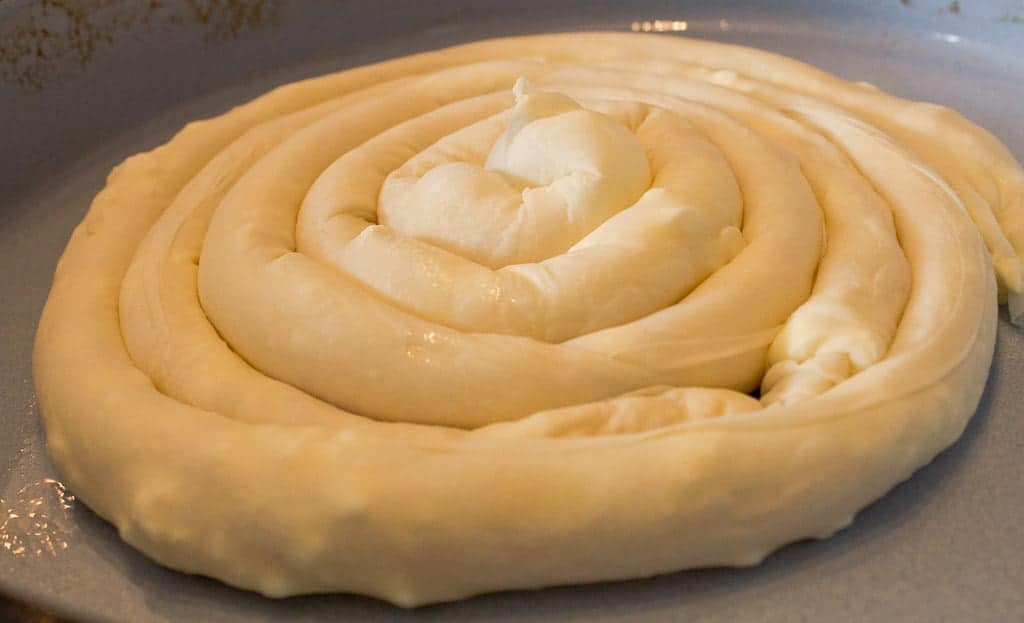
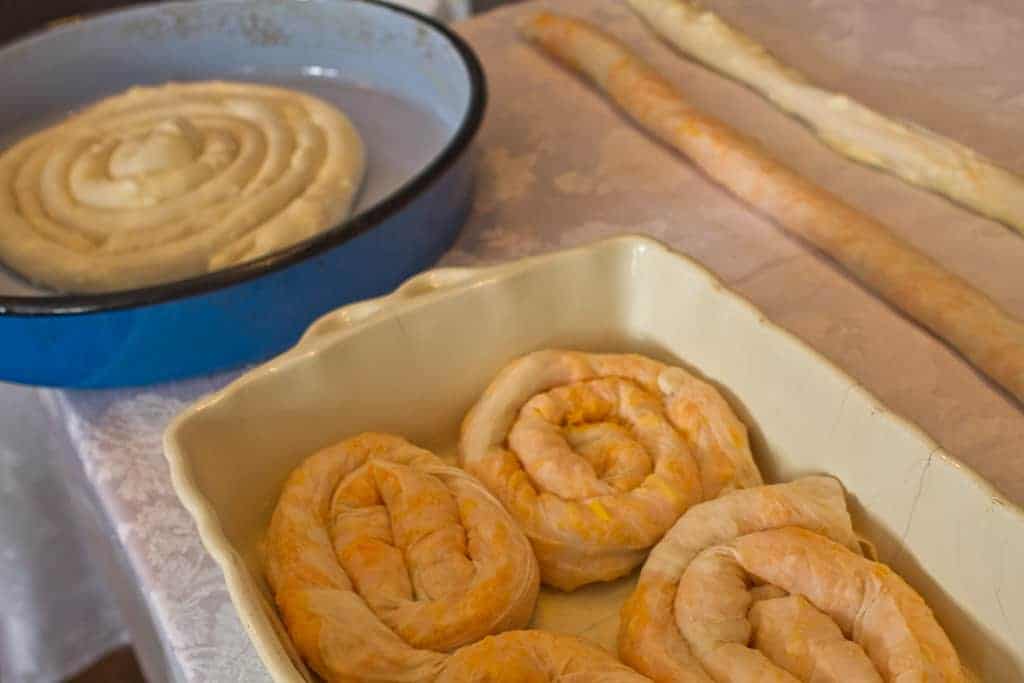
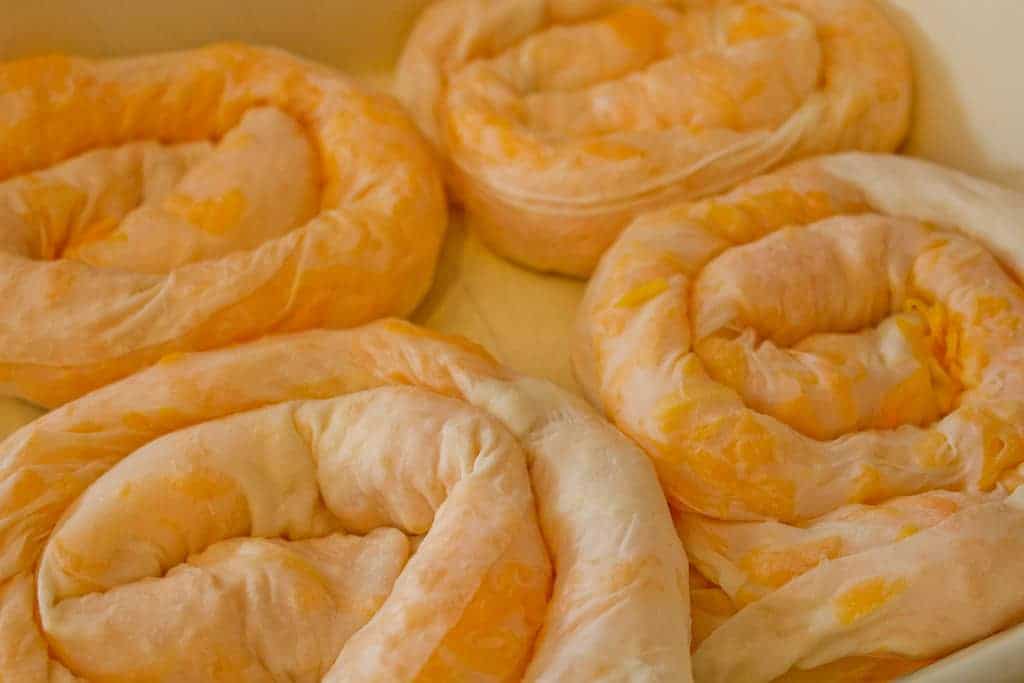
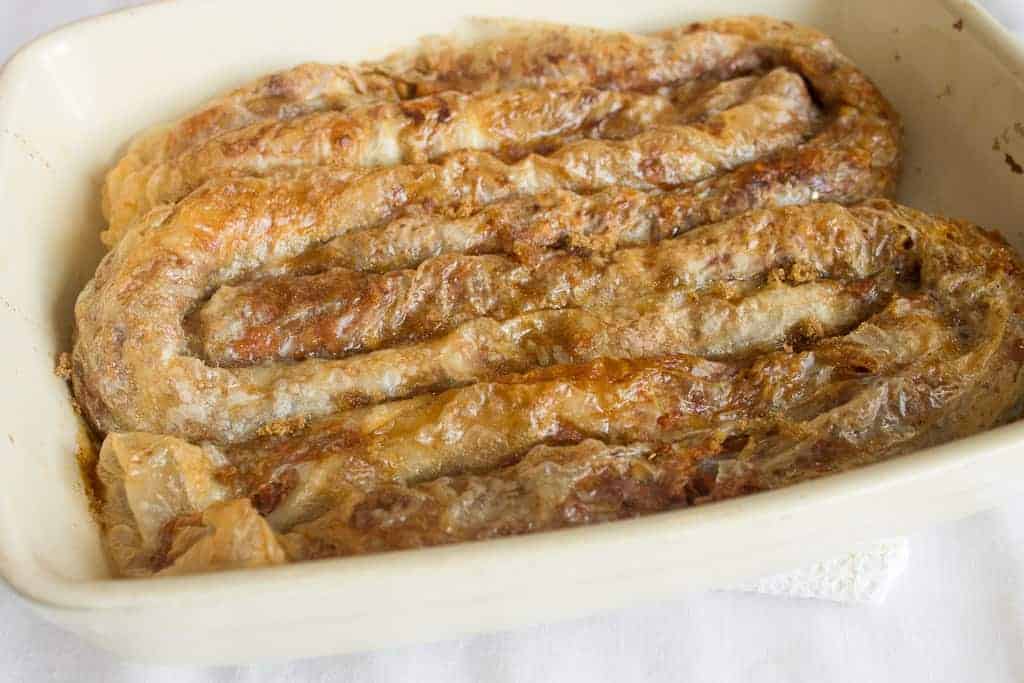
Oil a casserole dish. Arrange the rolls in the dish, shaping them into spirals and tight coils, like tightly-wound snakes that are ready to pounce.
Repeat with three other dough discs. You can vary the fillings in each disc (which separates into two rolls), using half of one and half of the other in the same disc (because the coils will be separated from each other, it really doesn't matter).
Bake pita 40 mins at 400F
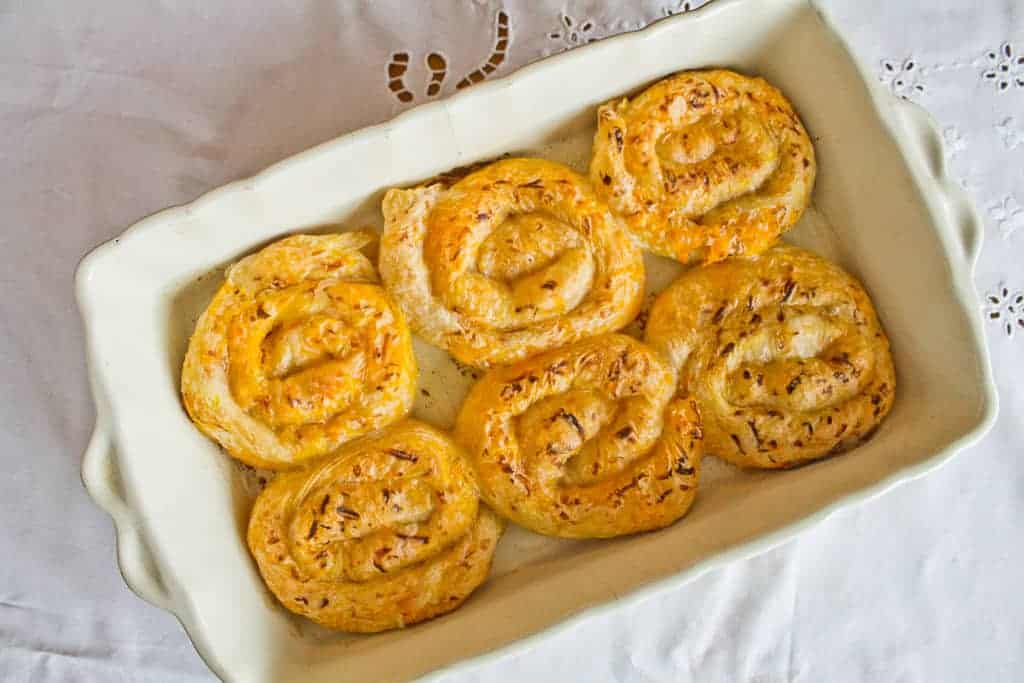
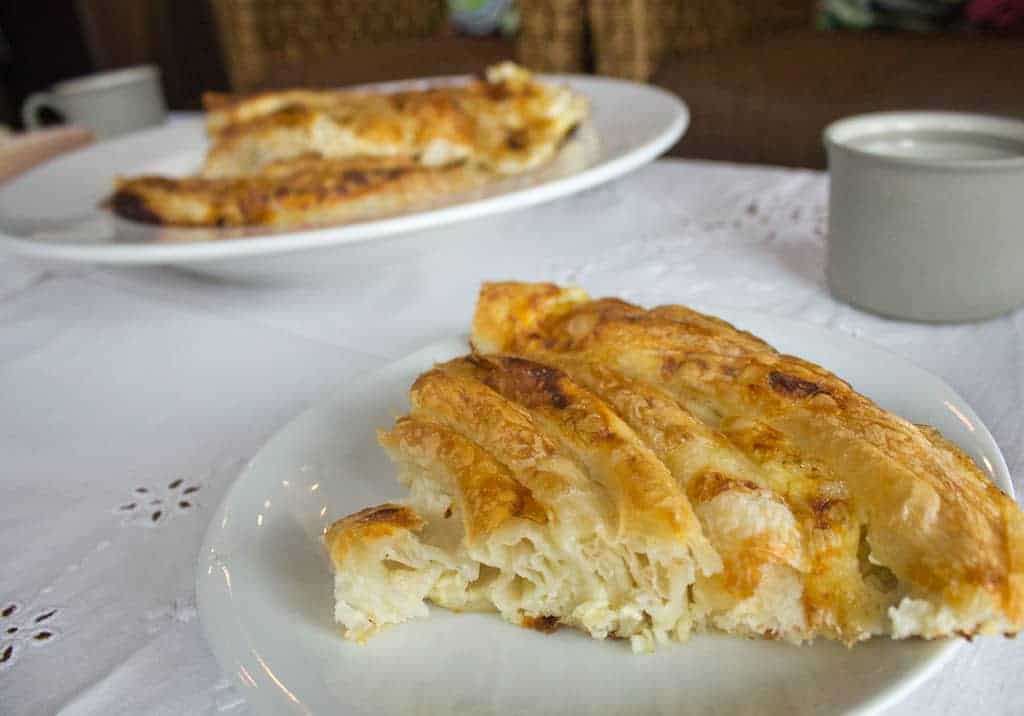
Bake dough stuffed with filling of your choice for 40 minutes at 400F, until pita is golden brown on top. Serve right away, or eat in room temperature for lunch the next day.
Storage
Prepared and baked pita will keep fresh in a sealed container for 5 days. However, it will never taste as crispy and flaky as when it was first made - but it doesn't mean it'll be any less delicious!
You can also freeze prepared and sliced pita for up to 5 months for easy grabbing and reheating in the microwave. You can keep it uncut as well, but it will change texture as it defrosts and may be a bit harder to cut.
Top Tips
Choose a large table for stretching your dough. It will not work on a counter.
Make the full batch of the recipe and freeze some in precut portions, for easy grabbing later.
Feel free to fill one half of each stretched dough section with a different filling - after all, they get separated and rolled each one completely on their own.
I have tried finding the round, enameled pan that Rose says is traditionally used for making pita. This 9" enamel round pie dish was as close as I've gotten, but it's really nowhere near big enough for the pita Rose rolls out. You can roll the pita into small spirals inside several pie dishes to get that beautiful slice. Or, make little spirals and arrange them in any large casserole dish, and serve them individually.
Step-by-Step Web Story
Check out our the step-by-step web story for how to make Bosnian Pita!
Recipe
Tried and loved this recipe? Please leave a 5-star review below! Your reviews mean a lot to me, so if you've got any questions, please let me know in a comment.

Bosnian "pita" (pie) with cottage cheese, apple, and squash
Equipment
- Mixing bowls (get this set)
- Solids measuring cups (I like these and these)
- Measuring spoons (I like these and these)
- Kitchen towels
- Baking sheets, 9" enamel round pie dish, or other dishes for baking the pitas
Ingredients
Butternut squash filling:
- 1 medium-sized squash peeled and shredded
- 1 pinch sugar
- ½ teaspoon salt or more, to taste
Cottage cheese filling:
- 2 cups cottage cheese drained
- 2-3 eggs depending on egg size
- 1 Tb olive oil
- ¼ cup feta cheese optional
- salt to taste (hold off until the last minute)
Apple filling:
- 4-5 sour apples shredded (use Granny Smiths, crab apples, or preferably apples from your own apple tree)
- 1 cup of walnuts crushed
- 2-3 Tbs brown sugar
- 1 teaspoon ground cinnamon
Bosnian Pita Dough:
- 4 cups of AP flour unbleached
- 1 cup of AP flour reserved for dusting counters, etc
- ½ teaspoon salt
- 2 cups warm water use a mixture of boiling and cold water
Instructions
To make butternut squash filling:
- Mix squash, sugar and salt. If you want to add more salt, only do so at the last minute (otherwise, the squash will get soggy and bleed, making the dough too wet).
To make cottage cheese filling:
- Mix cottage cheese, eggs, feta cheese and olive oil. Add salt at the last minute, to taste.
To make apple filling:
- Mix cinnamon, brown sugar and walnuts in a separate bowl. Keep apart from shredded apples until the last minute (otherwise, the apples will get soggy and bleed, making the dough too wet).
To make dough:
- Place 4 cups of flour in a large bowl. Add water gradually to it, until dough is soft but not sticky.
- Flour work surface generously. Place dough on counter and knead down gently for about 10-15 minutes, until the dough is springy to the touch. Knead in soft motions, almost stroking the dough and transferring it from hand to hand. Do not be too violent.
- Divide dough into 4 pieces. Flour surface lightly, and roll each piece into a ball, transferring from hand to hand gently. Then, adding a bit of flour as needed. roll out dough thinly with a rolling pin, like thin pizza dough.
- Cover another area with clean kitchen towels, and arrange rolled out dough circles close to each other, edges touching. Drizzle a tiny bit of olive oil on each disc, and spread it out evenly across the surface with your hands. Cover the discs with plastic wrap, and let rest in a warm place for about 30 minutes. Afterwards, dough should be very elastic, like good pizza dough.
- Cover a large dining room table with a clean tablecloth. Transfer one dough disc to the table, laying it in the middle. Start spreading the dough very gently, pinching the ends with your fingers (never touch or pull from the centre, only from the edges). Pull the ends towards you gently, going around the table clockwise (or counter-clockwise, just try to go in one direction all the time), spreading the dough into a very thin layer as much as you can. Continue expanding the dough by pulling on the edges gently until the paper-thin dough covers the whole table like a tablecloth, draping over the edges.
Fill the Bosnian pita
- Preheat oven to 400F.
- Start spreading filling onto the dough with a tablespoon, dropping dollops all over its surface, but leave one line, the width of about 3 inches, empty all across the middle (please see photos for this). Drizzle with a bit of olive oil. Fold the corners of the dough that are draping over the table, making the dough contained on top of the table.
- Now, gently raise one edge of the tablecloth, allowing the dough to roll towards the empty part in the middle. Stop when the dough gets to that part. Repeat on the other side. You should now have two long snakes of dough and filling, with a thin layer of dough separating them. Cut that line in half with a sharp knife, separating your two snakes from each other.
- Oil a casserole dish. Arrange the rolls in the dish, shaping them into spirals and tight coils, like tightly-wound snakes that are ready to pounce.
- Repeat with three other dough discs. You can vary the fillings in each disc (which separates into two rolls), using half of one and half of the other in the same disc (because the coils will be separated from each other, it really doesn't matter).
Bake
- Bake for 40 minutes at 400F, until pita is golden brown on top. Serve right away, or eat in room temperature for lunch the next day.


Naomi says
What a great story! thanks to Rose for this amazing tale, and delicious looking pita. I don't know if I'll master that kind of pastry any time soon, but I can dream (and try multiple times!)
kseniaprints says
I agree - watching Rose make this was incredibly impressive and inspiring.
milica says
My family on my dad's side are all Bosnian refugees. My grandma makes the best cottage cheese pita i've ever tasted. It's really refreshing to see posts like these, and it's nice to know that there are other families to whom the pita tastes like home.
kseniaprints says
That's so nice to hear! That's exactly what I was aiming for - to illustrate the importance of food as a cultural and historical binding agent, so to speak.
Pavle iz Winnipega says
There are two things I want to say in response to your blog. Okay maybe three or four.
First: tart yogurt sauce drizzled on top. Ubiquitous in Sarajevo. Delish. The icing on the cake for me.
Second, while you can use almost anything as filling at home (and I like how you highlighted how Rose did that during the war) I would say there are 4 non-meat fillings that are the golden standards on the street. The most common was cheese (sirnica) and spinach (zeljanica) and potato (krompiruša.) Pumpkin/squash (tikvenica) is my all-time fav (and the golden orange looks gorgeous in your pix.) It was only available at certain places. These types are sold as fast food in Sarajevo, Tuzla around Bosnia where the pita was a refined art but that's it. Otherwise, it was usually meat filled.
Third: my favorite pita place. Here: http://www.sarajevo360.ba/bs/forino
It was simple and rustic. Now handsomely renovated. Hope the pita is still as good. I lived 5 mins north of this spot, up the hillside. Incidentally, the Forino place is on Titova, which means Tito’s way. Every town in the former Yugo had a street called Titova and every town has renamed that street, except Sarajevo. It’s a special street and pita is a special dish. I may not get there for a while but for now I can try to make Tikvenica, thanks to you and Rose.
kseniaprints says
Thank you for the informative comment, Pavle. I hope you'll get to visit your favourite pita joint soon!
Maria says
I wasn't able to stretch the dough. It stayed thick in the center and kept ripping as I tried stretching the edges. The bottoms burned at 400' so I had to take it out 10 minutes early. My crust was not crunchy at all!
kseniaprints says
Hmm. Do you know how long you kneaded it for in the beginning? This recipe truly works, but it’s not easy to get the dough to the right consistency and stretching it without ripping…. It’s definitely a work of art and a labor of love! I don’t get it right every time by any means. As for the temperature, this is what works for me and Rose, the woman who developed this recipe, but as always you have to watch your oven and gauge. Sorry it didn’t work for you!
Deborah Nutkins says
What is the size hoped for, in stretching out the crust? So that I know how thin to hope for?
Met a neighbor of my mom, 93, a very sweet woman named Hestoria, from Croatia/Bosnia. Made my mom pita and my mom raved. I asked for the recipe, a half of a small pie pumpkin,1/2 butternut squash, a medium zucchini all cut to the size of your tooth. 🙂 LOL Cook till tender but not soft. Add sour cream and an egg. With a bit of brown sugar and a sprinkle of black pepper and a dash of cinnamon. She bakes it, just the filling as her hands are unable to roll out the beloved dough.
kseniaprints says
So every time I've seen this made by a Bosnian native, people literally pull it all over their dinner table of 6 people.... I think if you're new to making this, just try to get it as thin as possible without ripping. I recommend using a small table or even a large cutting board to make it, so you can use the table edges to hold the pastry corners. It's REALLY hard to make right!!!!