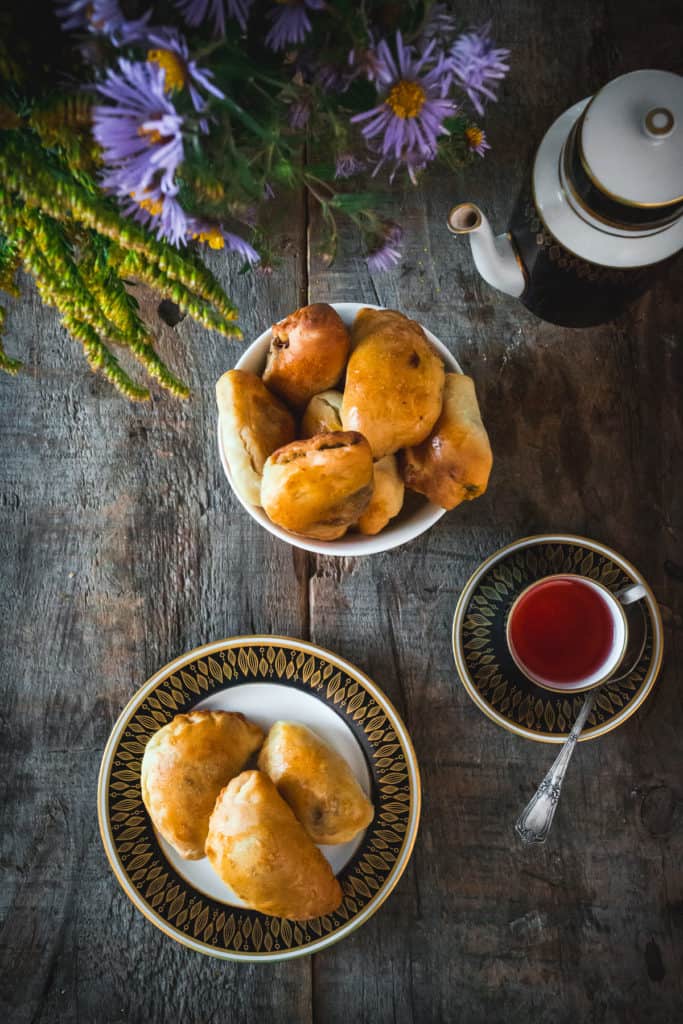
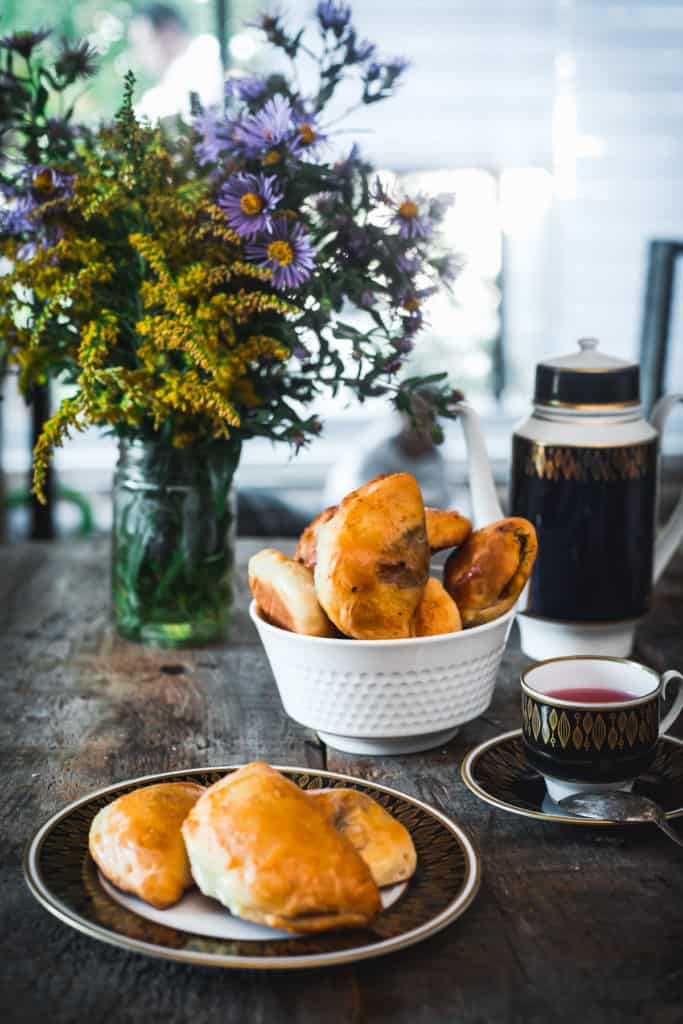
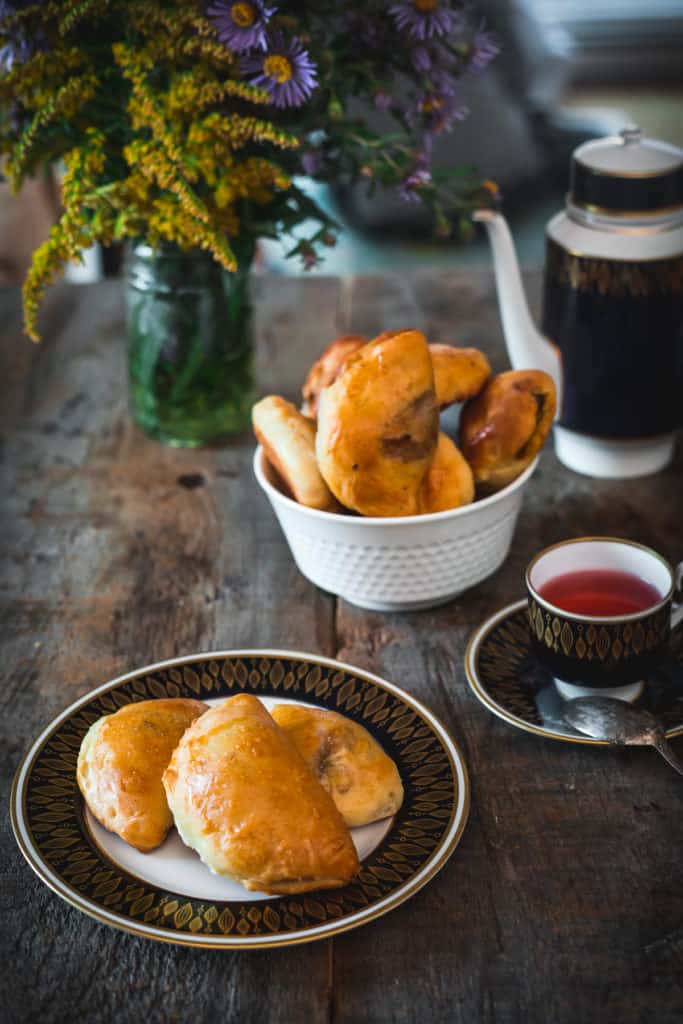
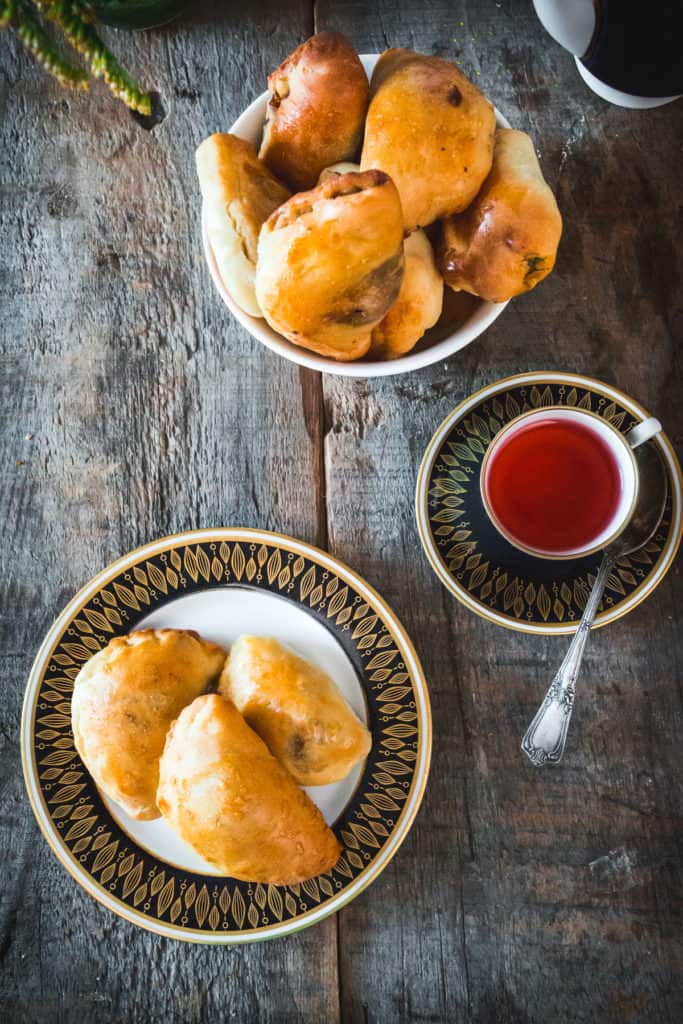
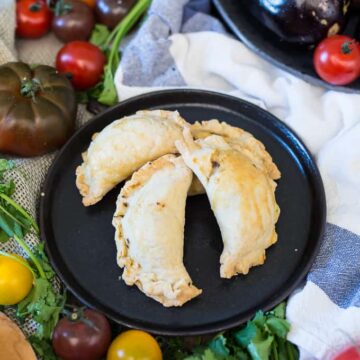
Russian vegetarian pirozhki are pillowy pockets of dough, stuffed with a variety of flavous and baked to a perfect golden hue. Choose between cabbage and egg pirozhki, the classic mushroom pirozhki or a new, modern and perfectly fall-appropriate pumpkin with caramelized onion, feta and dill pirozhki.
The ingredients for these vegetarian Russian pirozhki were generously provided by Epicure Market. Please support the brands that make running this blog possible.

Comfort food means different things to different people. A lot of it depends on the culture you're from: Italians love their cacio e pepe or pasta in Italian marinara sauce. The French swoon over baked brie and quiches with brie and peaches. Some Israelis crave mujadara. For many Colombians, the battle for the best comfort food is between cheesy arepas with different arepas fillings and vegetarian empanadas. And Russians? We love our vareniki, Russian blintzes, and Russian pirozhki.
So in the effort of bringing as much comfort as possible during these cold, uncertain and frankly crazy months, I bring you my three versions of Bbakedaked Russian Vegetarian Pirozhki with three unique piroshki fillings.
What are Russian Pirozhki?
Sometimes spelled as vegetarian piroshki, Russian pirozhki are individual-sized pockets of pillowy yeasted dough, stuffed with a variety of fillings. Pirozhki can be either baked or fried; this recipe is for baked Russian pirozhki.

Grandmother knows best
Growing up, my grandmother Berta lived in the room next to mine. It's no secret we didn't always get along, so when she finally got her own apartment in a seniors living complex, I was first in line to help her pack her boxes.
Then she moved out, and I was faced with an empty fridge. You see, my mom wasn't the greatest cook when we were little. My grandmother easily filled that void with her signature recipes and Ukrainian know-how. It was so easy, in fact, that we barely noticed she was the one doing all the cooking.
Pretty soon, my father started conspicuously disappearing for dinner. Patients ran late, or he ate in the office. Sometimes he had association dinners.
At first my mother suspected cheating. Then she occused him of spending money. Yet when a few times too many, my father showed up smelling of baked yeasted dough and fried onions, my mother figured out just where he was spending his dinners.
Then we all started going to my grandmother's, who could always be counted on to produce a couple piroshkis, carrot tzimmes, or traditional fish soup, served with a hot cup of spiced cranberry mors or mulled wine. She would customize the fillings to suit our tastes, and sometimes even fry the piroshki for a special treat.
Eventually, my mother made peace with my grandmother's superior cooking skills. I think she was mollified by a few packages of frozen vegetarian pirozhki.


A true Russian family recipe
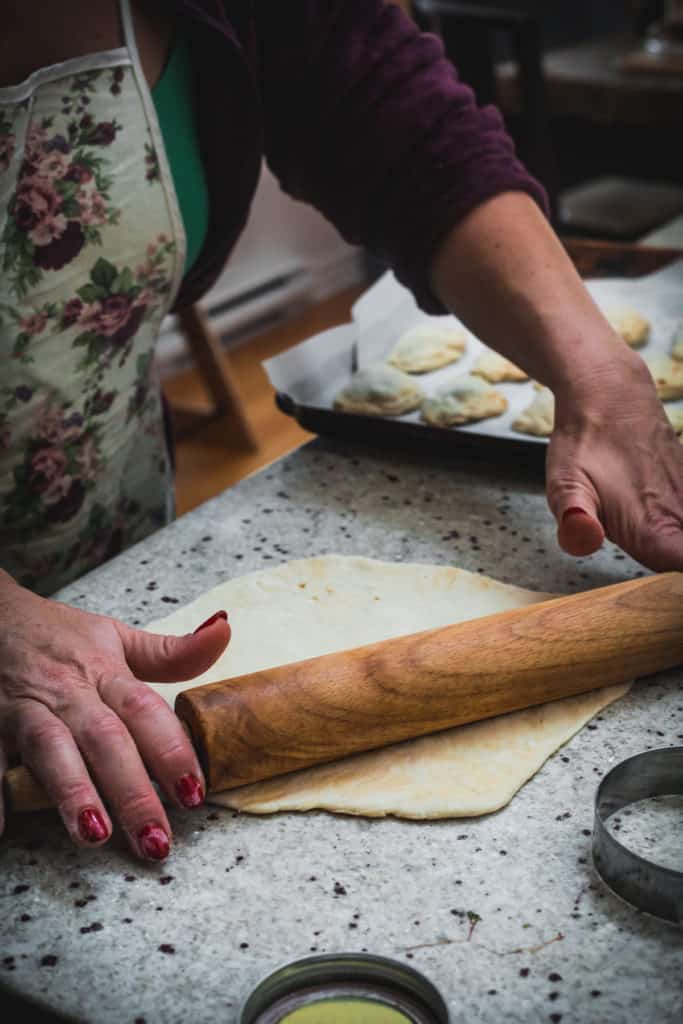
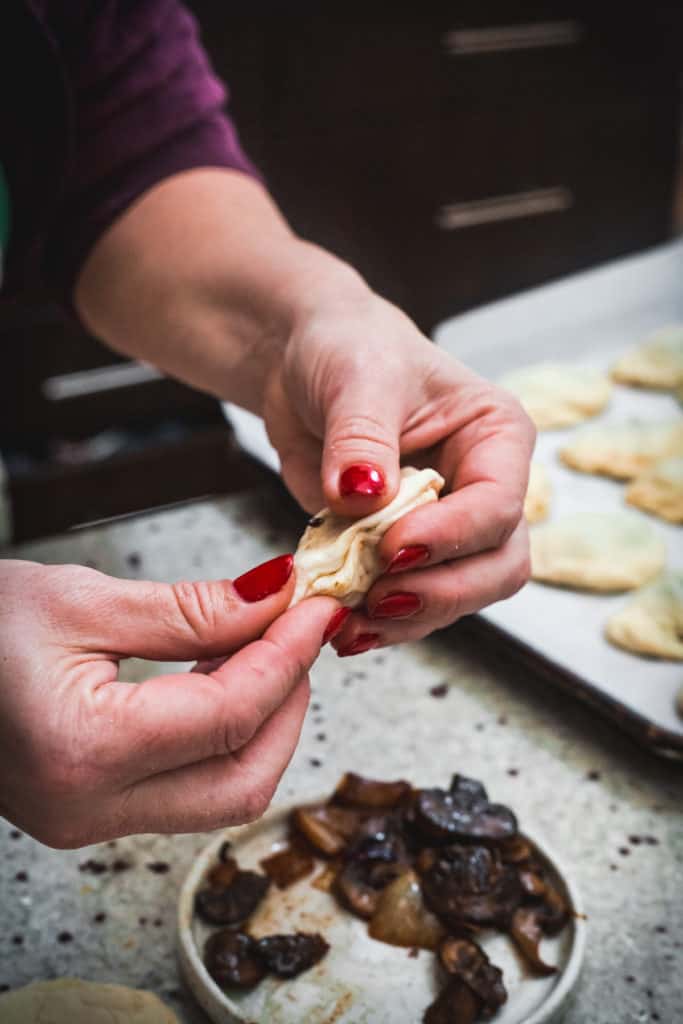
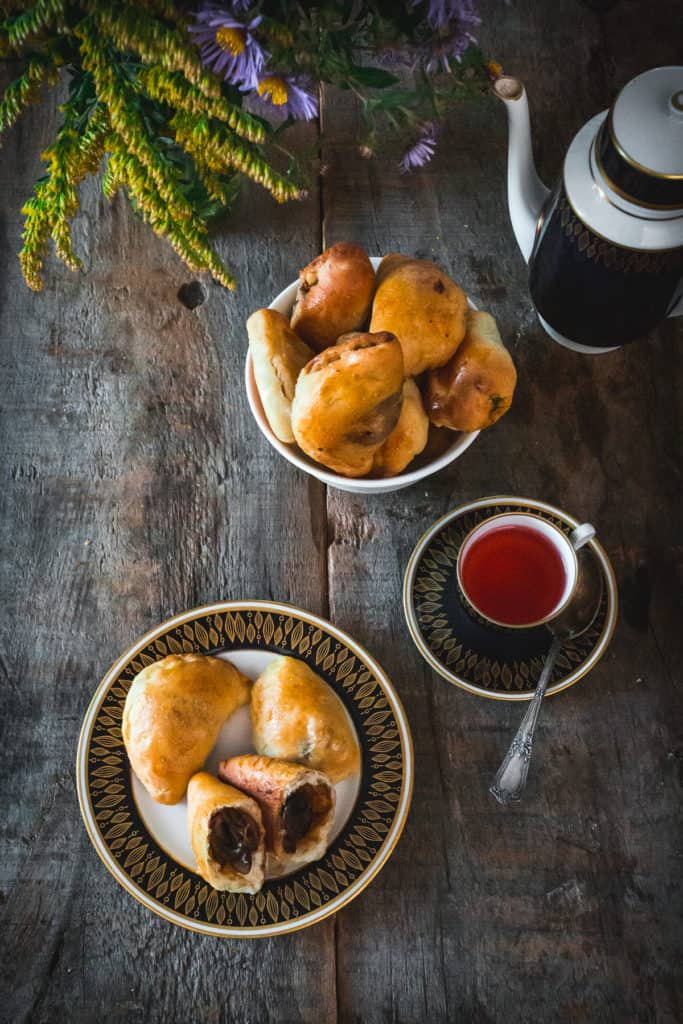
If you look at the photos, you'll notice someone else's hands in the photos. I was lucky enough to make these Russian vegetarian pirozhki with my mother, during her recent visit to Montreal (see my Quebec city guide for more).
While my father kept the baby occupied, my mother and I spent a few hours in the kitchen, rolling dough and cooking fillings. We adjusted this and that, tweaked the cabbage filling and kept my grandmother's traditional dough. The resulting vegetarian baked pirozhki with three fillings are as authentically Russian as they are modern.
Nowadays, it's fair to say that these baked Russian vegetarian pirozhki are a true family recipe.
Should you say Piroshki or Pirozhki?
That's really just a question of phonetics! There's no right or wrong here. Both are attempts to write the Russian letter Ж, which is pronounced somewhere between a dj and a zh - /d͡ʒ/. I have noticed that in the anglocization of Polish recipes, there's a tendency to write piroshki - but I am not sure about the Polish word itself.

Can you Make Authentic Vegan Russian Pirozhki?
Of course! It's actually quite easy to veganize Russian pirozhki. For the best vegan Russian pirozhki, use soy milk in place of regular milk and omit the egg wash in the end. You will also need to make the following tweaks in the filling:
- In the cabbage filling, omit the boiled egg for a vegan cabbage pirozhki
- In the pumpkin filling, omit the feta for one-of-a-kind pumpkin, caramelized onion and dill vegetarian pirozhki. Thats the same advice I give my readers about veganizing my caramelized onion and pumpkin pizza.
- Omit the butter from the mushroom filling for vegan mushroom pirozhki (similar to my mushroom bourekas)
You can also stuff vegan pirozhki with mixed vegetables, sweet potato or potato filling.
Do you need dipping sauce for Russian Vegetarian Pirozhki?
These vegetarian pirozhki are great on their own! If you're looking for a good dipping sauce, I recommend the sauce from my Ukrainian cucumber salad. It's super simple! All you gotta do is mix equal parts sour cream and mayo, add dried dill, salt and pepper. You can even dilute it with a touch of vinegar if you want a more liquid, pourable sauce.
Do you need a stand mixer to make Russian pirozhki?
No, though I have to admit it greatly helps! My grandmother never used a stand mixer in her life, not for pirozhki or for anything else. I have made these without a mixer, and it takes some elbow grease - but if an 85-year-old woman can do that, so can you!
However, I do admit that since purchasing my Kitchenaid stand mixer, I am much more likely to whip together Russian pirozhki or any other recipe requiring a yeasted dough like this one. But this is a big, expensive purchase and I understand not everyone is ready to pull the plug on it. It took me years and an opportune discount to save up for my own stand mixer!
If you're thinking about getting a stand mixer, here are ones I love, from the affordable to the deluxe:


Making the Baked Pirozhki Dough Recipe:
First, you have to make the filling. Because this pirozhki recipe uses a traditional yeasted dough, the dough requires time to rise. While the dough is rising, make your favourite filling - or make all three to try them all out!
Make the Dough

Combine yeast, sugar and water in a small bowl. Mix together and set aside, letting yeast activate for 10 minutes.
Then in a large bowl, combine ½ the milk, yeast mixture, sugar, salt, and oil. Mix to combine. Begin adding flour in batches; add more flour or milk if needed. Dough should be not too sticky and very soft and elastic. I make this with a Kitchenaid stand mixer, but you can also easily do it all by hand (see more on this below!).
Cover with a clean kitchen towel and set aside in a dark, warm but well-ventilated place. Let dough rise for 1.5 hour, or until doubled.
Mix dough again with spoon or stand mixer paddle, and see if need to add flour. Let rise again for 30 minutes.
Make the Piroshi Shapes
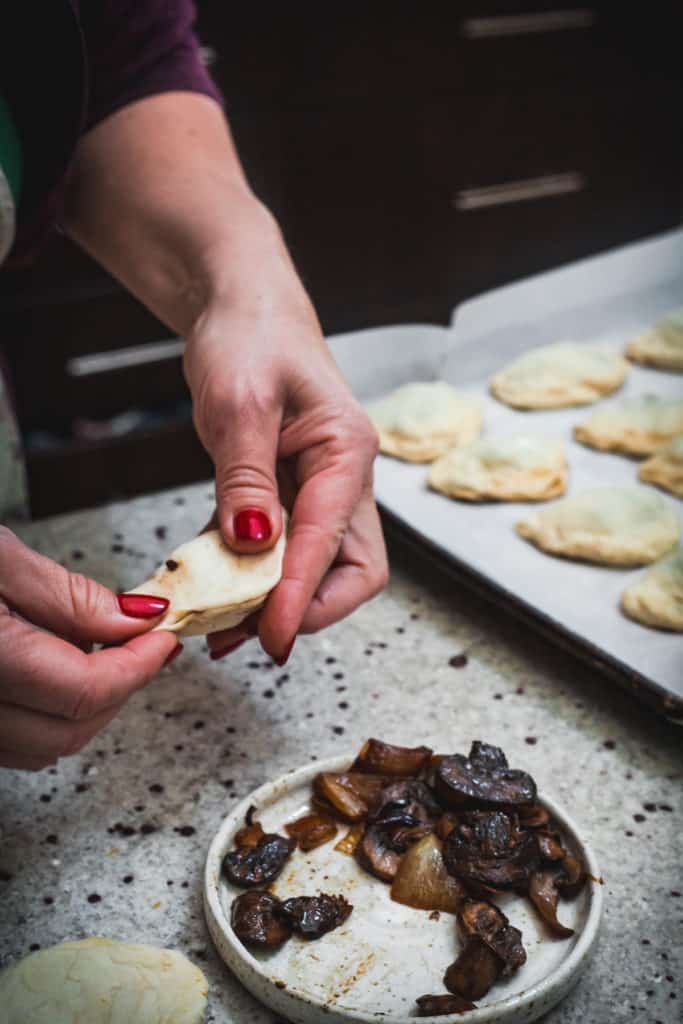
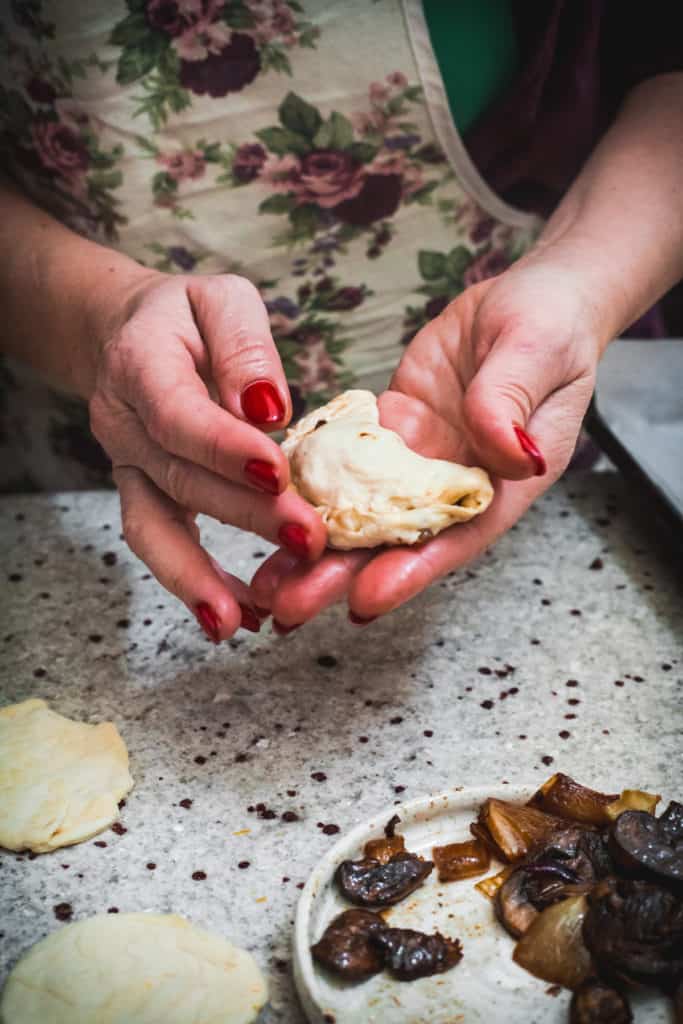
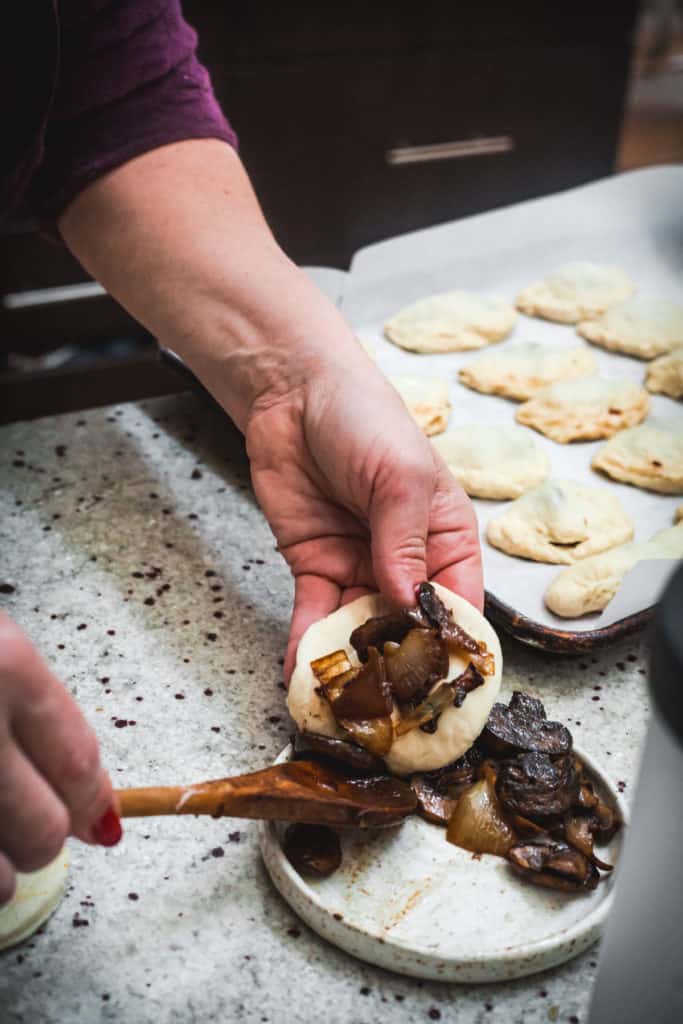
Divide Pirozhki dough into portions: Cover counter with flour, and roll dough out into thin layer. Cut pirozhki forms with cup, and place filling in the middle of each one. Fold and pinch sides.
Bake Piroshi

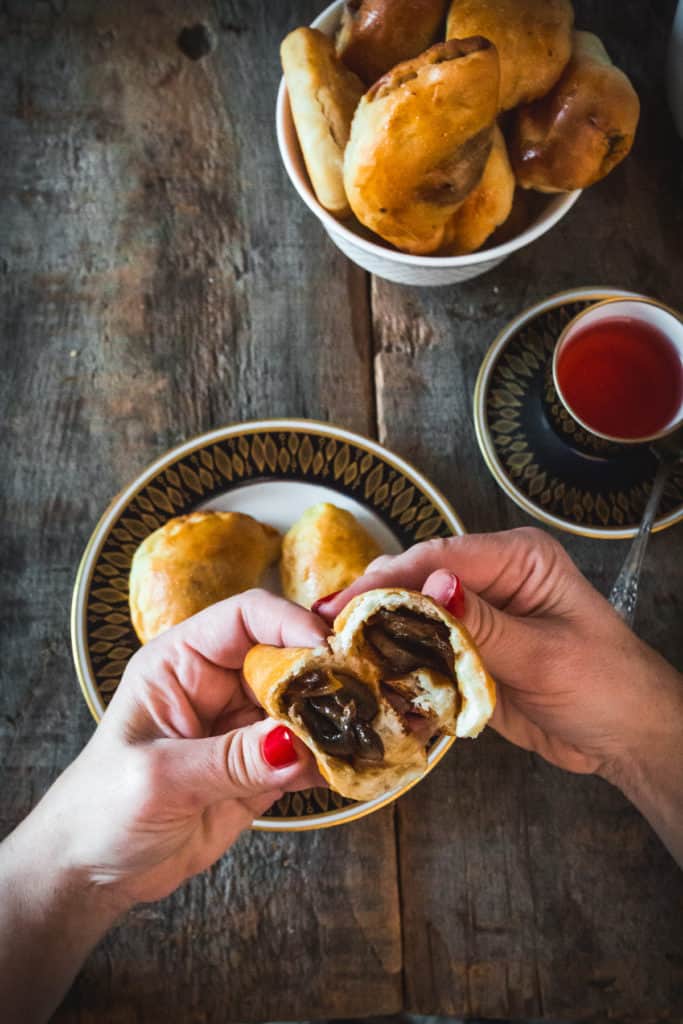
To bake, cover baking sheet with parchment paper. Add a bit of oil. Place pirozhki, and brush each with egg wash. Bake at 360F for 20-25 min, until golden up top. Remove from oven and cover with a soft kitchen towel until ready to serve.
Piroskhi Filling Ideas:
Cabbage Pirozhki Filling:
Ingredients:
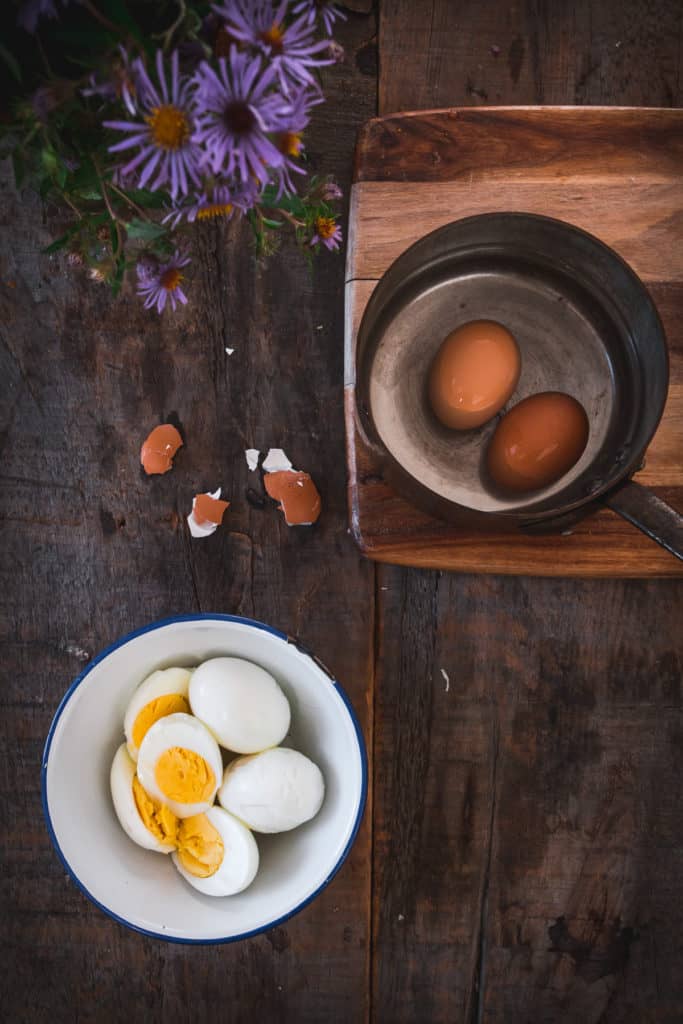
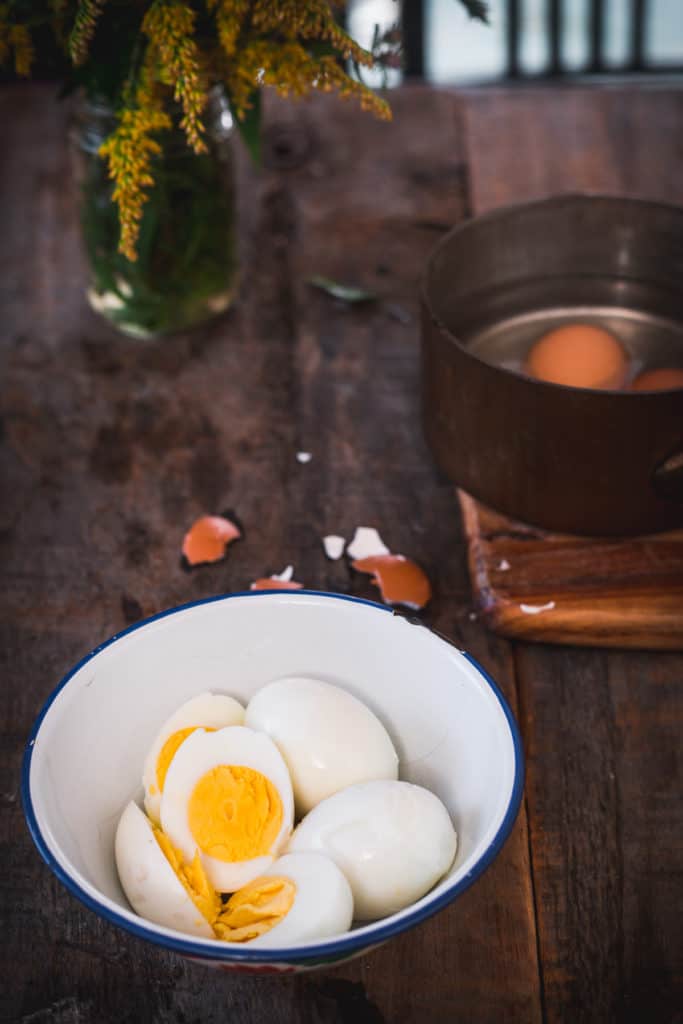
You will need onions, cabbage, and hard-boiled eggs.
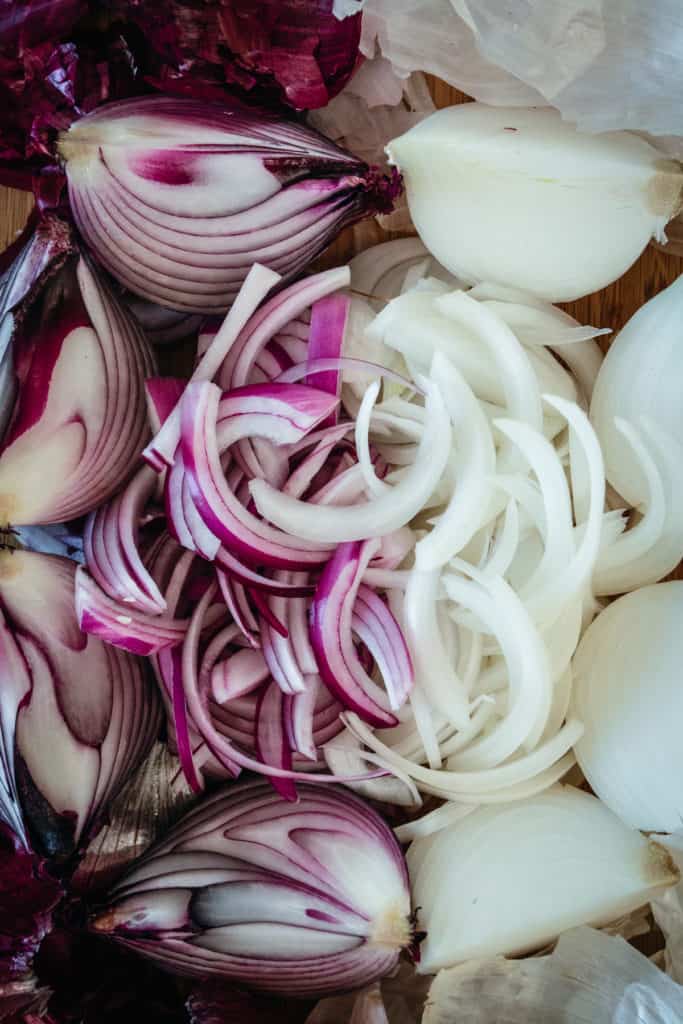

Making Cabbage Piroshki:
Slice onion into half-moons. Heat pan to medium heat. Add 2 TBs neutral-tasting oil, like Canola, grapeseed or vegetable oil. Add onions and cook until colour changes and onions become golden, about 15 minutes.
Chop cabbage into thin strands. Add cabbage to large bowl with 2 TBs water. Put cabbage in microwave for 2 minutes, to soften slightly. Let cool until easy to handle and add 2 TBs of salt. Proceed to massage cabbage until it has softened considerably, approximately 5 minutes.
Chop hard-boiled eggs into small pieces.
Combine cabbage, sauteed onions and hard-boiled eggs. Taste and add salt and pepper, as needed.
Mushroom Pirozhki Filling:
Ingredients:
For this filling, all you need are mushrooms, onions, and butter.

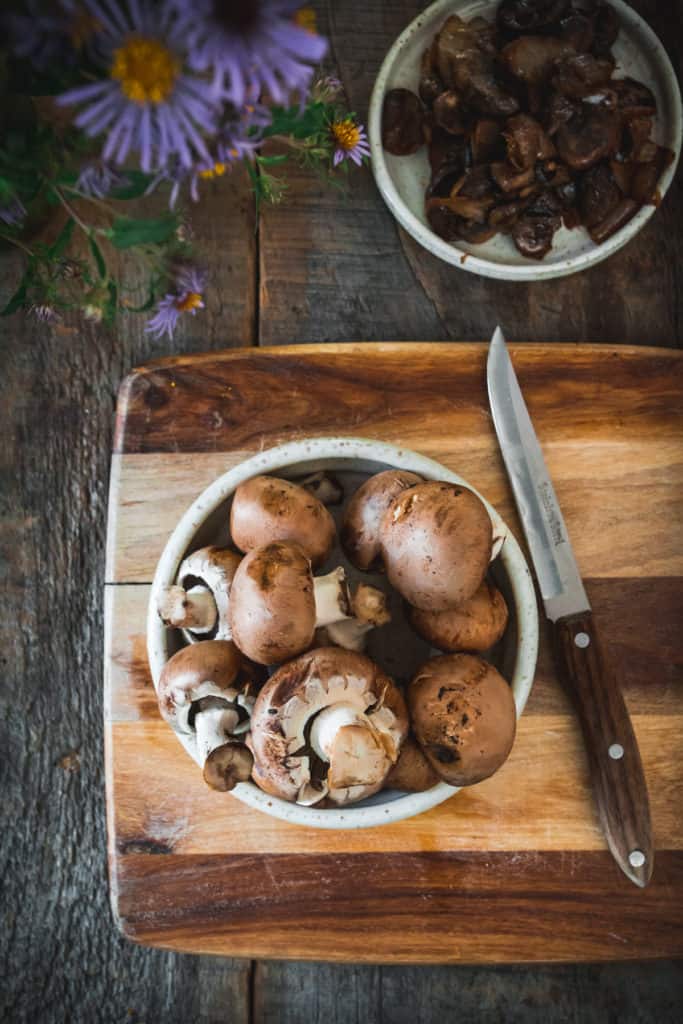
Directions:
Slice onion into half-moons. Heat pan to medium heat. Add 2 TBs butter. Add onions and cook until colour changes and onions become translucent, about 10 minutes.
Slice mushrooms thinly. Add mushrooms to onions and sautee until mushrooms begin to brown, about 10 minutes.
Taste and add salt and pepper, as needed.
Pumpkin Pirozhki with Caramelized Onion and Feta:
Ingredients:
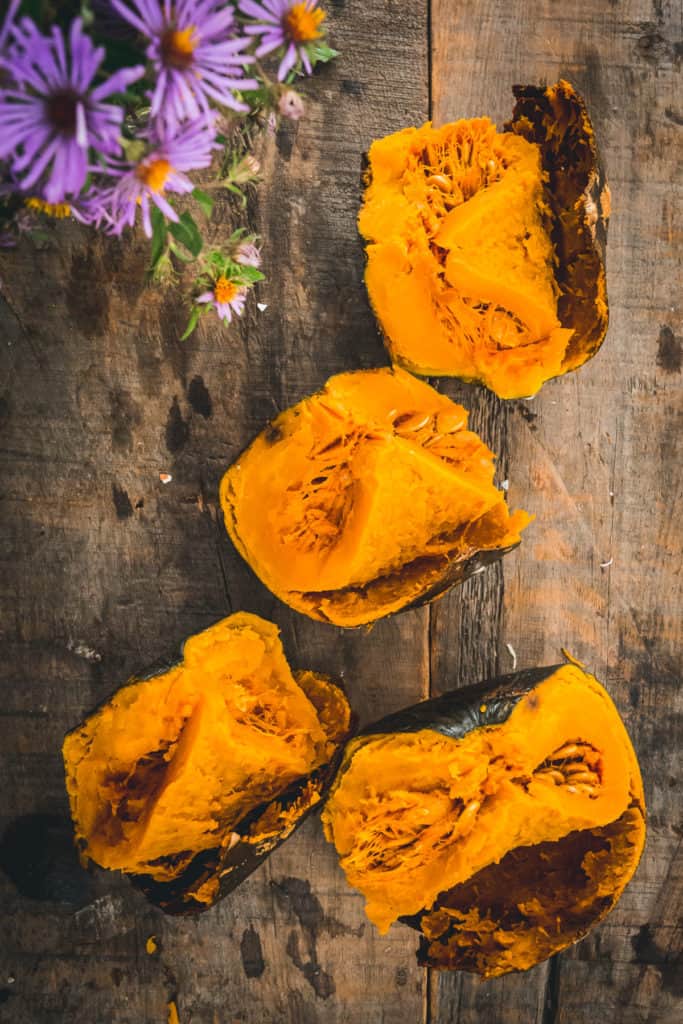
For this filling, you can either use pumpkin or butternut squash, along with onion, dill, and feta.


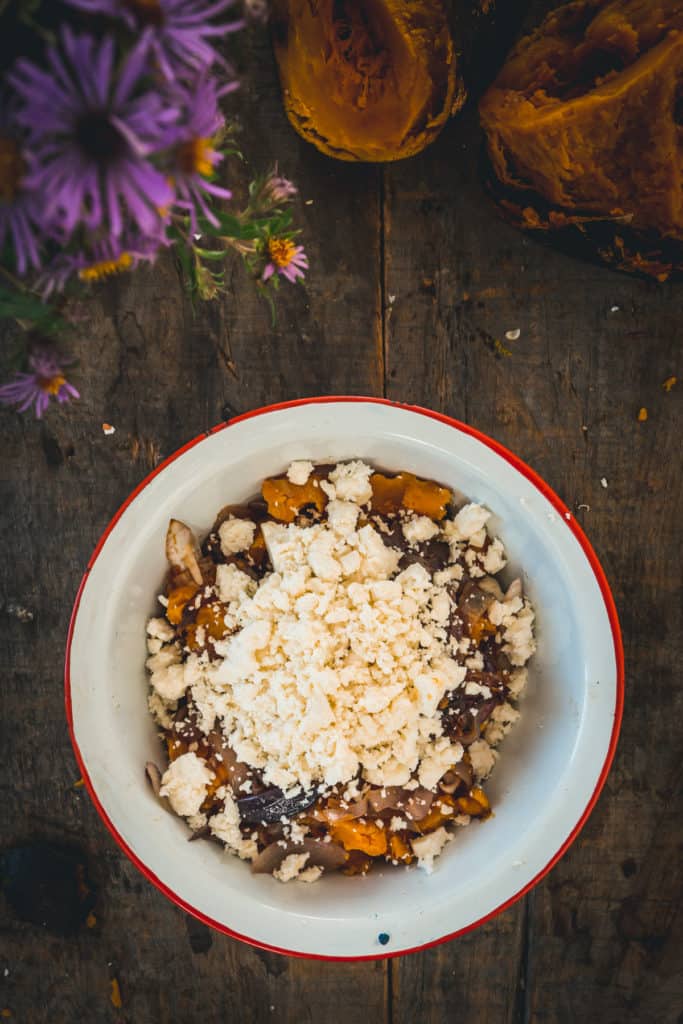

Directions:
Set oven to 400F. Cover baking sheet with parchment paper or a reusable silicone mat. Cut pumpkin or squash in half, scoop out seeds and sprinkle with salt, pepper and a drizzle of oil. Place pumpkin face-down on the baking sheet. Pierce skin a few times to let steam escape. Bake until pumpkin collapses fully when poked with a fork, about 30-45 minutes, depending on the size of the pumpkin. Let cool until safe to handle and scoop out pumpkin flesh. Set aside.
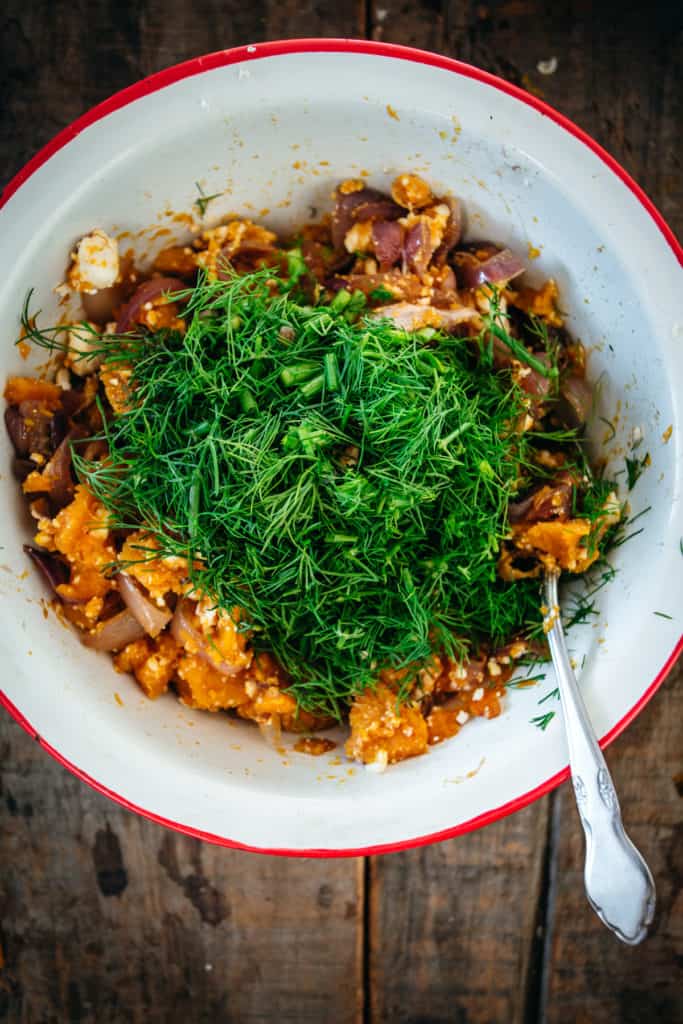
Slice onion into half-moons. Heat pan to medium heat. Add 2 TBs neutral-tasting oil, like Canola, grapeseed or vegetable oil. Add onions and cook until onions change colour, about 10 minutes. Lower heat and continue cooking until onions fully caramelize, an additional 15-20 minutes.
Mix pumpkin, caramelized onions, dill and feta together.
Storage Instructions for Baked Vegetarian Pirozhki
Allow the pirozhki to cool completely before storing. Place them in an airtight container or wrap them tightly in plastic wrap. They will stay fresh in the refrigerator for up to 4 days. To reheat, warm them in a 350°F (175°C) oven for about 10 minutes or microwave for 30 seconds to 1 minute until heated through.
For longer storage, freeze baked pirozhki in a single layer on a baking sheet until solid, then transfer them to a freezer-safe bag or airtight container. They will keep for up to 3 months. To reheat, bake frozen pirozhki at 350°F (175°C) for 15-20 minutes, or microwave for 1-2 minutes, until heated through.
Where to source our ingredients:
Please note that all ingredients for these Russian vegetarian pirozhki came from Epicure Market. I am not being paid to say that this is my favourite store for Russian ingredients in the city! If you're located in the Montreal, check out one of the three locations of Epicure Market - on rue Paré, in Cote-St-Luc or Pointe-Claire.
While all the ingredients for Russian pirozhki are simple, everyday and often pantry ingredients, Epicure is known for sourcing some really unique and hard-to-find Russian and European staples. My family are also big fans of their hot and cold buffet and ready-made cakes and breads.
If you liked my Russian vegetarian pirozhki, try these authentic Russian recipes:


If you're looking for more International baked stuffed pockets, try these:


Recipe
Tried and loved this recipe? Please leave a 5-star review below! Your reviews mean a lot to me, so if you've got any questions, please let me know in a comment.

Authentic Vegetarian Russian Pirozhki with Three Fillings (Mushroom Pirozhki, Cabbage Pirozhki and Pumpkin pirozhki with feta and caramelized onion)
Ingredients
Ingredients for Russian Pirozhki Dough:
- 1 TB Active Dry Yeast
- 2 TBs icing sugar
- 1 cup water or enough to cover
- 1 liter milk warmed to lukewarm (around 100-110°F)
- a few pinches of salt
- ½ cup oil
- 1 kg flour (about 8 cups)
- 2 TBs sugar
Ingredients for Mushroom Pirozhki Filling:
- 2 lb mushrooms
- 1 onion
- 2 TBs butter
Ingredients for Cabbage Pirozhki Filling:
- 2 large onions
- ½ head of cabbage
- 2 hard-boiled eggs
Ingredients for Pumpkin Pirozhki with Caramelized Onion and Feta:
- 1 onion
- 1 pumpkin or squash of your choice
- ½ bunch dill
- 100 g feta
Instructions
How to make Russian Pirozhki Dough:
- Combine yeast, sugar and water in a small bowl. Mix together and set aside, letting yeast activate for 10 minutes.
- Then in a large bowl, combine ½ the milk, yeast mixture, sugar, salt, and oil. Mix to combine. Begin adding flour in batches; add more flour or milk as needed. Dough should be not too sticky and very soft and elastic. I make this with a Kitchenaid stand mixerfollow, but you can also easily do it all by hand (see more on this below!).
- Cover with a clean kitchen towel and set aside in a dark, warm but well-ventilated place. Let dough rise for 1.5 hour, or until doubled in size (the dough should roughly fill twice the volume it started with).
- Mix dough again with spoon or stand mixer paddle, and see if need to add flour. Let rise again for 30 minutes.
- While dough is rising, prepare filling.
How to make mushroom filling for pirozhki:
- Slice onion into half-moons. Heat pan to medium heat. Add 2 TBs butter. Add onions and cook until colour changes and onions become translucent, about 10 minutes.
- Slice mushrooms thinly. Add mushrooms to onions and sautee until mushrooms begin to brown, about 10 minutes.
- Taste and add salt and pepper, as needed.
How to make cabbage filling for pirozhki:
- Slice onion into half-moons. Heat pan to medium heat. Add 2 TBs neutral-tasting oil, like Canola, grapeseed or vegetable oil. Add onions and cook until colour changes and onions become golden, about 15 minutes.
- Chop cabbage into thin strands. Add cabbage to large bowl with 2 TBs water. Put cabbage in microwave for 2 minutes, to soften slightly. Let cool until easy to handle and add 2 TBs of salt. Proceed to massage cabbage until it has softened considerably, approximately 5 minutes.
- Chop hard-boiled eggs into small pieces.
- Combine cabbage, sauteed onions and hard-boiled eggs. Taste and add salt and pepper, as needed.
How to make pumpkin, caramelized onion and feta filling for pirozhki:
- Set oven to 400F. Cover baking sheet with parchment paper or a reusable silicone matfollow. Cut pumpkin or squash in half, scoop out seeds and sprinkle with salt, pepper and a drizzle of oil. Place pumpkin face-down on the baking sheet. Pierce skin a few times to let steam escape. Bake until pumpkin collapses fully when poked with a fork, about 30-45 minutes, depending on the size of the pumpkin. Let cool until safe to handle and scoop out pumpkin flesh. Set aside.
- Slice onion into half-moons. Heat pan to medium heat. Add 2 TBs neutral-tasting oil, like Canola, grapeseed or vegetable oil. Add onions and cook until onions change colour, about 10 minutes. Lower heat and continue cooking until onions fully caramelize, an additional 15-20 minutes.
- Mix pumpkin, caramelized onions, dill and feta together.
Continue shaping pirozhki:
- Divide dough into portions: Cover counter with flour, and roll dough out into thin layer. Cut circles using a 3-4 inch round cup or cookie cutter. Place about 1-2 tablespoons of filling in the center of each circle.
- Fold the dough over the filling to create a half-moon shape, then pinch the edges firmly together to seal. You can also bring all edges to the center for a round shape.
- To bake, cover baking sheet with parchment paper. Add a bit of oil. Place pirozhki about 2 inches apart on the baking sheet, and brush each with egg wash (1 egg beaten with 1 tablespoon water).
- Bake at 360F for 20-25 min, until golden up top. Remove from oven and cover with a soft kitchen towel until ready to serve.
Notes
- Shape the pirozhki and place them on a parchment-lined baking sheet
- Freeze until solid (about 2-3 hours)
- Transfer frozen pirozhki to freezer bags or airtight containers, separating layers with parchment paper
- Store for up to 3 months
- To bake from frozen: Place frozen pirozhki on a greased baking sheet, brush with egg wash, cover loosely with a kitchen towel, and let thaw and rise at room temperature for 1-2 hours before baking. Then bake as directed at 360°F for 20-25 minutes.
- Alternatively, you can bake directly from frozen without thawing, but add 5-8 minutes to the baking time (25-33 minutes total). Brush with egg wash before baking.
- Let pirozhki cool completely after baking
- Place in freezer bags or airtight containers with parchment paper between layers
- Store for up to 3 months
- To reheat: Thaw at room temperature for 1-2 hours, then reheat in a 350°F oven for 10-15 minutes until warmed through. Or microwave individual pirozhki for 1-2 minutes.


Lisa Martin Smyth says
My mom was of Dutch Mennonite heritage from Ukraine. Our version is dough: 1 quart of milk, 1 lb butter, 3 cakes of yeast and 5 lbs flour. Filling was: 5 lbs stew beef, trimmed, cooked and coarsely ground simmered with 10 lbs of finely shredded cabbage, salt and water to prevent sticking until cabbage is thoroughly cooked. Drain excess moisture and stuff into dough rounds. Seal and bake. Yield: enough to feed the Russian army. Freezes well and dunking in tomato soup for supper on baking day is standard. This was a 3 day project.
Luke says
Thank you! Is it better to freeze before or after baking? How long should you bake from frozen if frozen before baking? Or better to defrost first?
kseniaprints says
I usually freeze after baking, but you can do either one!
To freeze UNBAKED pirozhki (recommended method):
Shape the pirozhki and place them on a parchment-lined baking sheet
Freeze until solid (about 2-3 hours)
Transfer frozen pirozhki to freezer bags or airtight containers, separating layers with parchment paper
Store for up to 3 months
To bake from frozen:
Place frozen pirozhki on a greased baking sheet, brush with egg wash, cover loosely with a kitchen towel, and let thaw and rise at room temperature for 1-2 hours before baking. Then bake as directed at 360°F for 20-25 minutes.
Alternatively, you can bake directly from frozen without thawing, but add 5-8 minutes to the baking time (25-33 minutes total). Brush with egg wash before baking.
To freeze BAKED pirozhki:
Let pirozhki cool completely after baking
Place in freezer bags or airtight containers with parchment paper between layers
Store for up to 3 months
To reheat: Thaw at room temperature for 1-2 hours, then reheat in a 350°F oven for 10-15 minutes until warmed through. Or microwave individual pirozhki for 1-2 minutes.