My smooth garlic Israeli hummus recipe is a middle eastern hummus recipe that is made from dried chickpeas, nourished with the best tahini, full of pungent garlic, and a hint of lemon juice.

Is the Israeli-style hummus truly Israeli?
Hummus is one of those dishes that have become completely ubiquitous with Israel. But is it actually Israeli?
Despite its association with Israel, hummus is a dish that is entirely borrowed from other Middle Eastern neighbours: Egyptians, Jordanians, Syrians, Lebanese. In fact, there are as many regional variations of this recipe that attribute it to Lebanese dips and Arabic dips as there are grains of sand in the dessert.
So perhaps in that vein, we can claim ownership over some regional variations? In the great hummus debate, I fear that only time will tell who will stand victorious.
My favourite version of hummus is hummus mesabacha, the recipe for which you can find in my cookbook. I top hummus with crispy chickpeas, and love slathering hummus pita bread with apples. I always serve it as part of Middle Eastern sauces and dips platter. For less traditional versions, I turn to my black eyed peas hummus.
But most days, when asked to feed a crowd of hummus lovers, I go for this version of smooth garlic hummus: incredibly silky, nourished with the best tahini, and interspersed with large bites of raw, pungent garlic. The overall result is unforgettable, authentic and incredibly satisfying. And now, you can impress your friends with smooth garlic hummus as well!
Recipe
Tried and loved this recipe? Please leave a 5-star review below! Your reviews mean a lot to me, so if you've got any questions, please let me know in a comment.
Smooth garlic hummus
Equipment
Ingredients
- 1 cup chickpeas soaked in water for 12 hours
- 1 whole onion peeled
- ¼ cup raw tahini
- 1 lemon juice of
- 4 garlic cloves minced finely
- salt + pepper to taste
Instructions
- In a large pot, combine chickpeas and onion with enough water to cover, plus an additional 2 inches. Bring to a boil, cover and cook chickpeas on low heat until they are completely soft and fall apart at the lightest touch, about 2-2.5 hours, and most of the water has evaporated. (Be patient! If your chickpeas are really slow to cook, increase heat to low-medium, but no more than that! Low and slow is the key here.)
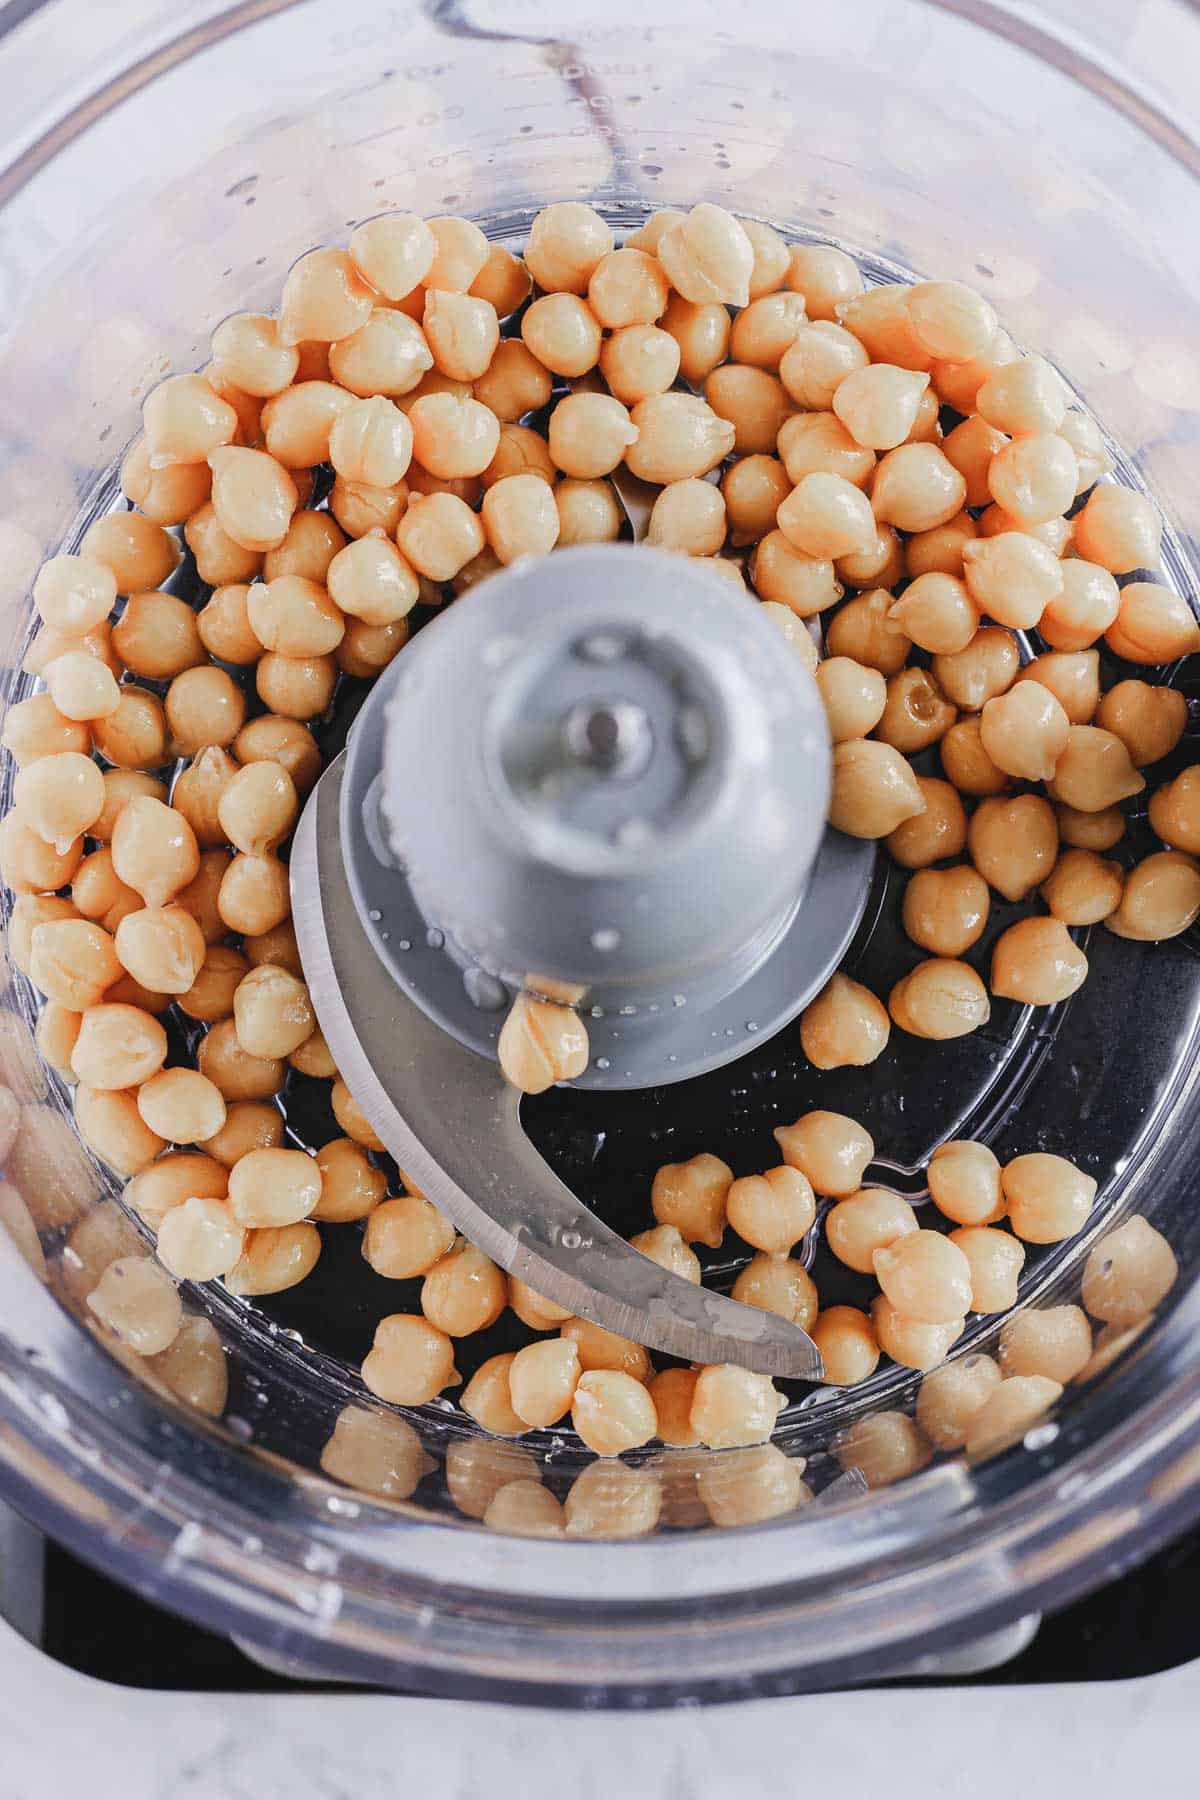
- Once cooked, remove chickpeas from liquid using a slotted spoon, reserving about ½ cup chickpeas for later. Reserve liquid.
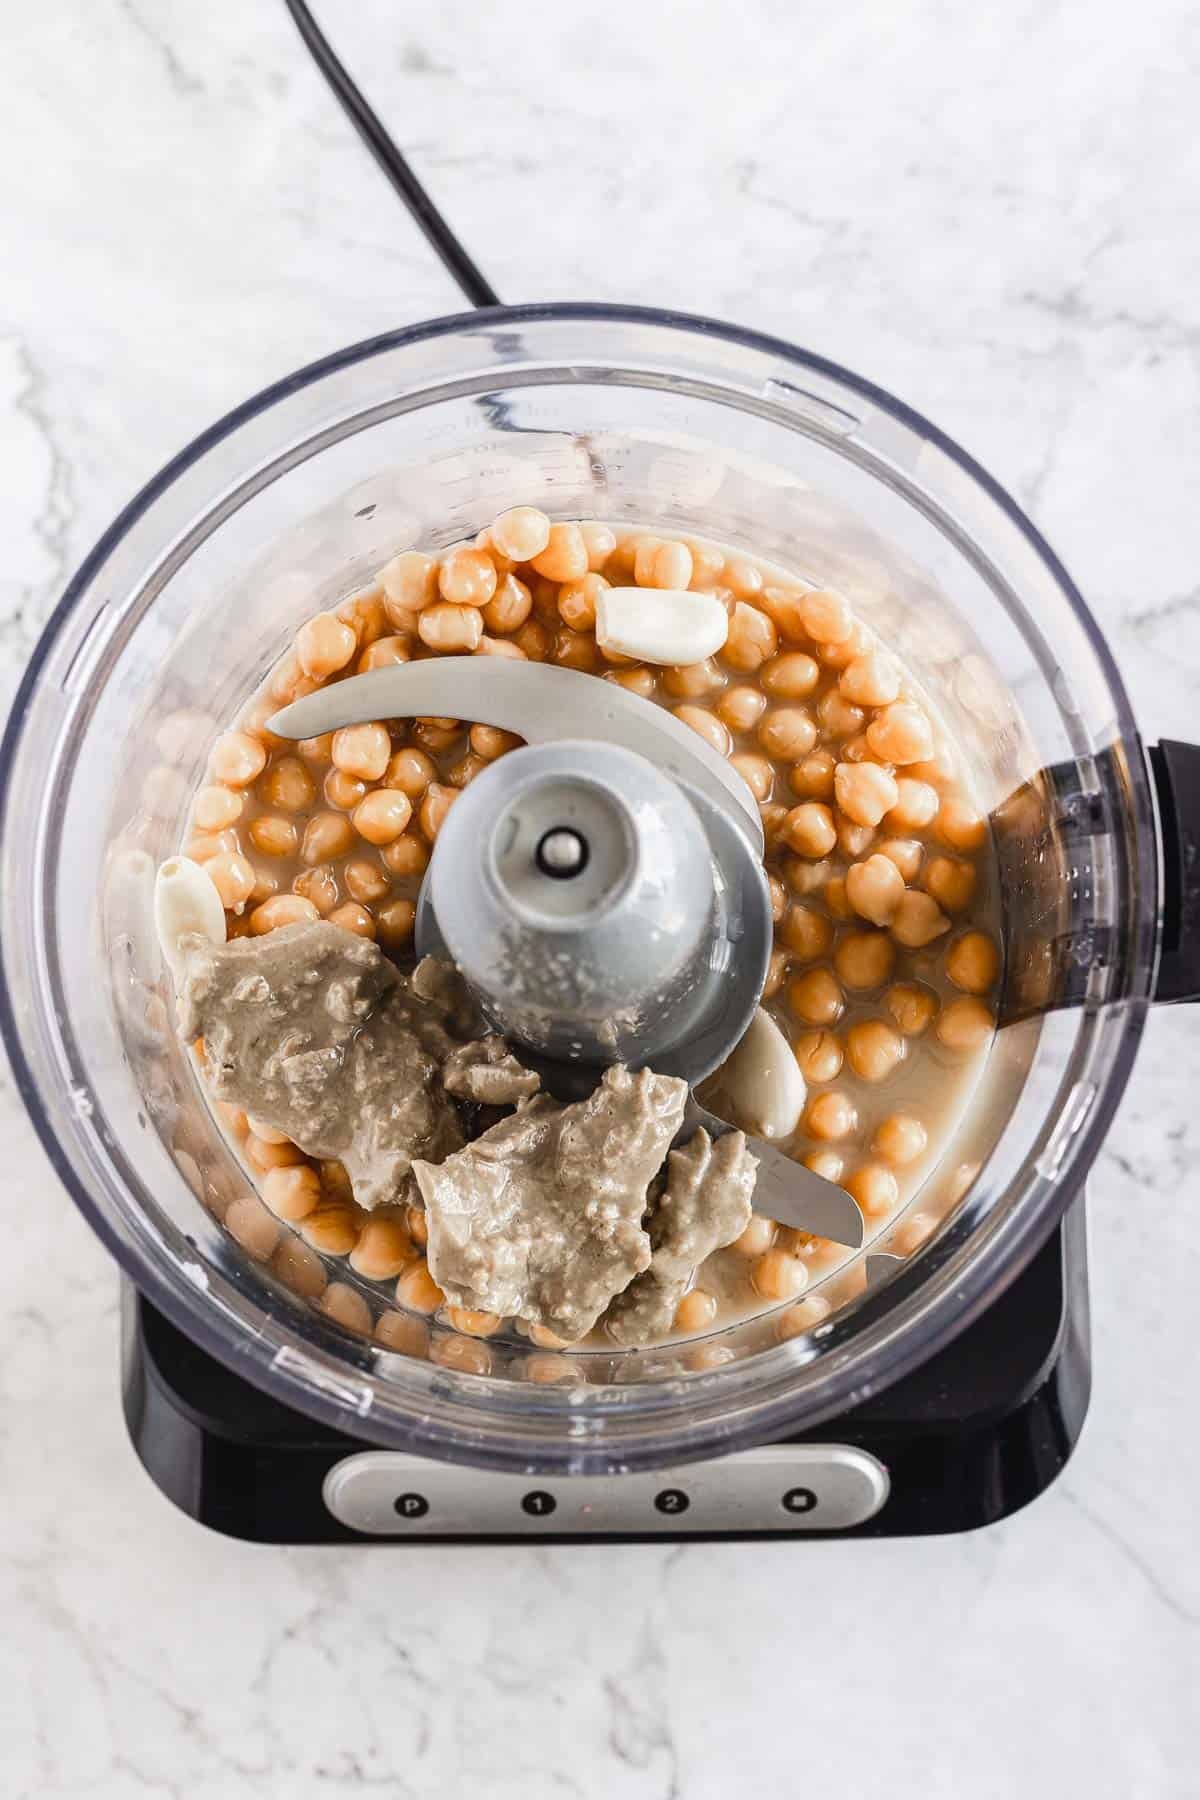
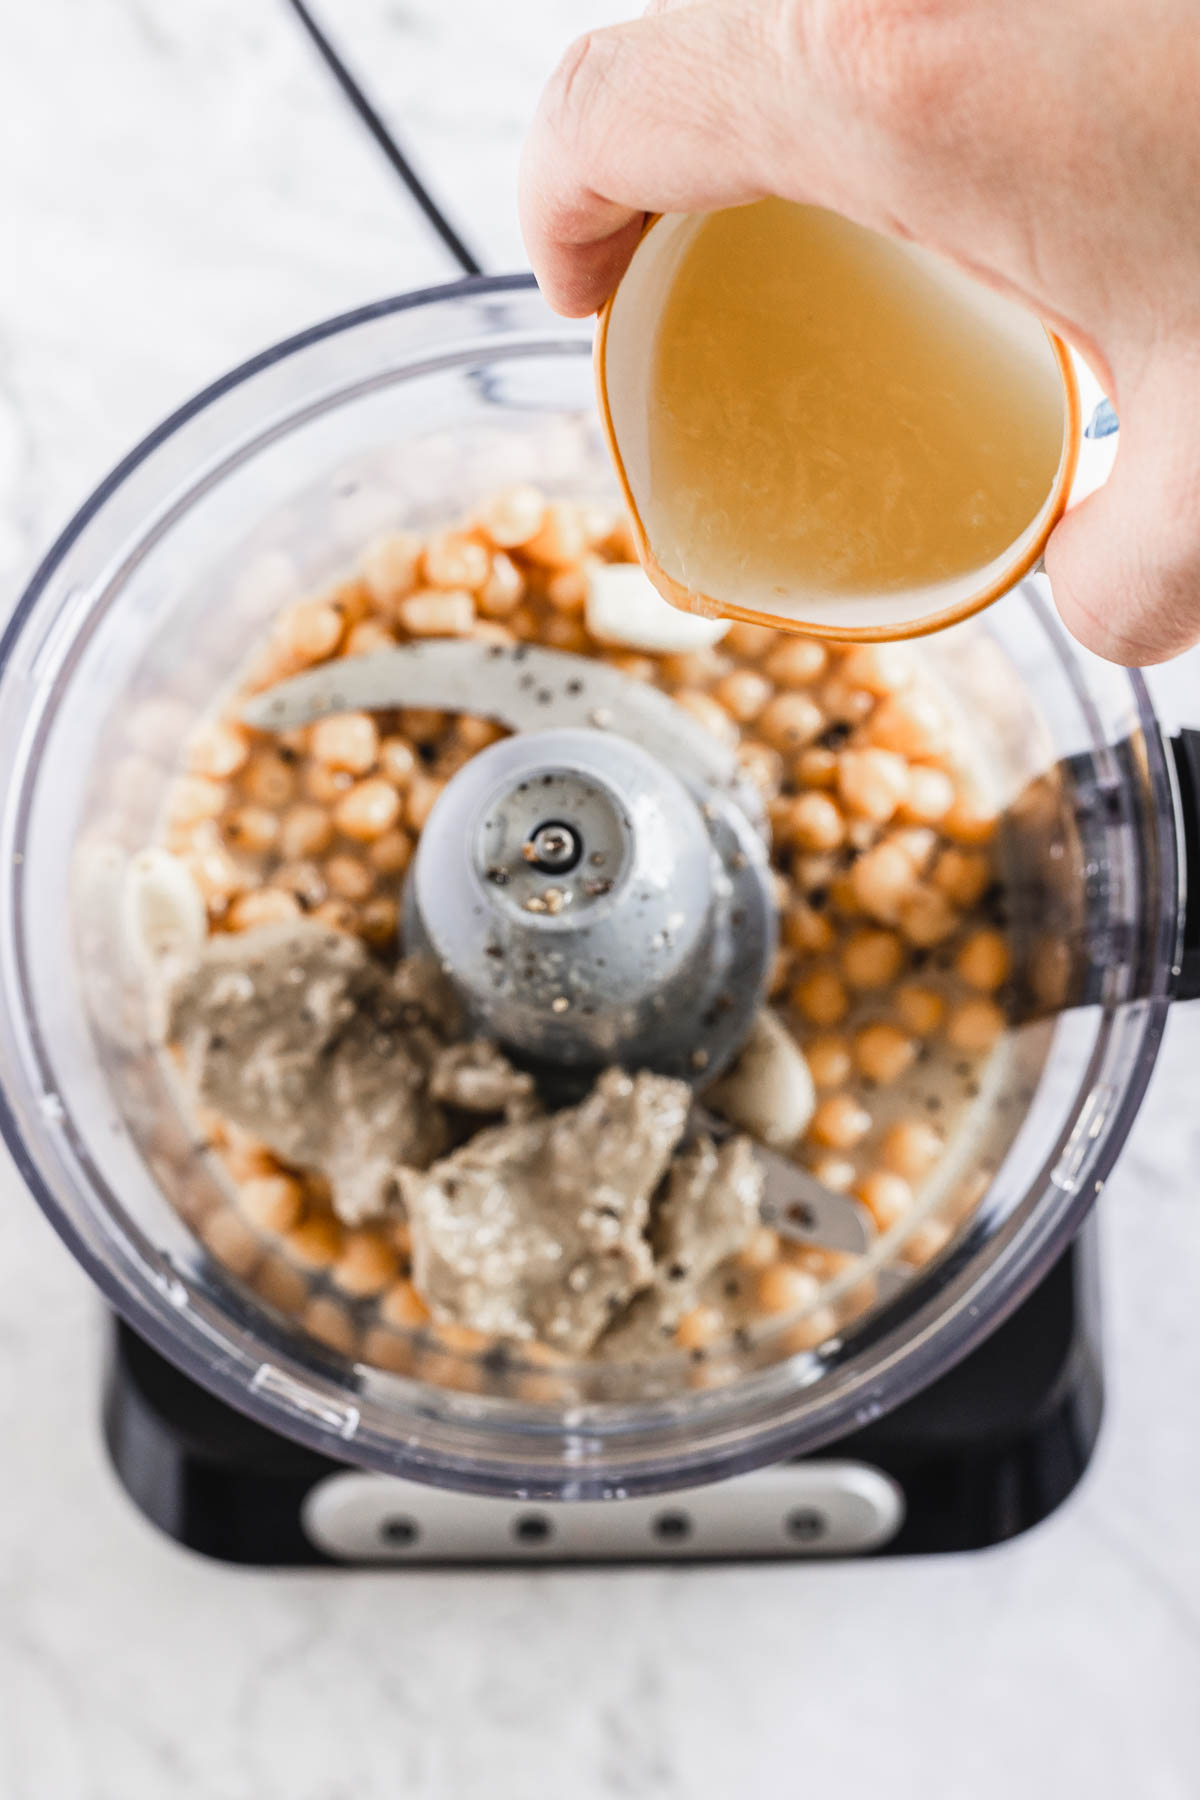
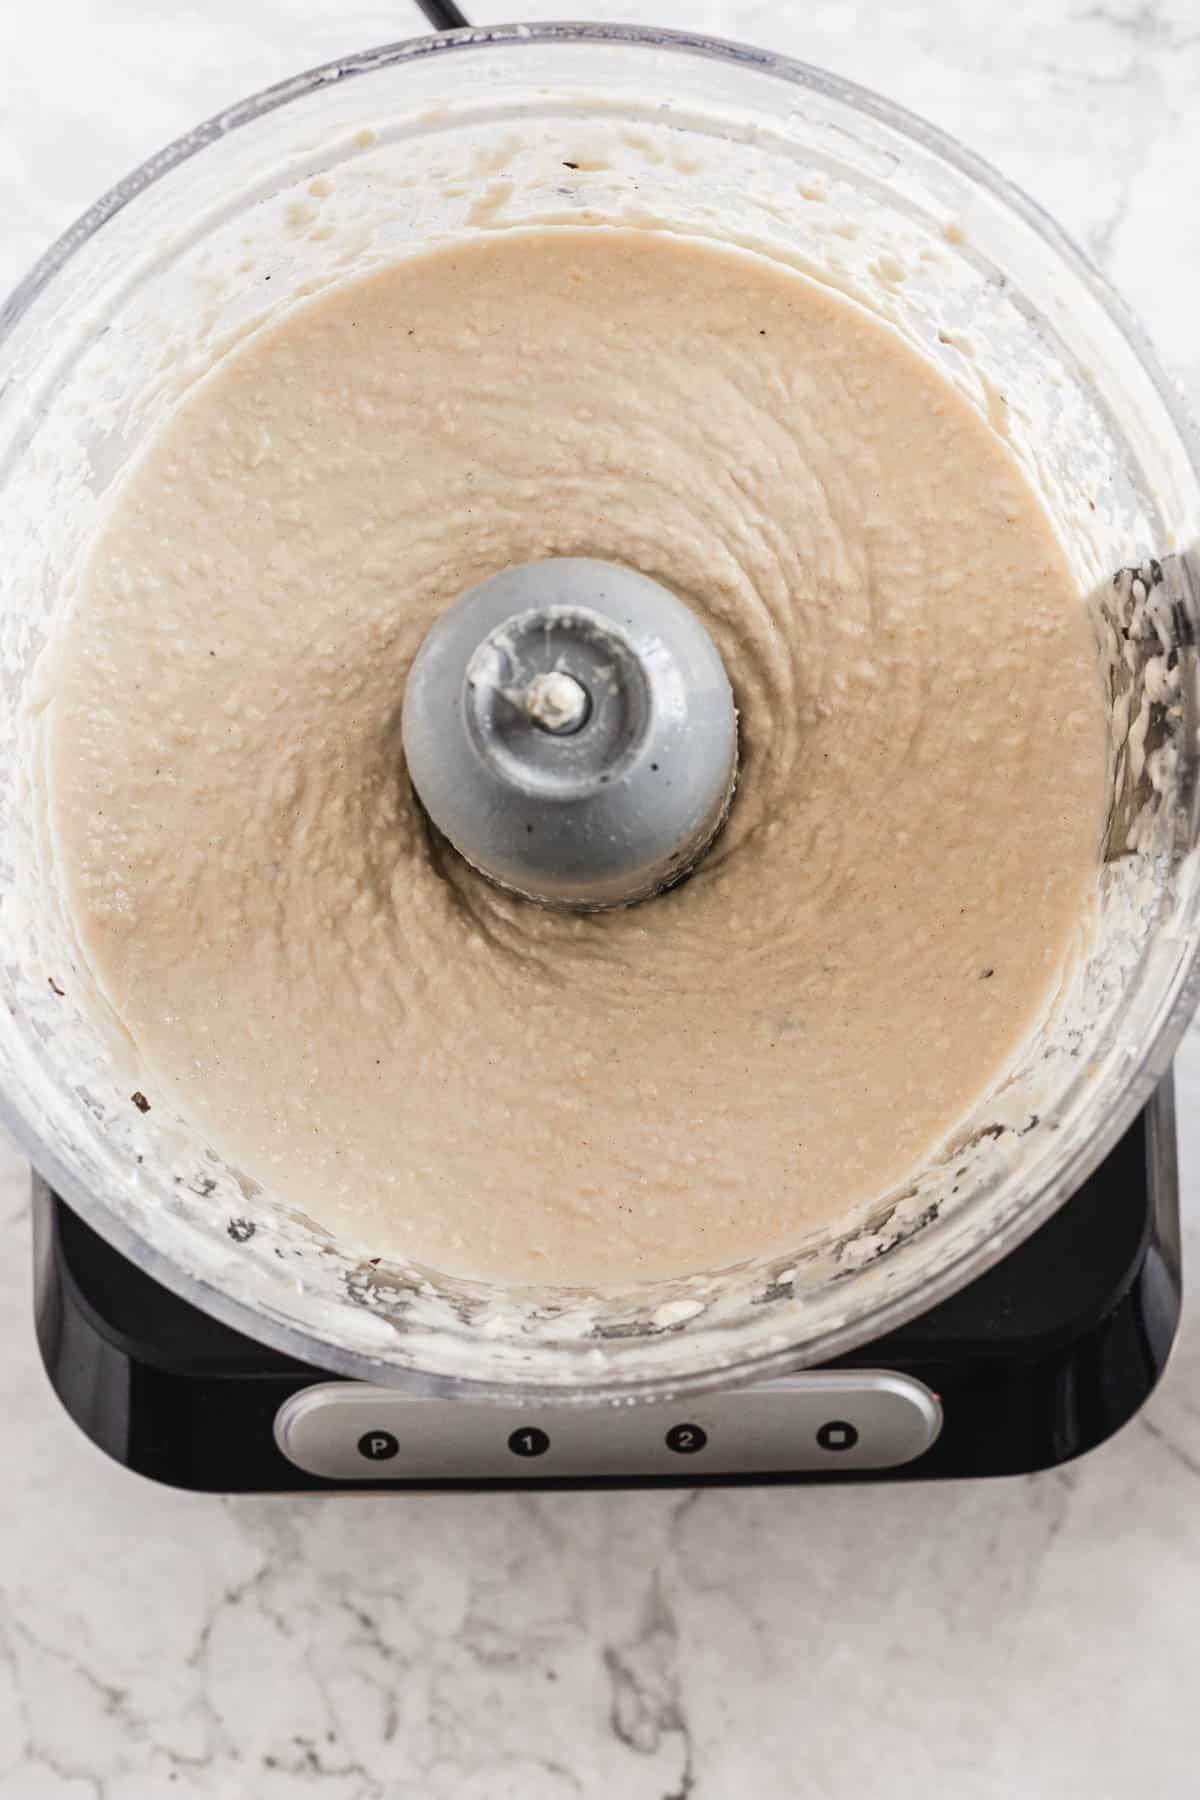
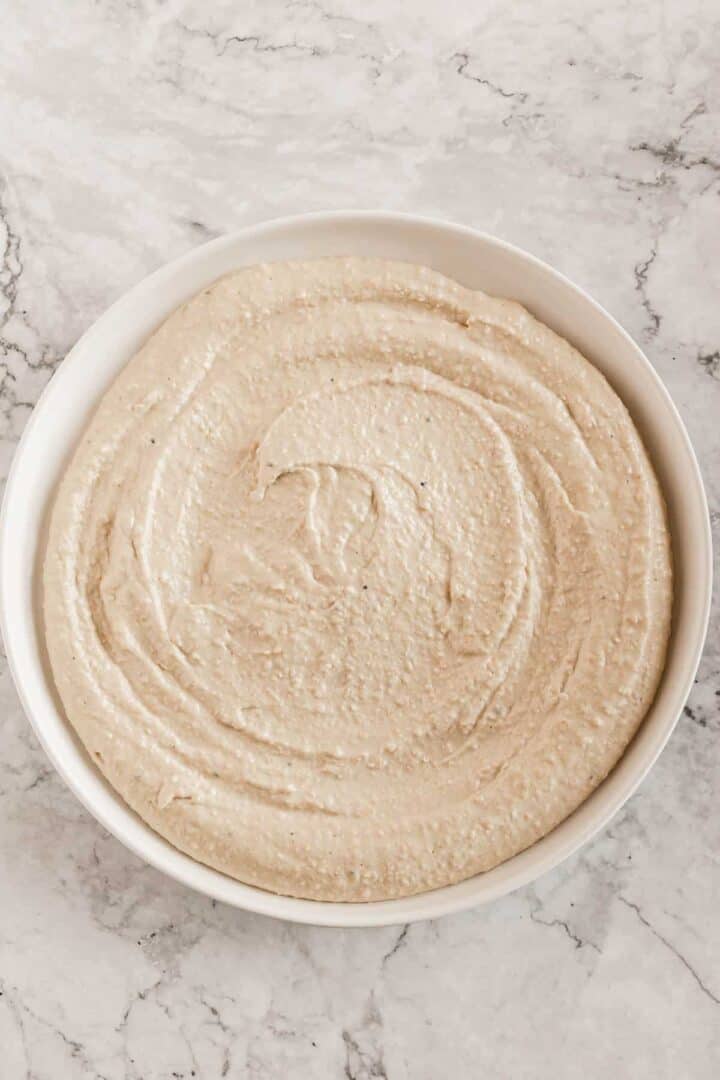
- In a food processor, combine chickpeas, tahini, lemon juice, garlic cloves and salt and pepper. Taste, and correct seasonings as needed. Hummus should be as smooth as possible - if consistency is too thick for you, thin out with water or chickpea cooking liquid, adding 1 tablespoon at a time.
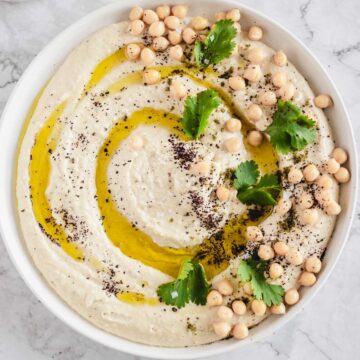
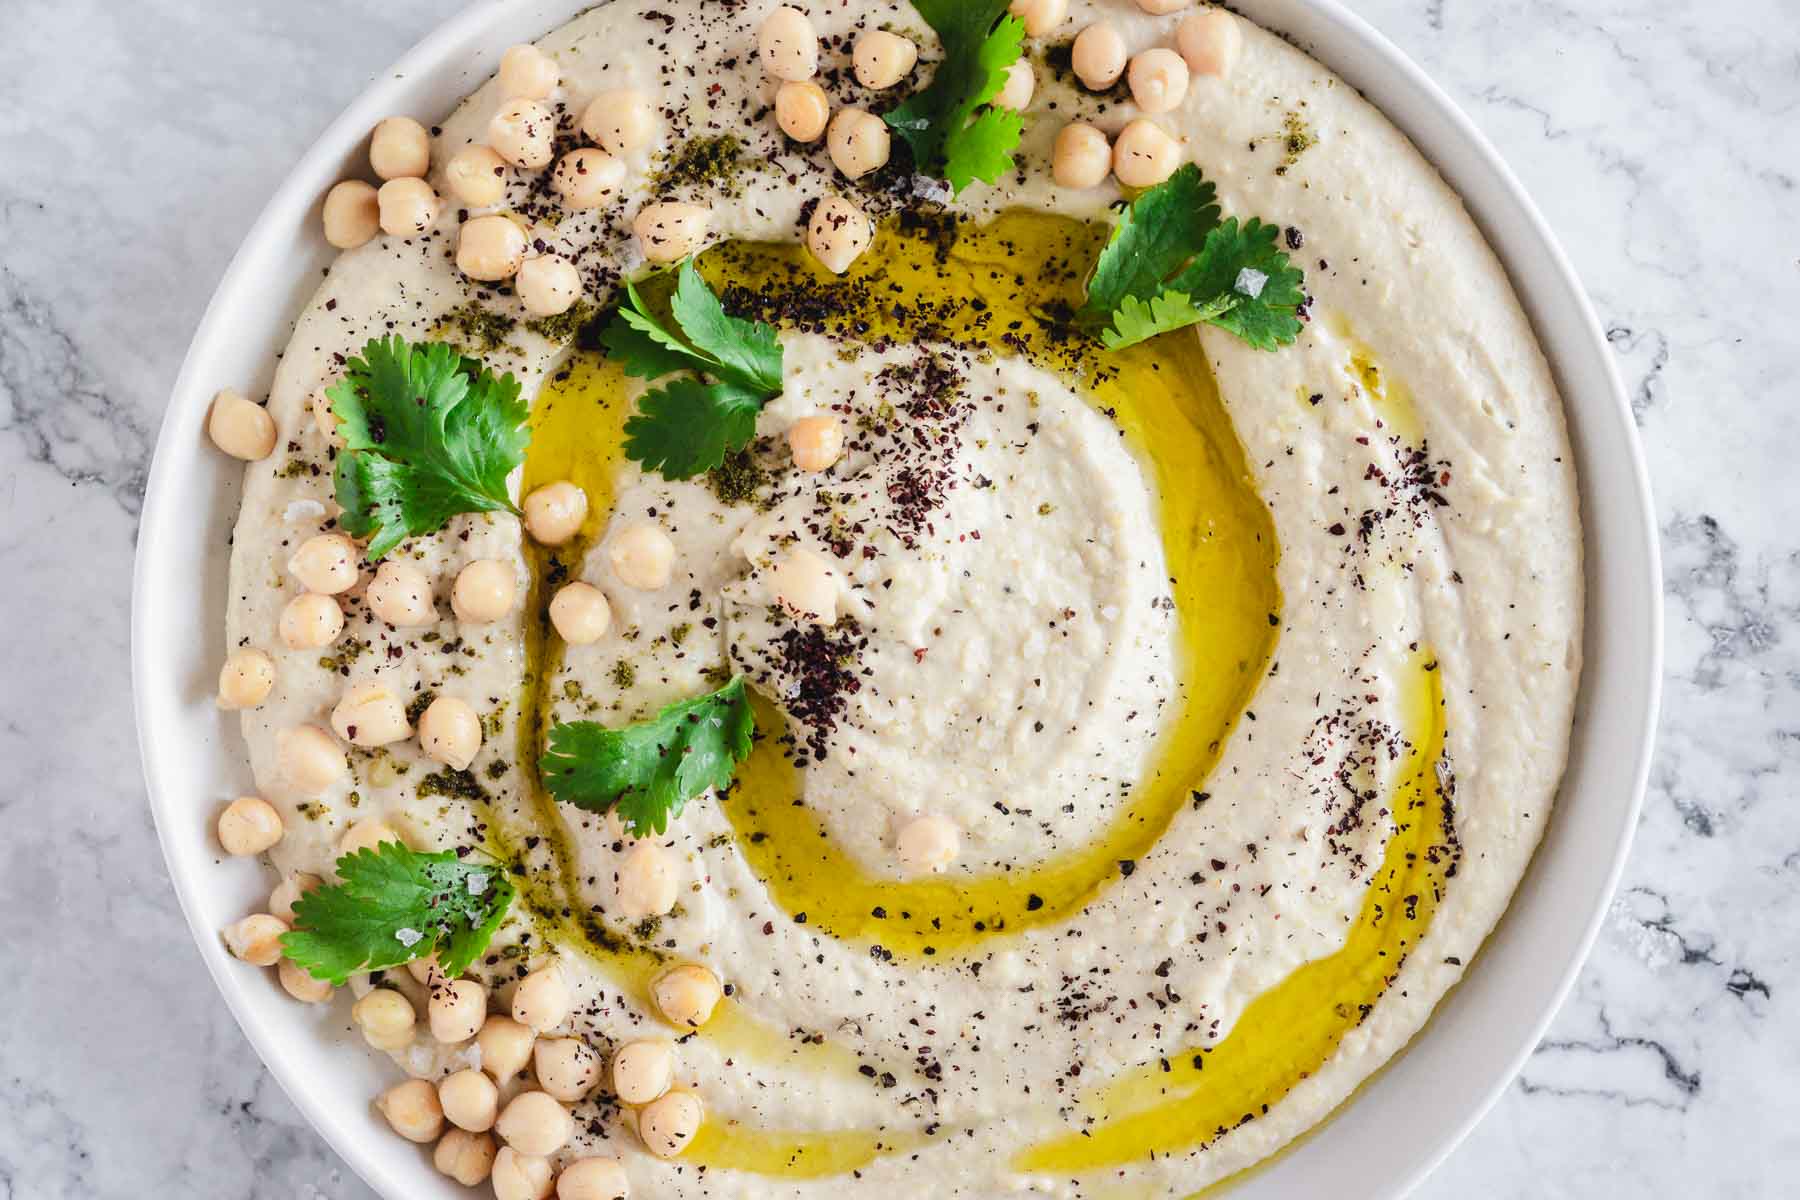
- Serve hummus warm, drizzled with olive oil and topped with whole reserved chickpeas, za'atar and sumac. Hummus can be eaten with pita, crudites or with pieces of raw onions.
Notes
Nutrition
Ingredients

For making smooth, garlic hummus, you will need:
- chickpeas soaked in water for 12 hours
- A peeled onion
- Raw tahini - The Dove brand tahini is my favorite, and I bring it with me from Israel each time I go. If shopping local, steer clear of Greek tahini; I've had good results with the Arabic tahini in a white jar with an orange lid, but I encourage you to try different ones and find your favorite.
- lemon juice
- garlic cloves
- salt and pepper
For serving:
See recipe card for exact quantities.
Equipment
Directions for making smooth Israeli-style hummus with chickpeas, tahini, and garlic:
Cooking the dried chickpeas

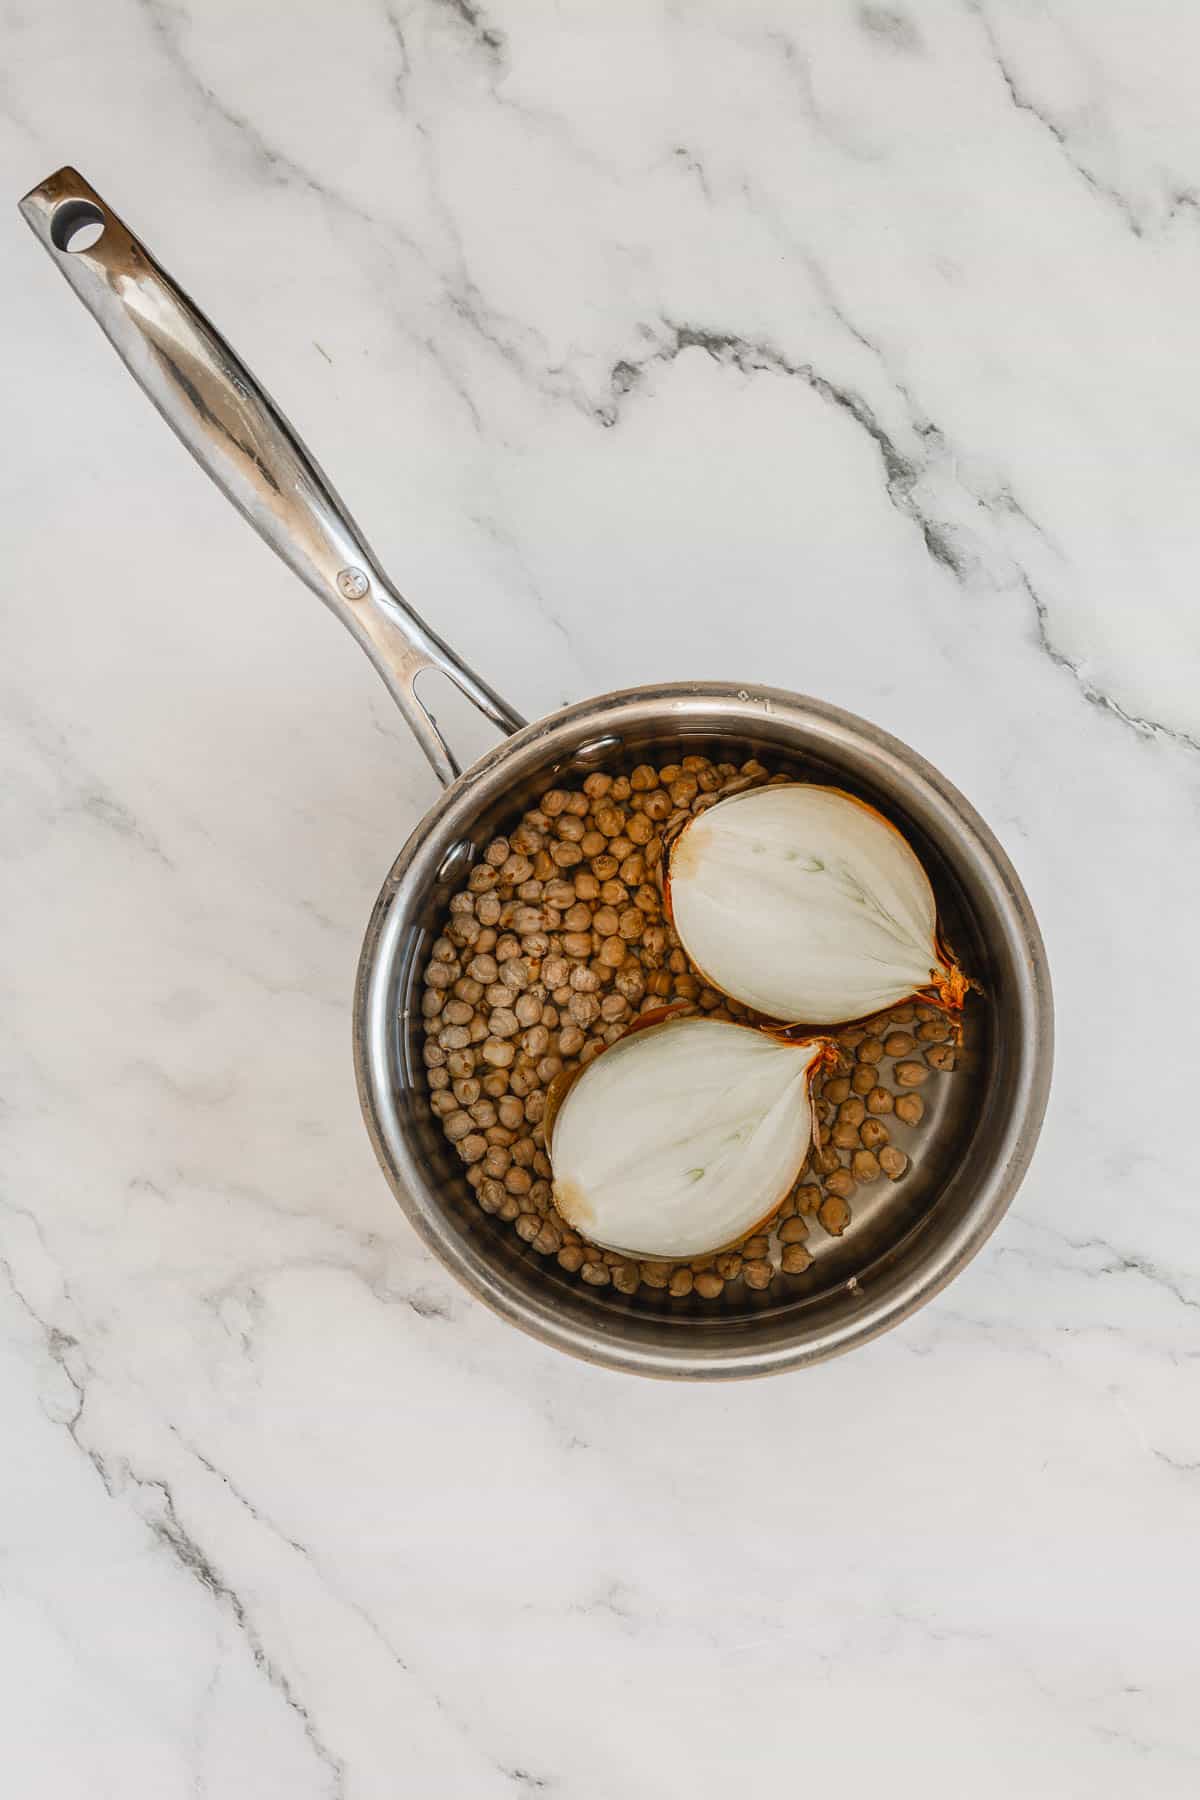
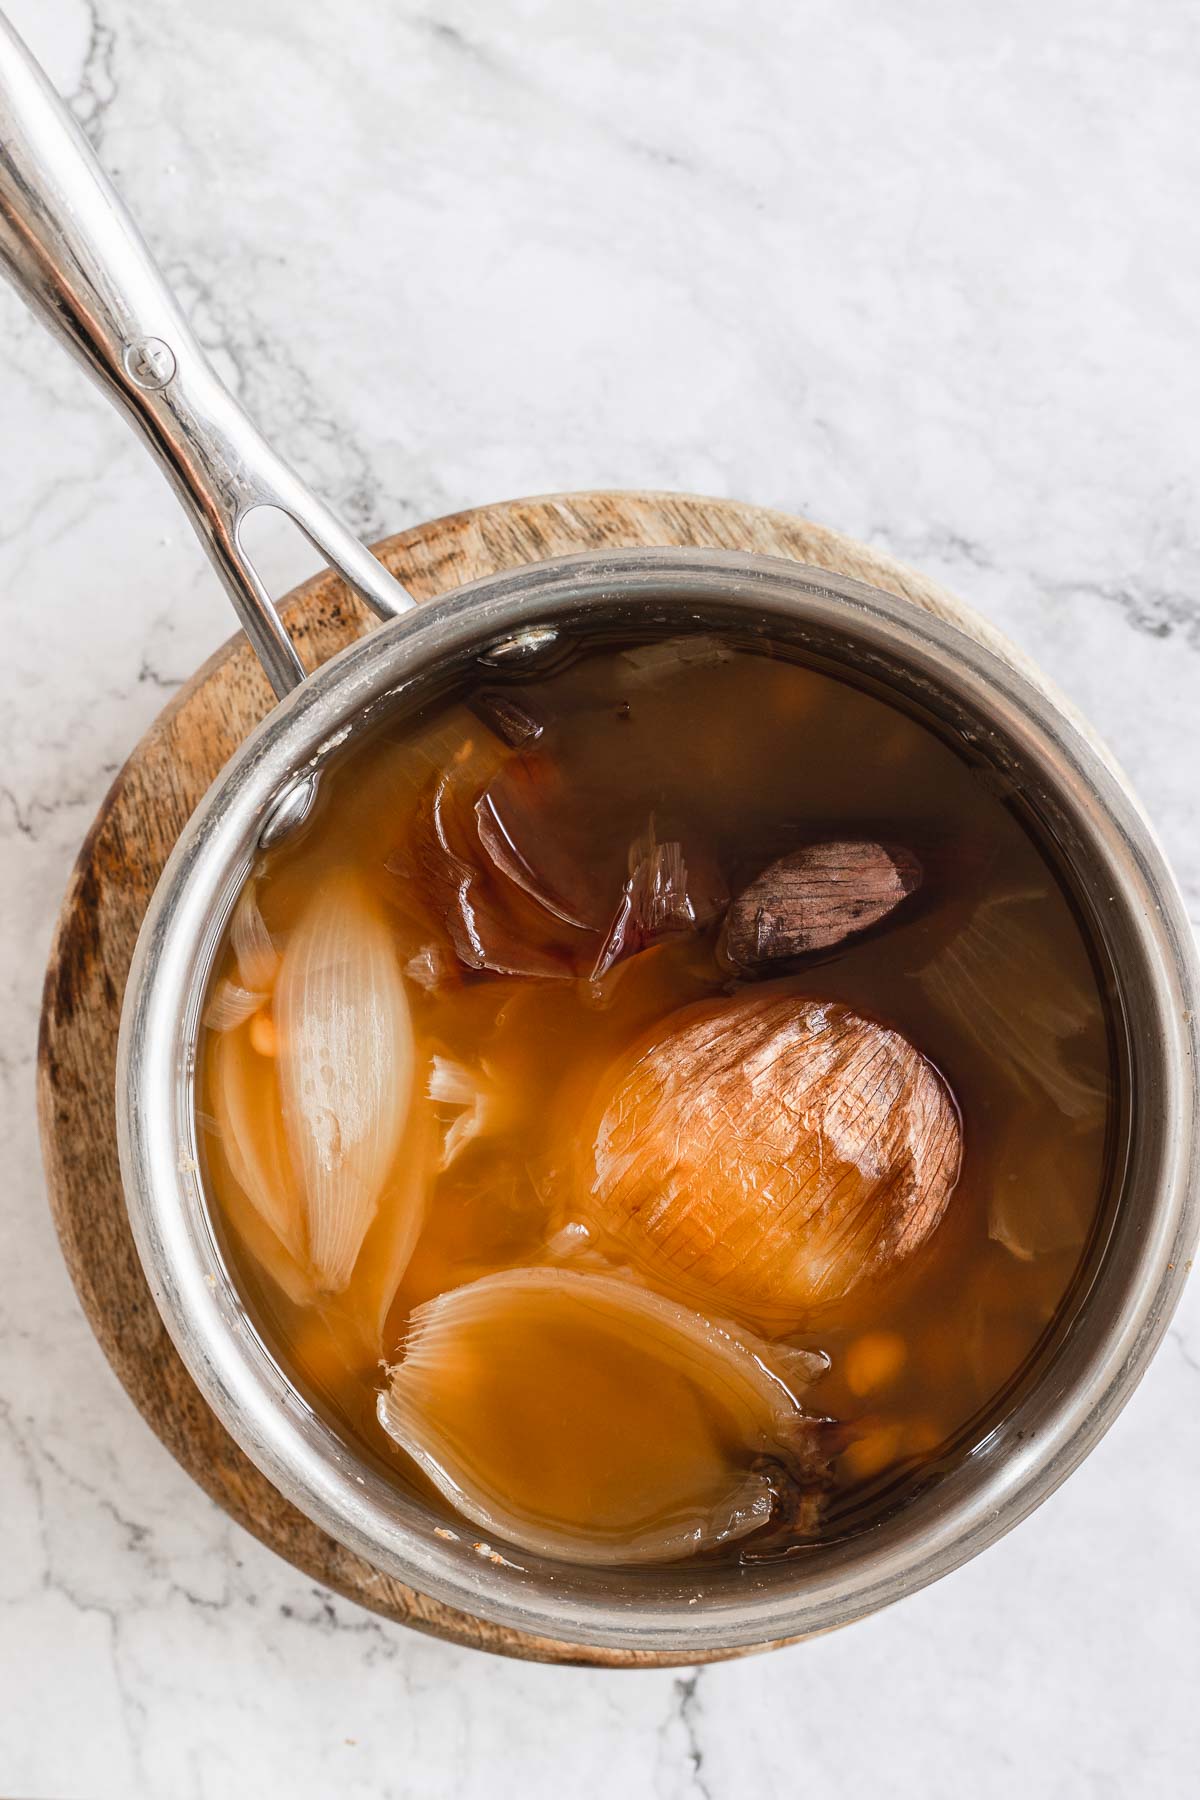
In a large pot, combine chickpeas and onion and cover chickpeas with cold water. Make sure there is enough water to cover the chickpeas. Bring to a boil, cover, and cook chickpeas on low heat until the chickpeas are soft and fall apart at the lightest touch, and most of the water has evaporated.
This can take between 2 and 2.5 hours, so be patient! If your chickpeas are really slow to cook, increase the heat to low-medium, but no more than that! But remember, low and slow is the key here.
Blending the hummus
After the chickpeas are cooked, remove the chickpeas from the liquid using a slotted spoon, reserving some for later. Reserve liquid.
Combine chickpeas, tahini, lemon juice, garlic cloves, and salt and pepper in a food processor. Process until completely smooth, adding water as needed, a tablespoon at a time.
Taste and correct seasonings as needed.
Serve hummus
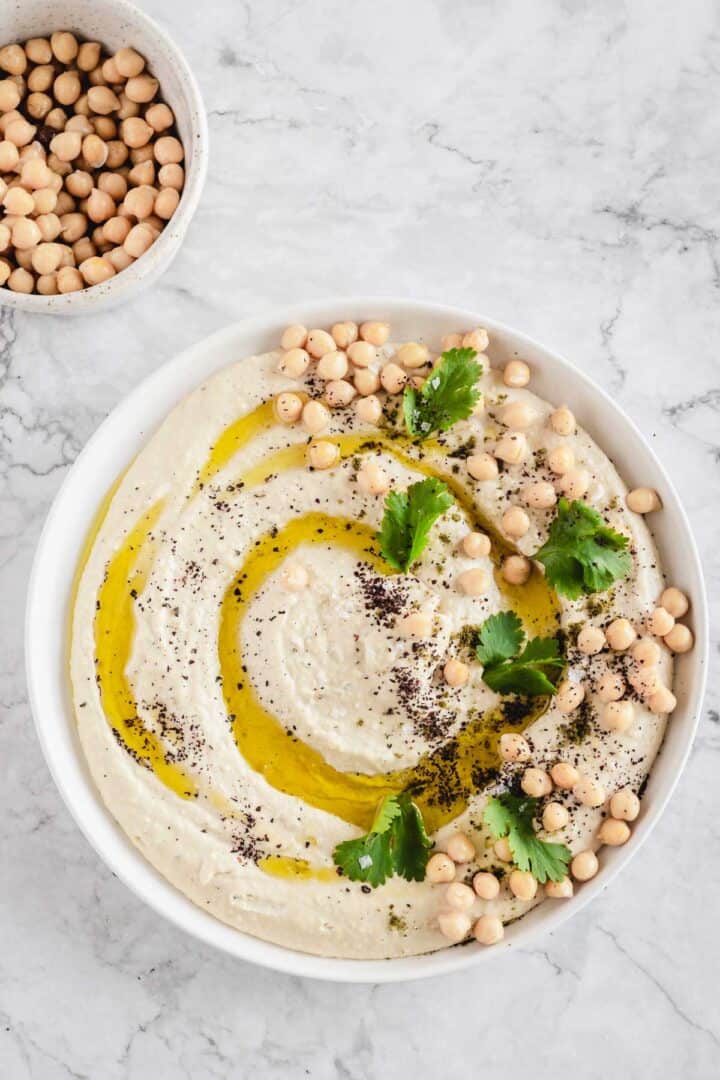
Transfer hummus to a large platter or bowl. Top with olive oil, reserved chickpeas, parsley, salt and pepper. Sprinkle with zaatar and sumac.
What should hummus consistency be like?
The consistency of hummus should be as smooth as possible - if the consistency is too thick for you, thin out with chickpea cooking liquid.
How to serve Israeli-style hummus
Serve the garlic hummus warm, drizzled with olive oil and topped with whole reserved chickpeas, za'atar and sumac. Hummus can be eaten with pita, lavosh crackers, crudites or even pieces of raw onions.
FAQ
Storing hummus is simple and easy. To store your homemade hummus for later use, make sure it is covered securely in an airtight container. Store the hummus in the refrigerator for up to two weeks.
Generally speaking, freshly-made hummus can be stored in the refrigerator for up to three days. If it's homemade, you may be able to extend the shelf life by adding a few extra tablespoons of olive oil or lemon juice. If you make your own hummus at home, it's best to consume it within two days of making it.
Yes! You can extend the shelf life of your hummus by freezing it. To do this properly, place your hummus in a sealed container and then place it in the freezer for up to three months. When you're ready to use it again, just thaw out the creamy hummus and enjoy! Alternatively, for ease of serving in small portions, you can freeze your garlic hummus in ice cube trays or small resealable plastic bags.
One common question about making hummus is whether you need to peel dried chickpeas before blending them for making hummus. The answer to this question is no; you do not need to peel dried chickpeas for hummus. When blended into hummus, the skins of the chickpeas will break down and become almost undetectable. If you are using canned chickpeas for your hummus however, it is recommended that you rinse them thoroughly before blending them up. This will help remove some of the sodium and other additives found in store-bought canned beans while ensuring that your final product has a smoother texture.
When it comes to making hummus, there is a debate about whether dried chickpeas or canned chickpeas are better. Both types of chickpeas have their benefits. Canned chickpeas are more convenient because they are already cooked and ready to go, while dried chickpeas require soaking and boiling before they can be used. However, many people, myself included, find that dried chickpeas have a richer flavor than canned, as they contain higher amounts of natural starches that give the hummus a creamier texture. Ultimately, it comes down to personal preference - both types of chickpeas can make delicious hummus!
When making hummus, the amount of salt to be added to the lemon juice and garlic depends on personal preference. Generally speaking, most recipes call for one teaspoon of sea salt or kosher salt to be added to every two tablespoons of lemon juice and two cloves of garlic. However, if you prefer a slightly less salty flavor, you can reduce the amount of salt used. The goal should always be to create a balanced flavor that complements the other ingredients in your dish such as chickpeas and tahini.
Israeli hummus is renowned for its smooth and creamy texture. This is because traditional Israeli recipes use tahini, which is a sesame paste that gives the hummus an extra-smooth consistency. The tahini also adds a nutty flavour to the dish and helps to balance out the other flavours such as lemon juice, garlic and cumin. As well as this, Israelis traditionally use chickpeas that have been soaked overnight and boiled until they are incredibly tender. This ensures that when blended with the other ingredients, it creates a smooth hummus with no lumps or chunks.
The Dove tahini is my favourite, and I bring it with me from Israel each time I go. If shopping local, steer clear of Greek tahini; I've had good results with the Arabic tahini in a white jar with an orange lid, but I encourage you to try different ones and find your favourite
My garlic hummus's role in the Montreal Mega Mission
We shot this video for smooth garlic hummus as part of the promotional drive for Montreal's Mega Mission, a behemoth undertaking that saw 1,000 Montrealers arrive in Israel for an unforgettable 10-day trip. Along with Israeli rugelach and eggplant shakshuka,, this hummus recipe highlights that food is an inseparable part of Israel, and I jumped on the opportunity to highlight some of my favourite dishes.
FULL DISCLOSURE: I made the videos as part of the Montreal Mega Mission promotional drive for my employer, Federation CJA. I received no additional financial compensation for this post.


Sonali Seneviratne says
Hi
Why do you cook the chickpeas with lemon but not put it in the processor? Also the recipe doesn't require parsley but it's used in the video. Is it necessary for an authentic hummus?
kseniaprints says
You don't need to process the whole lemon, it is used for softening the chickpeas and giving them the best flavor. WE use lemon juice in processing though. And nope, parsley is not necessary!
Ginger says
What do you do with the onion?
kseniaprints says
Discard it, it's there to help the chickpeas soften.